This is a long one, boys and girls! If you like watching videos, check this out on my youtube channel.
A while ago on my podcast, I asked my audience what was the ULTIMATE card for their favorite player. We came to the conclusion that there is probably no clear cut winning among many player collectors these days. Some may pick a PSA 10 rookie while others may pick a bat barrel. Still others may select a 98 Crusade Red of their favorite player, or a Superfractor. While the rarities and parallels they pump out these days may feel repetitive, there’s no denying beautiful cards are being pushed out monthly.
Over the past few months, I found myself in the middle of wanting to create the most elaborate, crazy Jose Canseco card ever to exist. Something that was wildly different from what is being produced these days, and something that could stick out in my collection. A true conversation piece loaded with fun, excitement, intrigue, mystery, and interactivity. (Was that too many adjectives? Keep reading!) I’ve created a lot of wild custom cards for my collection utilizing player-worn Canseco jerseys from that time my family hung out with him at his house. In a couple of weeks, that fun trip will have been 7 years ago.
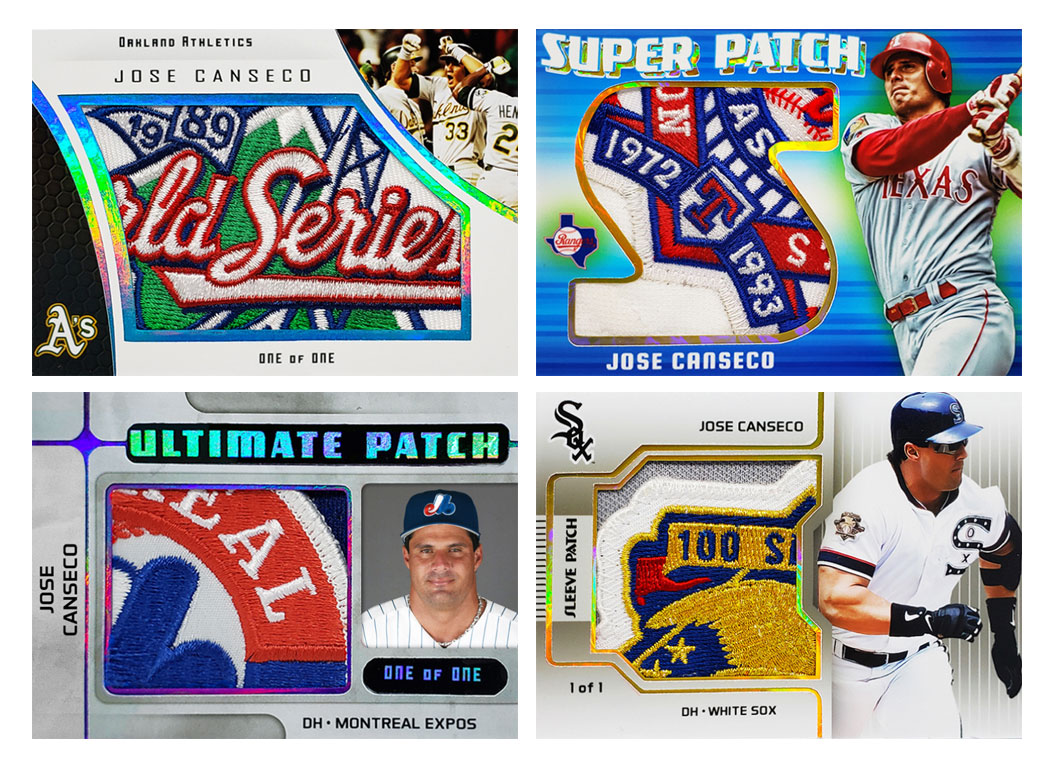
Here are a few player-worn patch cards I’ve created for my collection this past year …
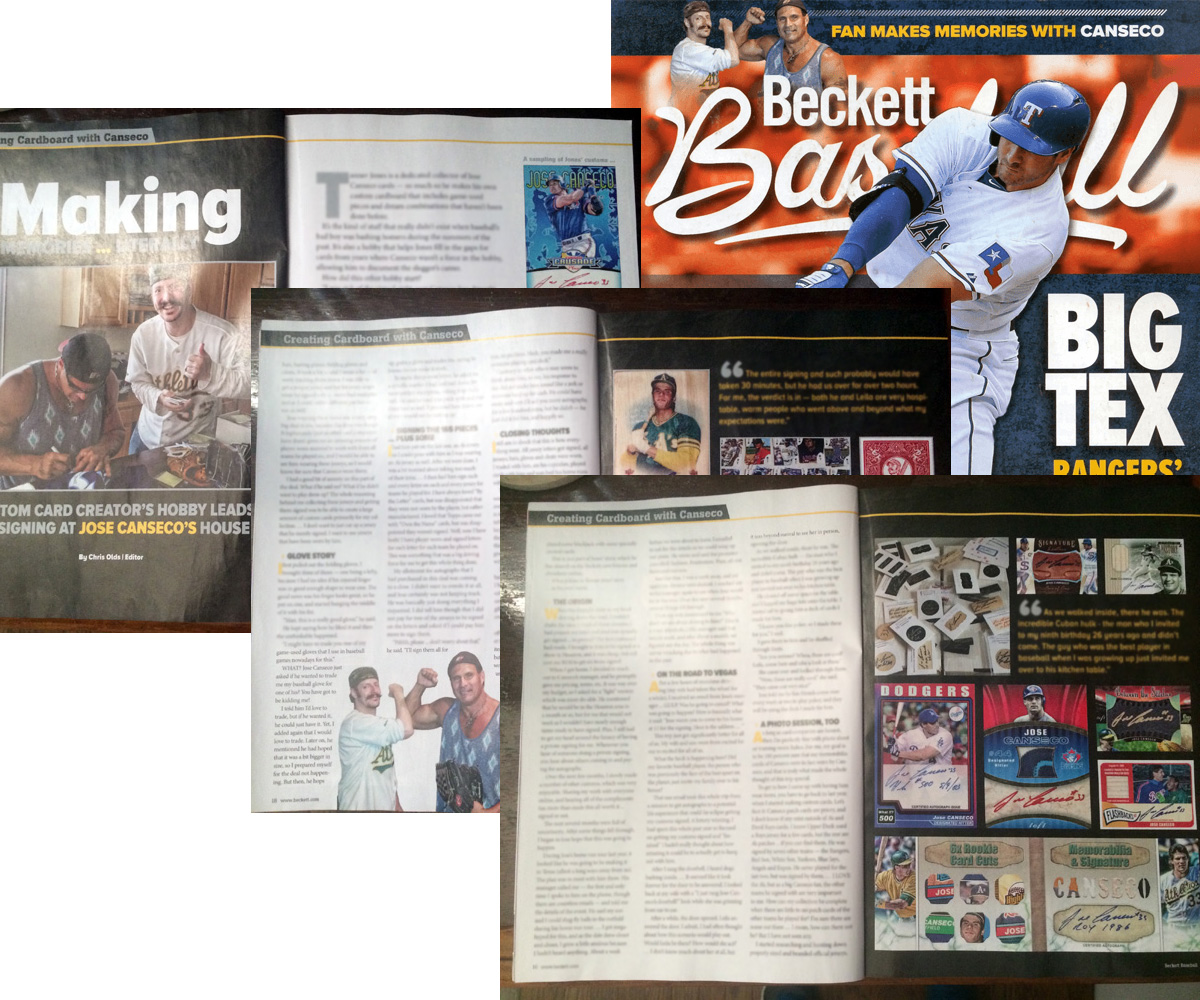
In the past, some of my customs have even made it inside Beckett Monthly Magazine from that time I was featured on the cover with Jose.
While all of that was a blast, and I’m happy with the pieces I’ve created, this new project is wildly different. In fact, it is wildly different from anything I’ve ever seen.
Over the past few months, I’ve poured more time and effort into this project than any I’ve ever worked on before. It has been a playground for me to fulfill bucket list items, and push the boundaries of what a baseball card is. The height and width are similar to a cabinet card, while the thickness is more similar to the crazy cleat cards you’ll see from time to time. It may not be the thickest or biggest card ever made, but calling it a “card” is a stretch! I’ve fallen in love with displaying pieces, and have taken a liking to cards that are much larger than standard sizing.
I’d like to introduce you to: The Mystery Cabinet.
(PSSST … this is probably better as a video. If you would prefer that, hop on over to my youtube channel.)
So, what caused me to begin this project?
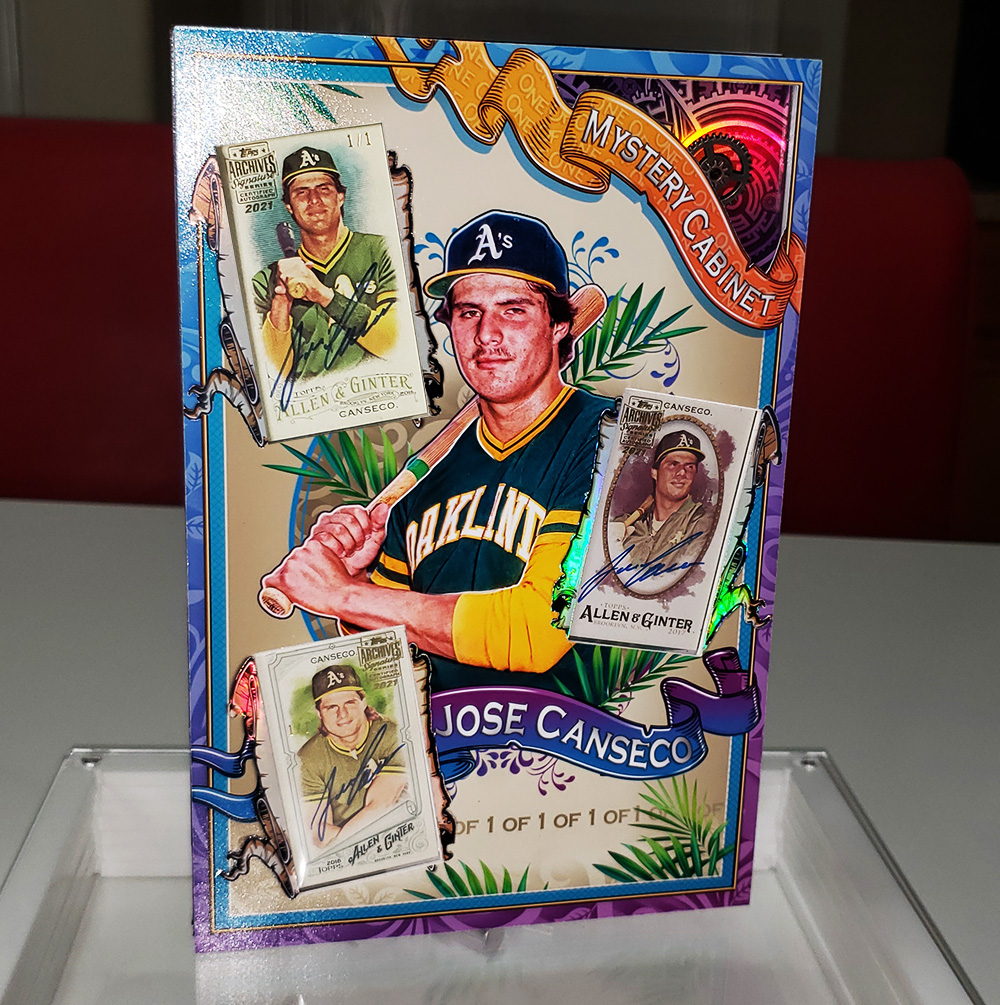
Canseco has only had 3 Allen & Ginter signed mini buybacks surface (so far), and while I’m not big into buybacks, I have been fortunate enough to acquire all three – all of which are 1/1s. They certainly won’t be the last made, but it is neat having the first three that have surfaced. I love how they had the minis stamped and signed. They are extremely aesthetically pleasing to me.
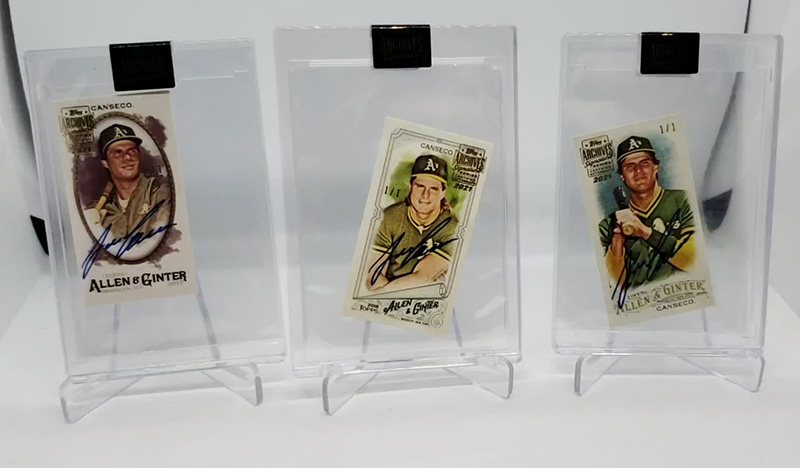
The holders? Not so much. And that is where we begin our journey!
This project started off as being a display piece for my 1/1 A&G trio, because they just looked super awkward in their holders. As mentioned above, I’m all about displaying, so this just wouldn’t do. The cards I add to my collection are not typically box dwellers. When I cracked open Photoshop back in February, I didn’t realize I was about to embark in something that would keep me up all hours of the night, and work out my brain like no other!
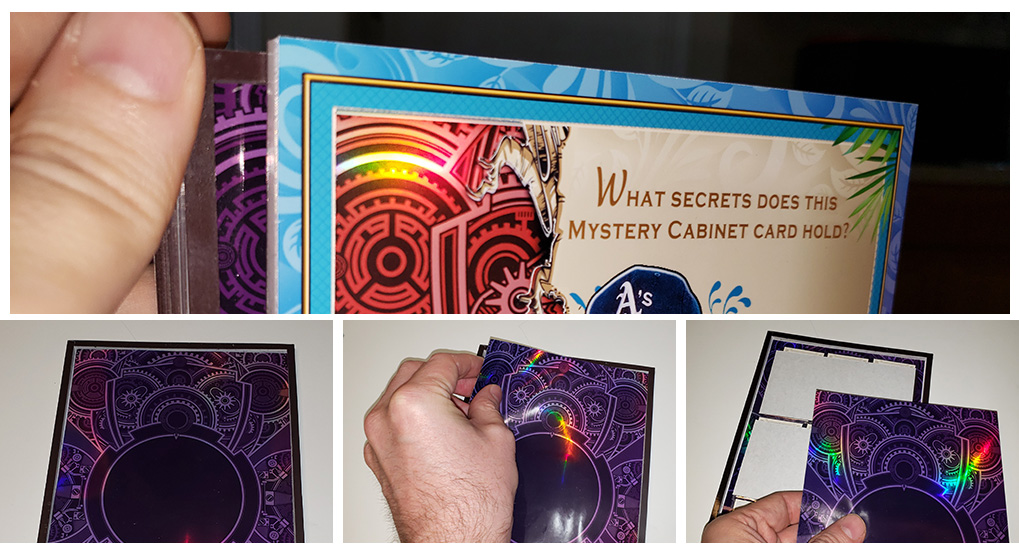
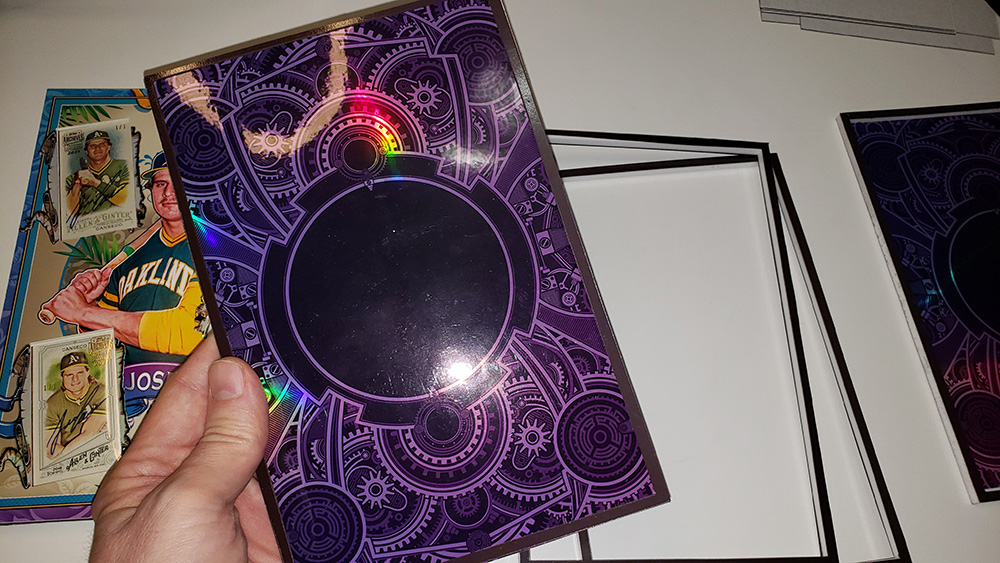
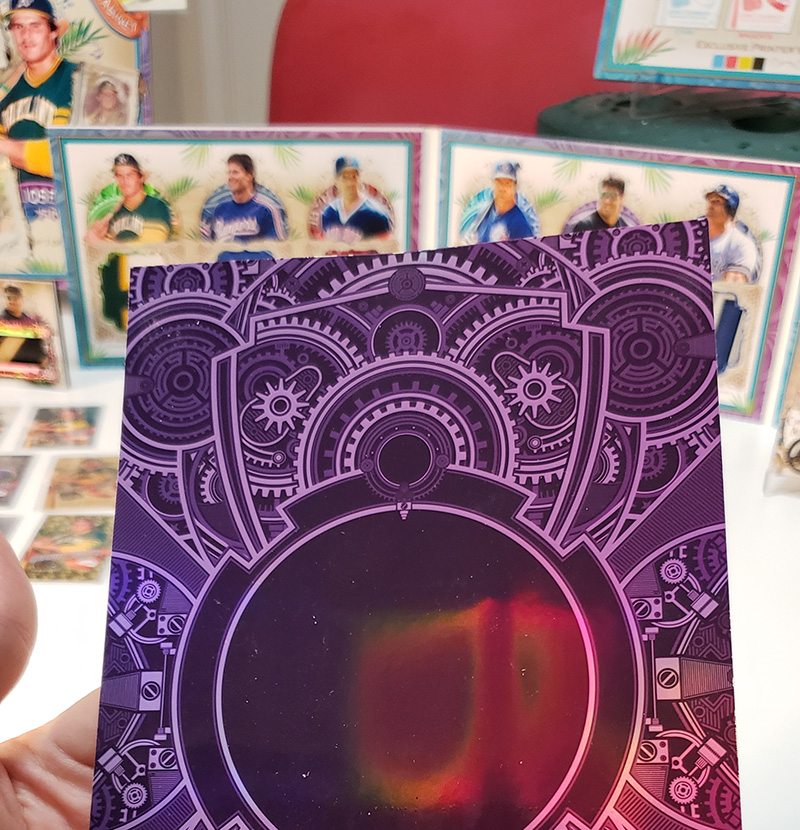
Here is what I came up with:
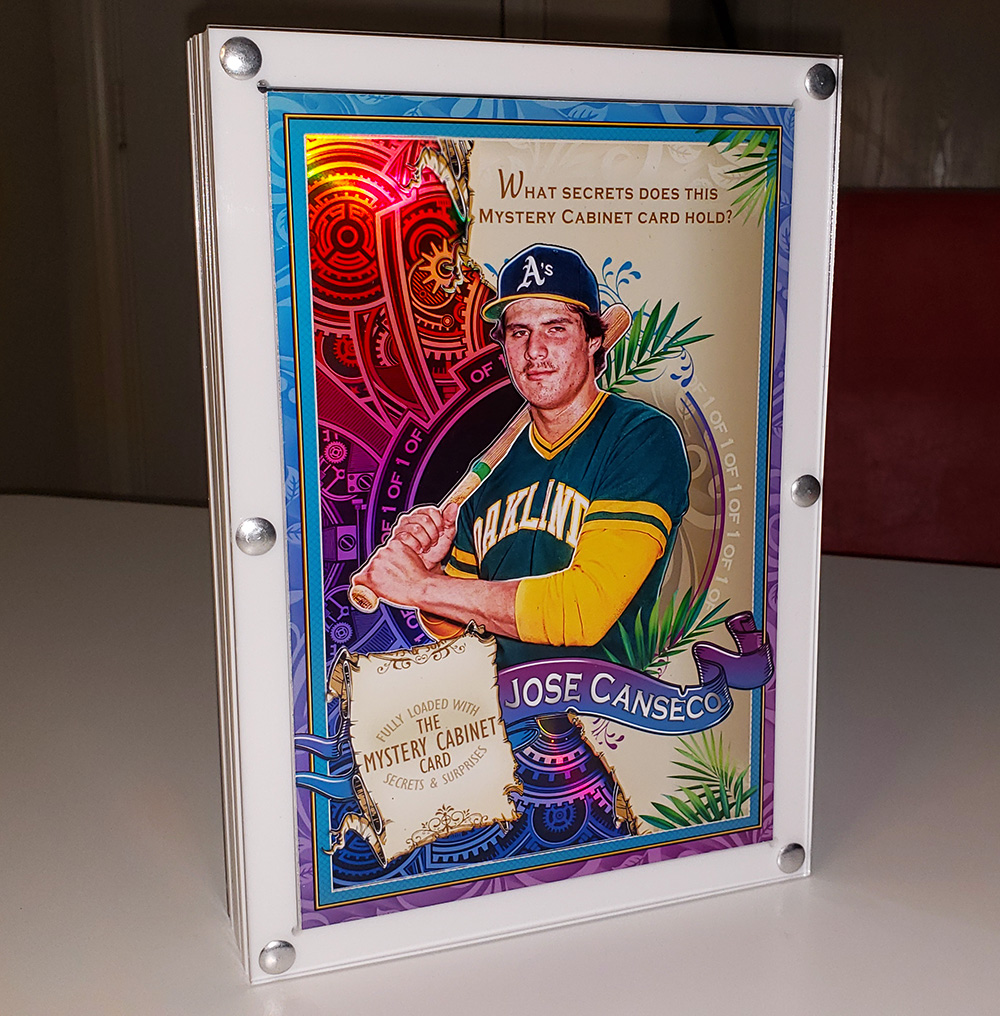
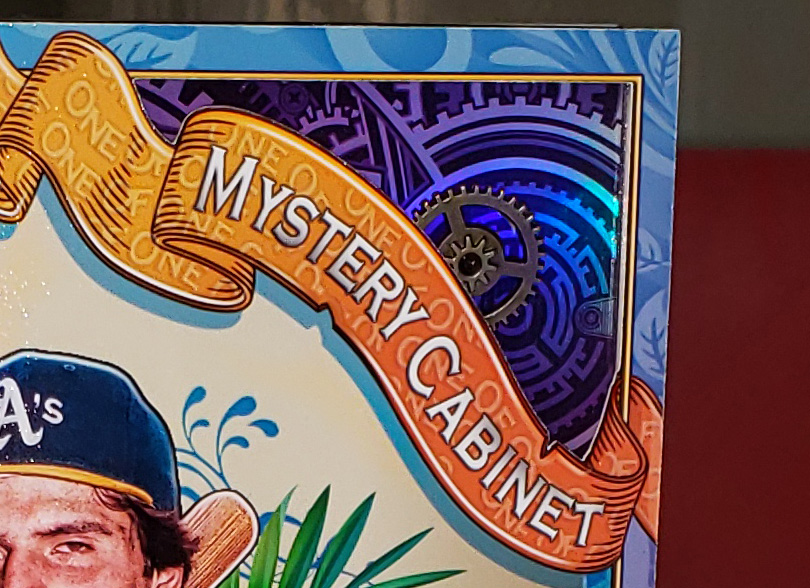
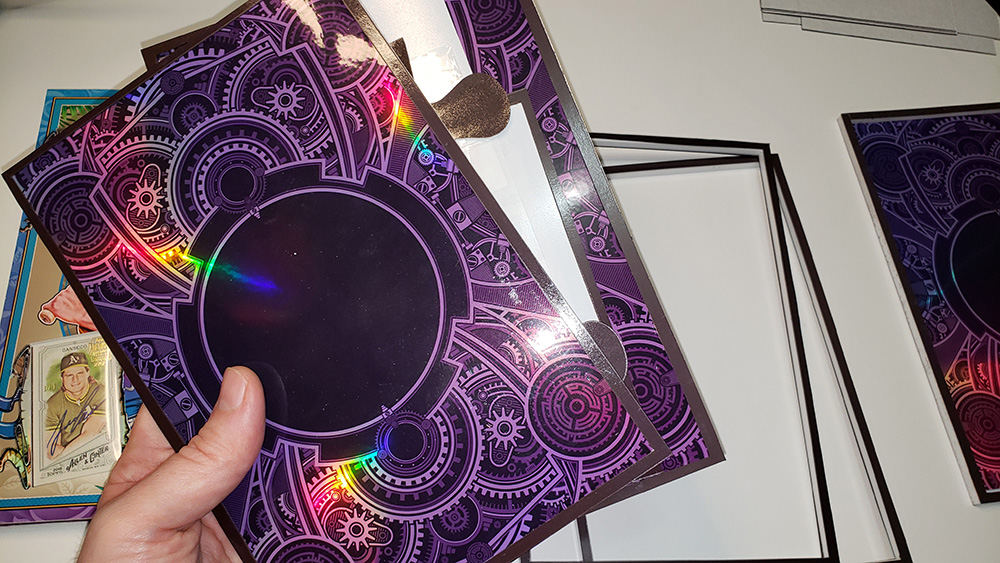
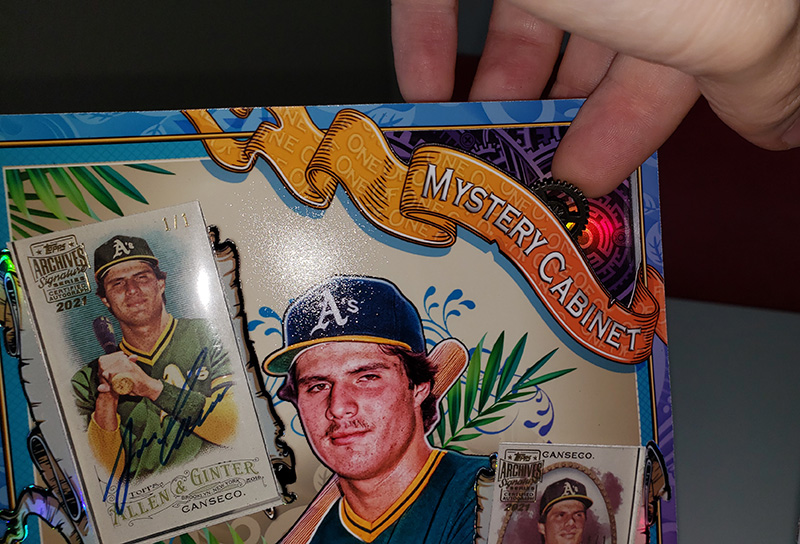
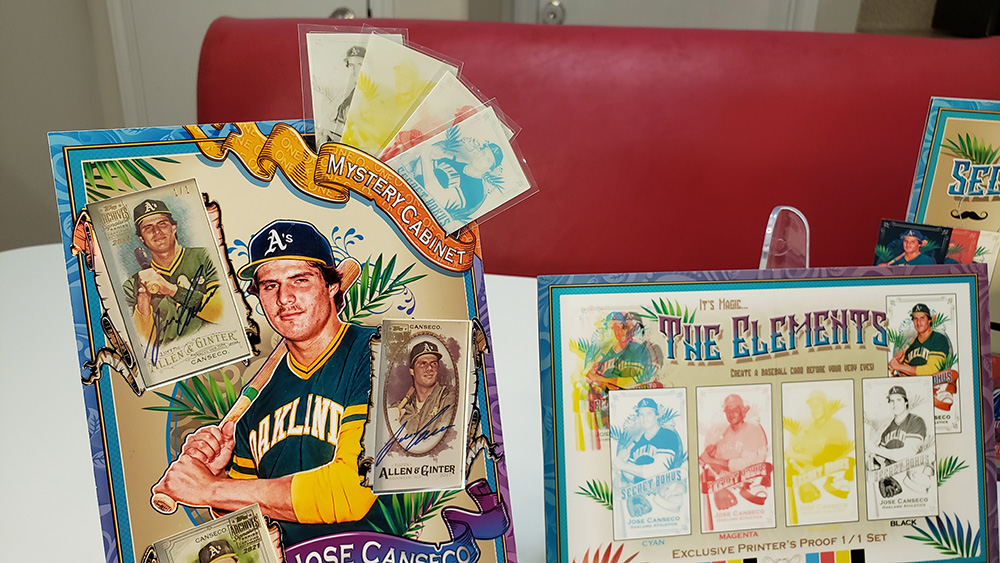
I wanted the design to be nature vs technology – Victorian and steampunk. It seems to match my favorite player perfectly. As you can see, it says “Fully Loaded with Secrets and Surprises”, and has “1 of 1 of 1 of 1 of…” all around the center portion. This gives clues to the fact that this isn’t just something pretty to sit on my shelf. I love intrigue, mystery, interactivity, etc. so that’s what I went for. There is an even mix of matte artwork with holographic foil to contrast the two styles.
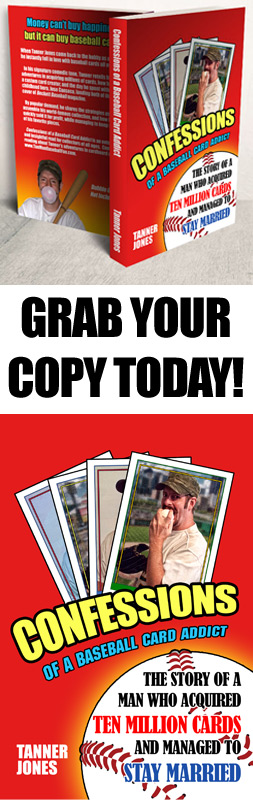
The height and width of my (*cough* shameless plug *cough*) book, Confessions of a Baseball Card Addict are identical to the Mystery Cabinet. My book isn’t nearly as thick, though.
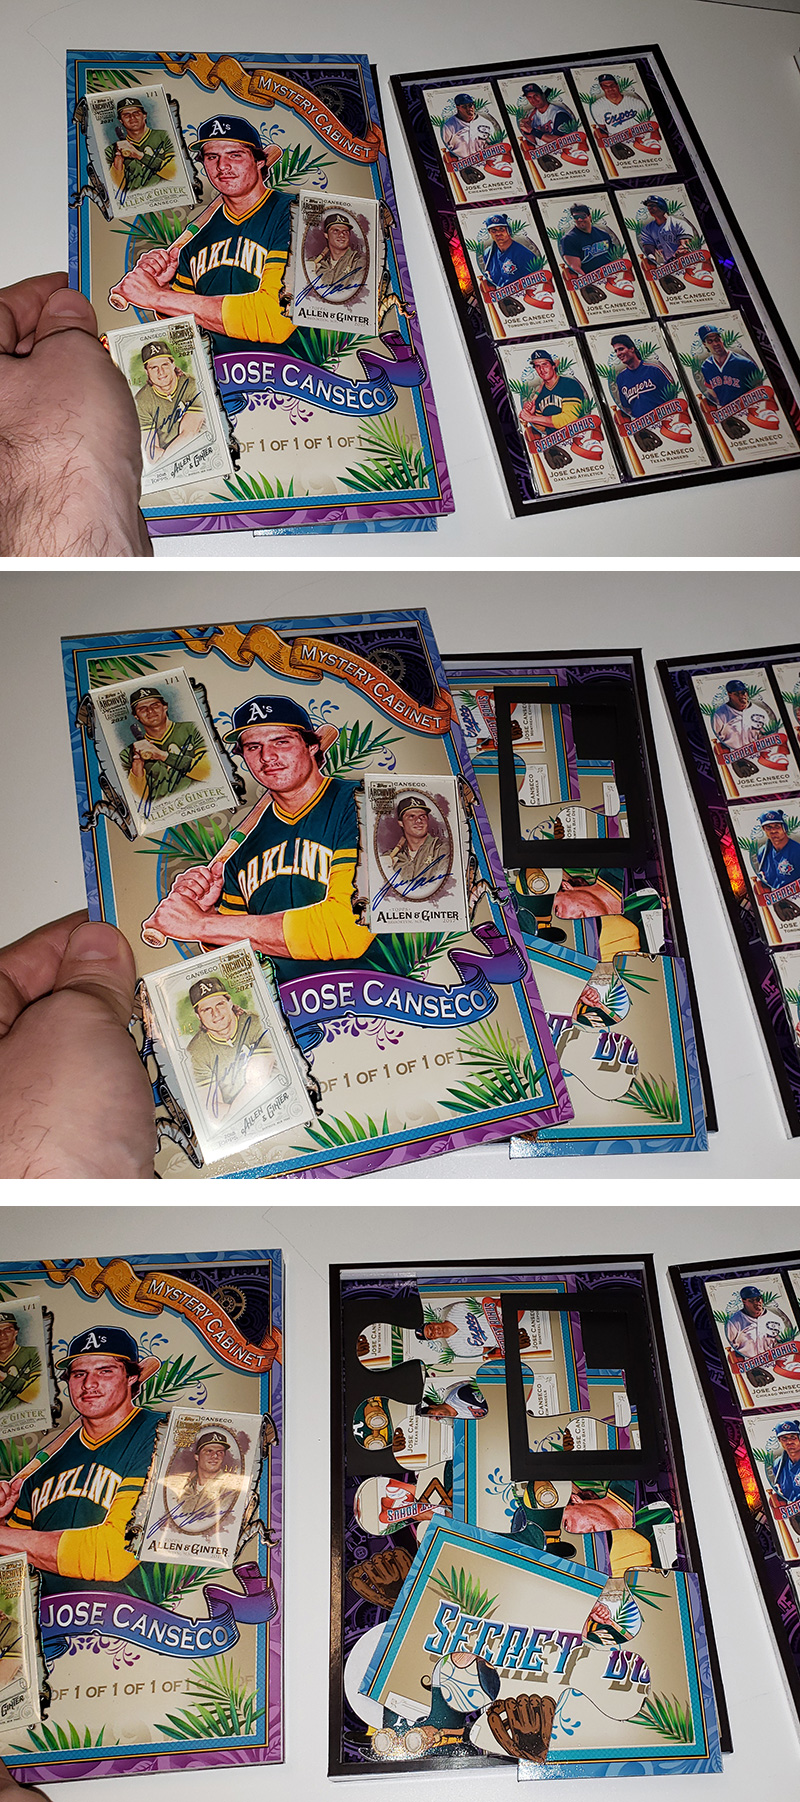
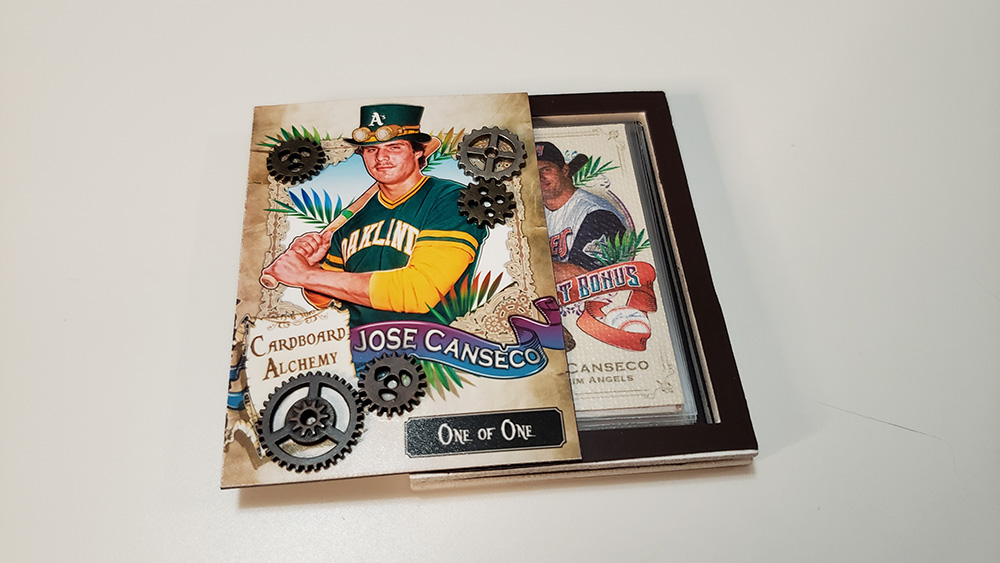
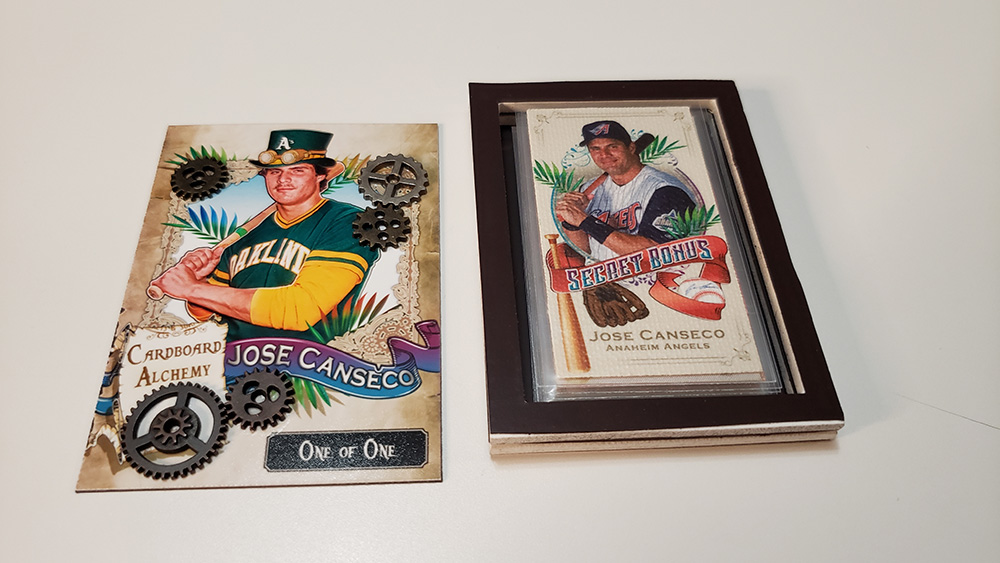
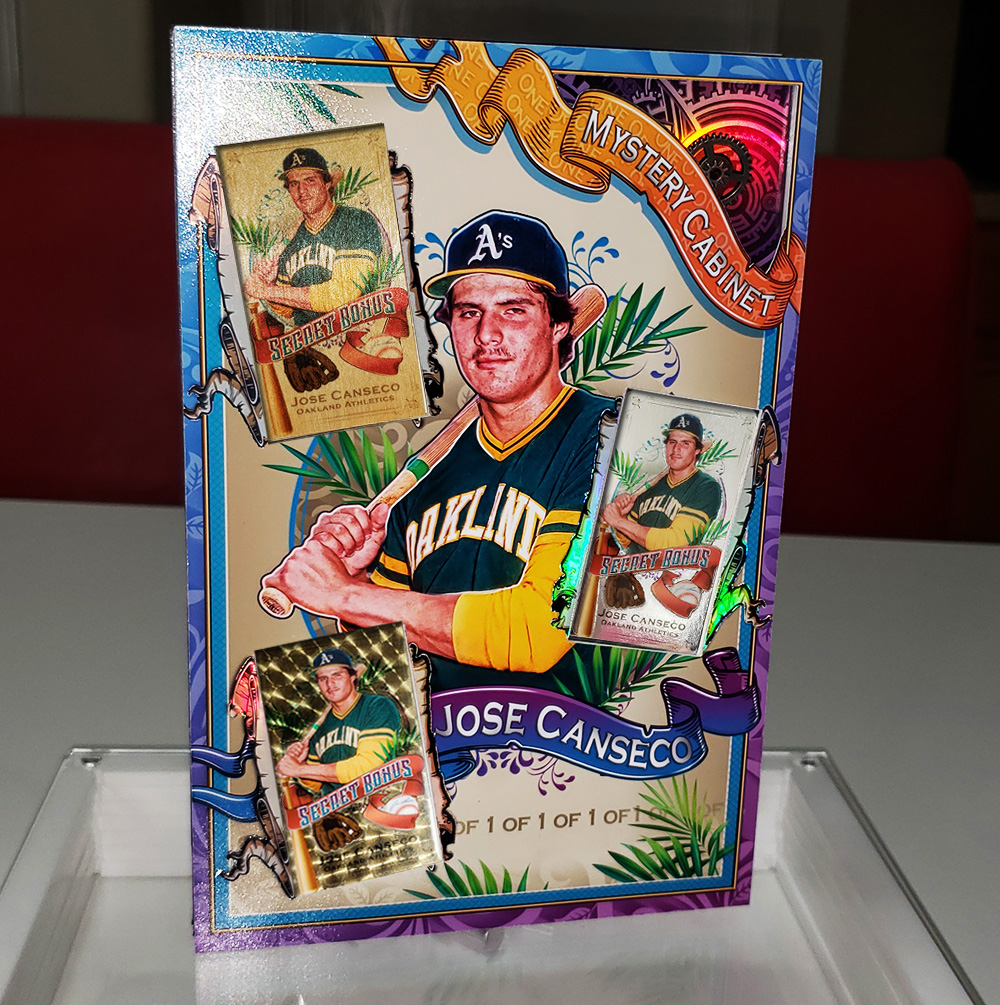
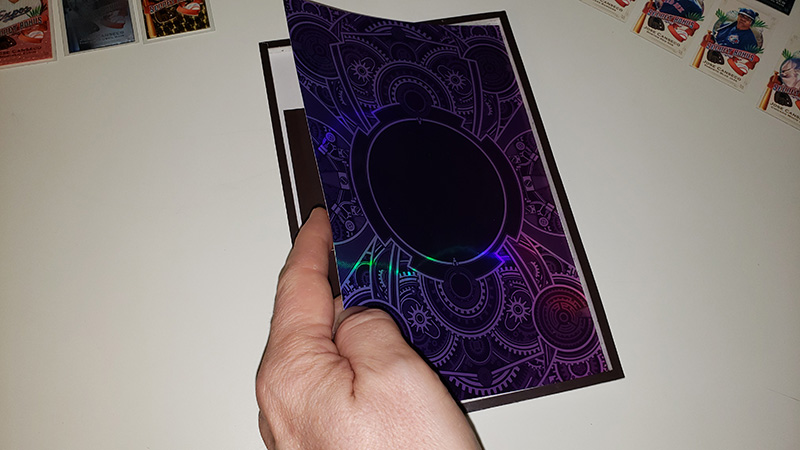
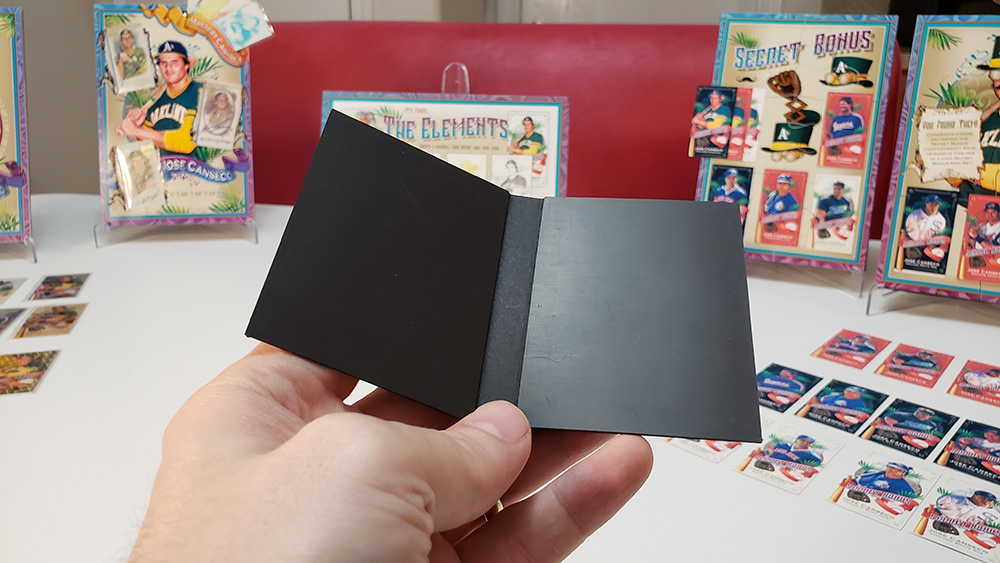
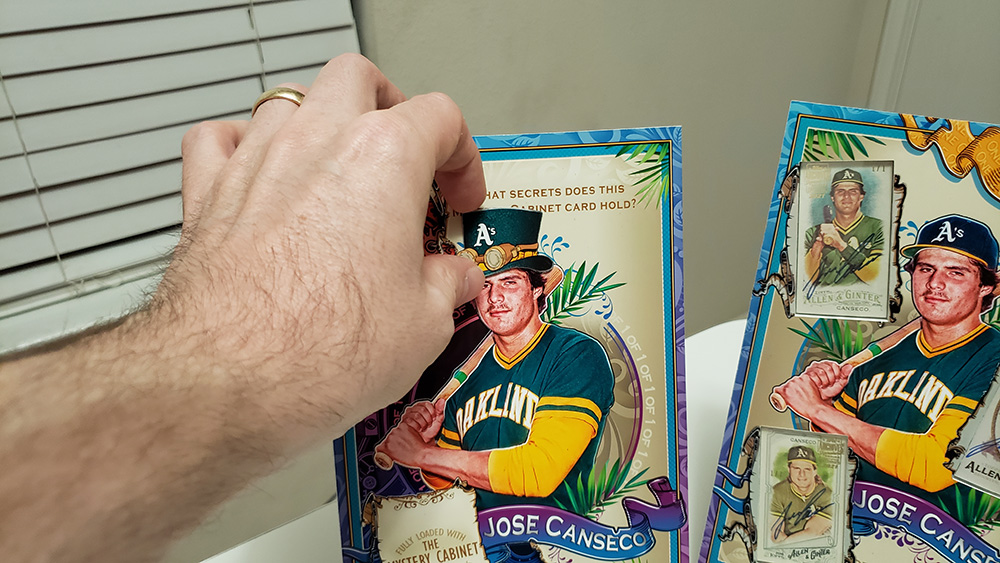
Oh, and that wasn’t the front. That was the back. This is the front …
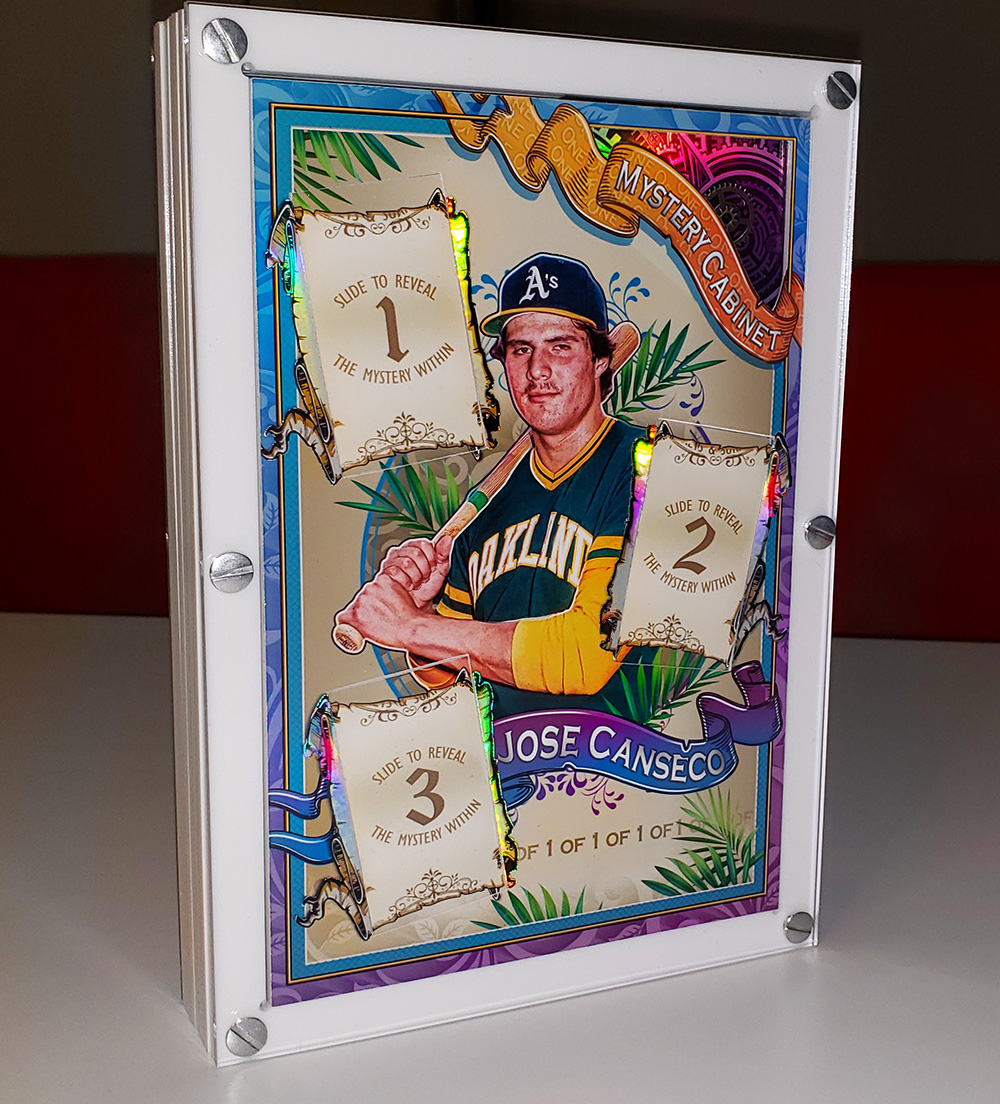
The front showcases three sliding doors. Can you guess what is behind the doors? That’s right … the minis!
It took a LONG time for me to figure out – and build – the mechanics to go inside this card just to make the sliding doors work smoothly.

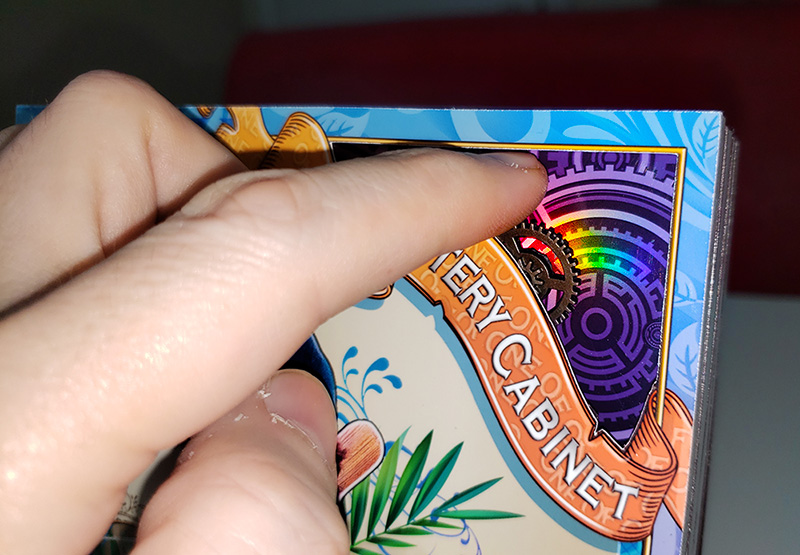
I had some room to play with in the upper right. You can see the cabinet seems to have some “depth”, as holographic purple foil gears appear to be just beneath the surface making everything work. A “real” gear was added.
But that’s not it. Not by a long shot.
As the days flew by during this project, I kept coming up with new ideas. Each one was met in my head with “Nah, that’s ridiculous. I can’t do that. It would be way too hard, and probably won’t turn out, anyway.” But each time, I worked hard to figure them out.
The first idea I had was to have some sort of a “surprise” card inside the Mystery Cabinet. I started thinking about rip cards, but how I didn’t want this to be destroyed. After thinking about it quite a bit, my first thought was … what about a magnet? Is there a strong yet pliable enough type of magnet that I can line the “frames” of the card with to hold it together, but allow me to pull it apart if I wanted?
I researched, and purchased a number of them to try tests on. Like many things in this project, it had me up until 2am many times running test after test. After a while, I figured it out! The question was this: What should I hide inside?
Have you ever seen a house with a secret room? I think secret compartments are the coolest thing ever, and like I said before – I didn’t want this to be a pretty piece that just sits on my shelf.
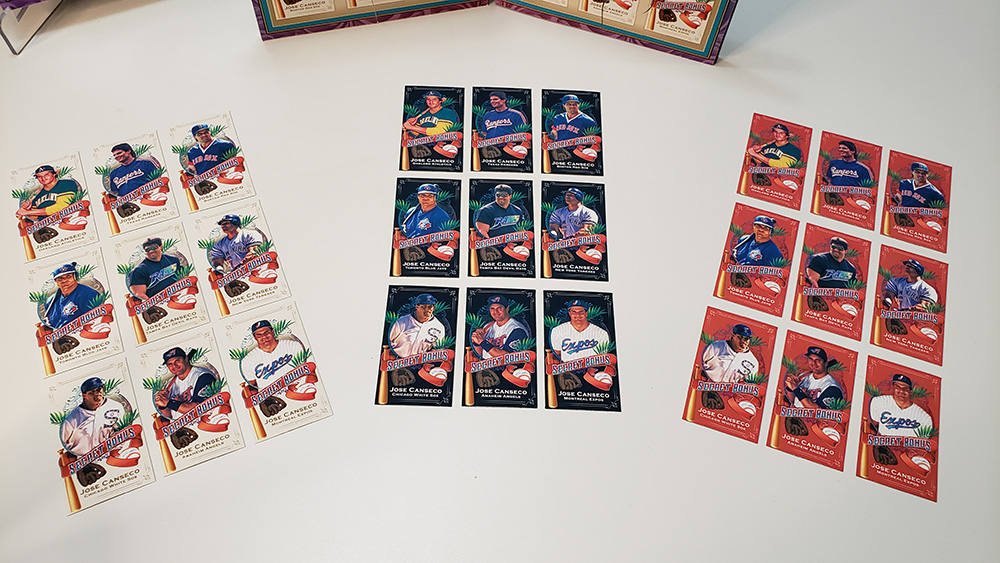
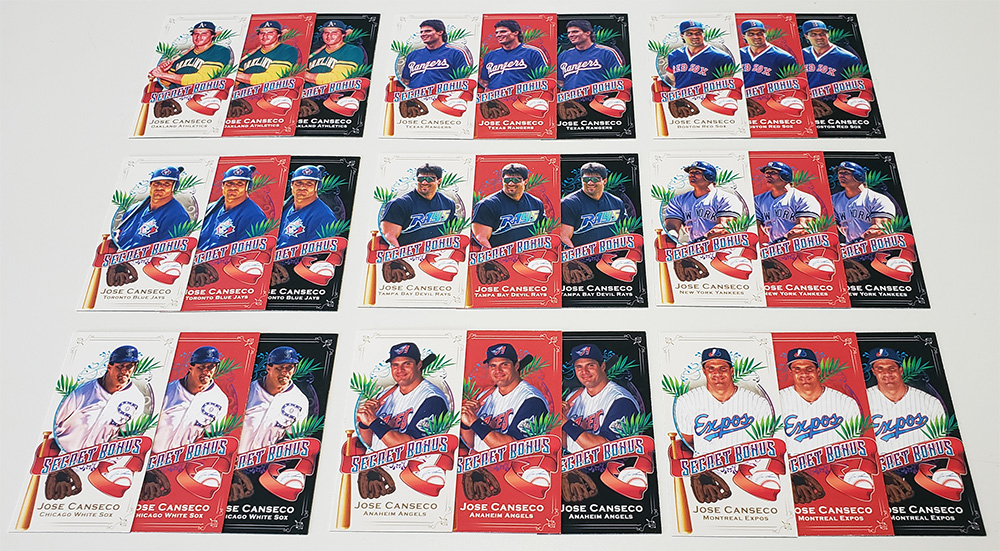
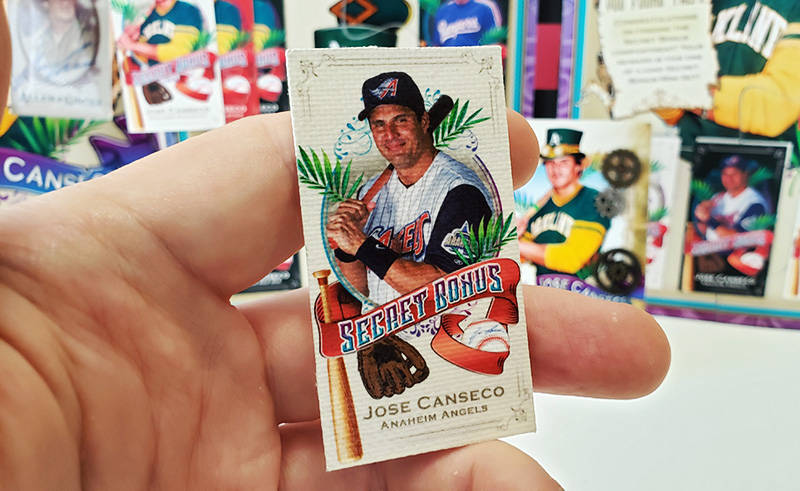
One of the things to do on my bucket list was to design my own mini card set. I love Allen & Ginter, but wanted to give it my own style. Since the subject is (as always) my favorite player, this is what I came up with:
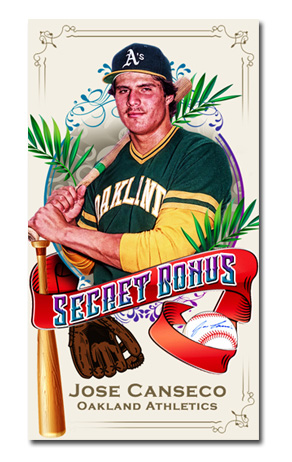
Jose played for 7 teams, but signed at one point or another with 9 teams, so I decided to do a 9 card set.
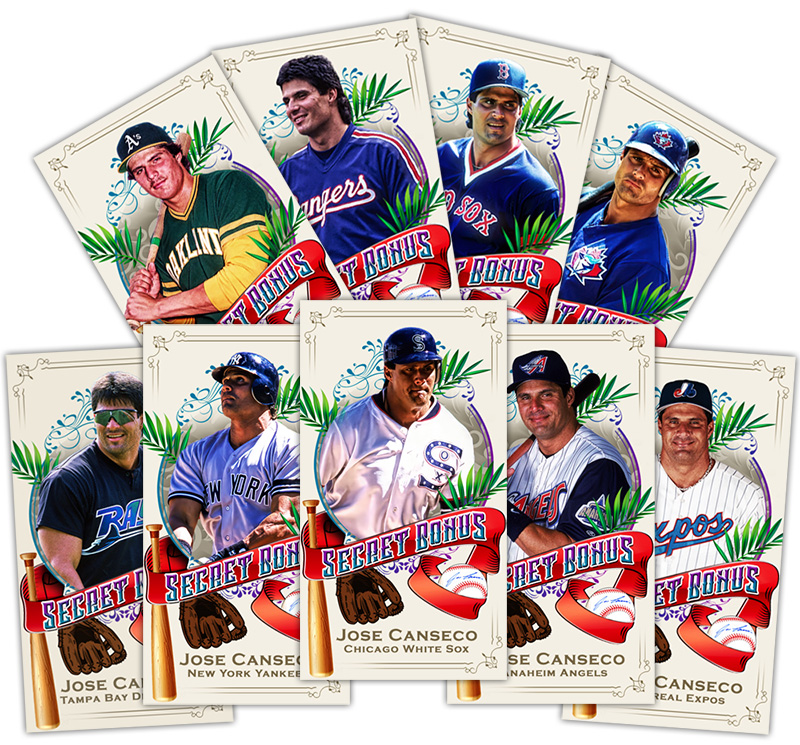
I’m very happy with how they turned out, but the question quickly became – how do I “hide” them in the Mystery Cabinet?
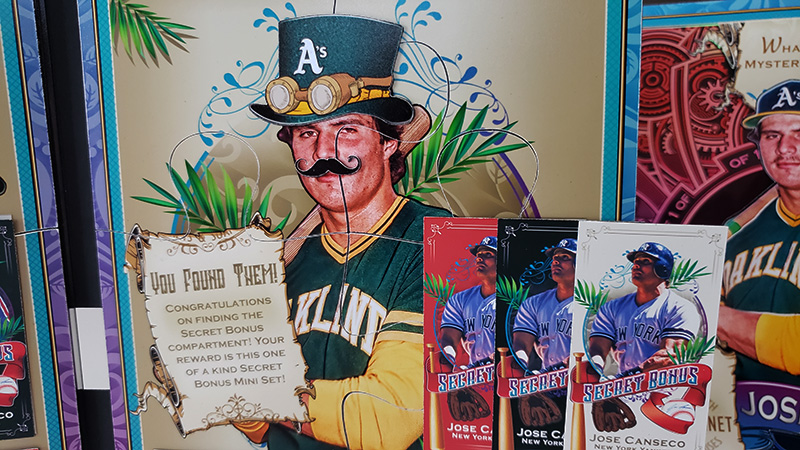
Right behind the back of the card, there is a secret compartment that is covered by holographic purple gears. Pulling that up reveals them.

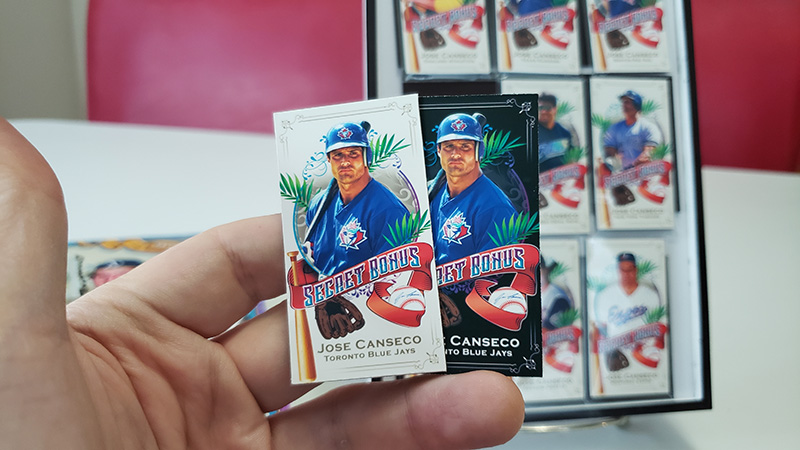
As with everything else in the Mystery Cabinet, not all is as it seems. To the naked eye, each mini looks like just a mini, but it is not. A little force shows what’s behind each one …
a black mini parallel!
That’s not all … force pushing a bit more shows another parallel – a red!
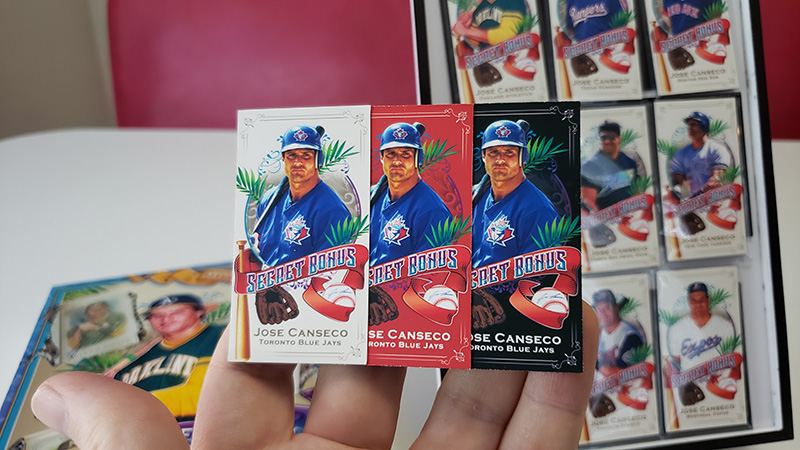
There are many ways you can display these … either all white, black, red … or mix.
We are not done with our journey yet! I wanted to do something extra fun with these minis.
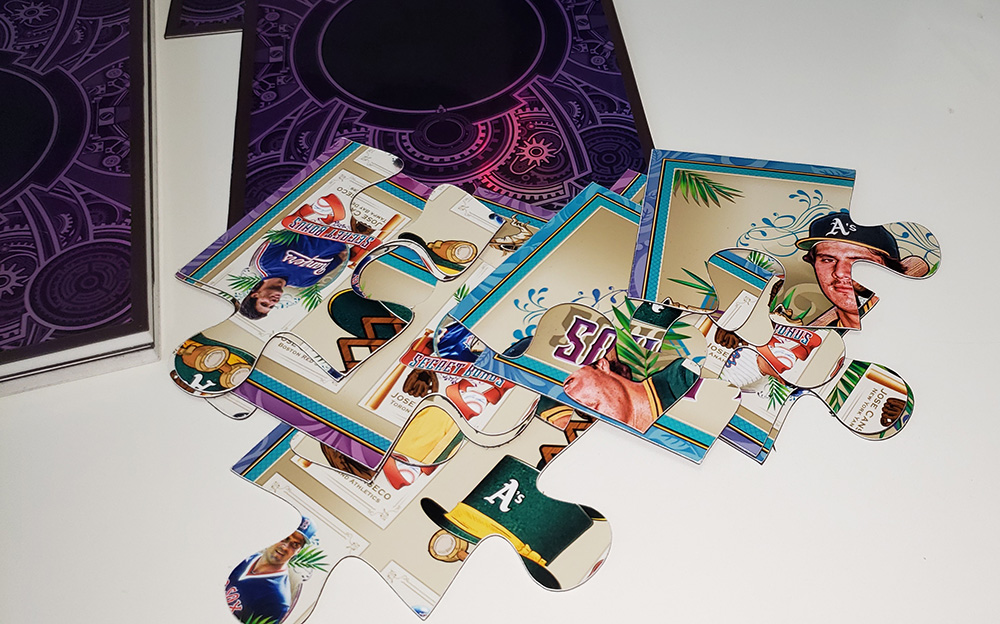
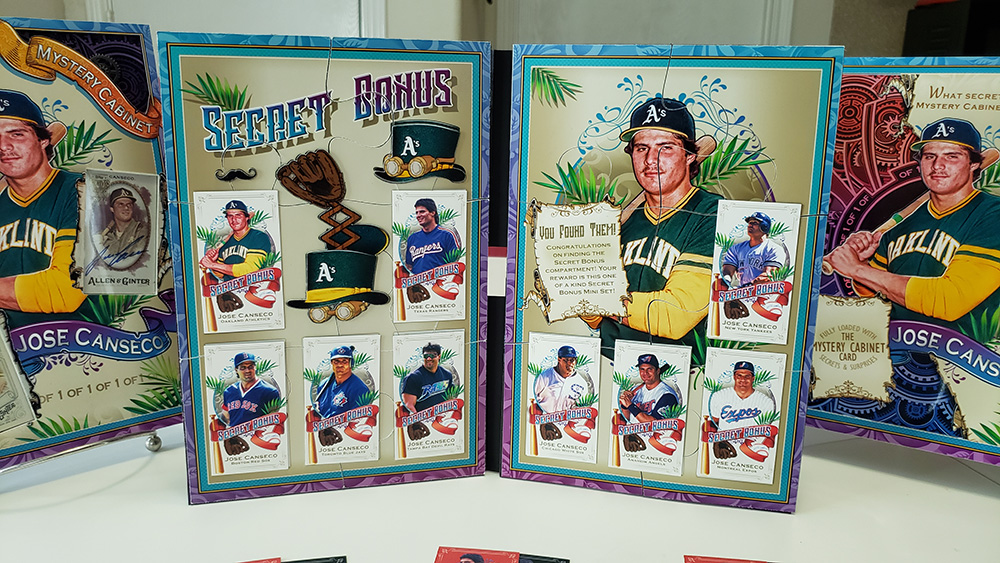
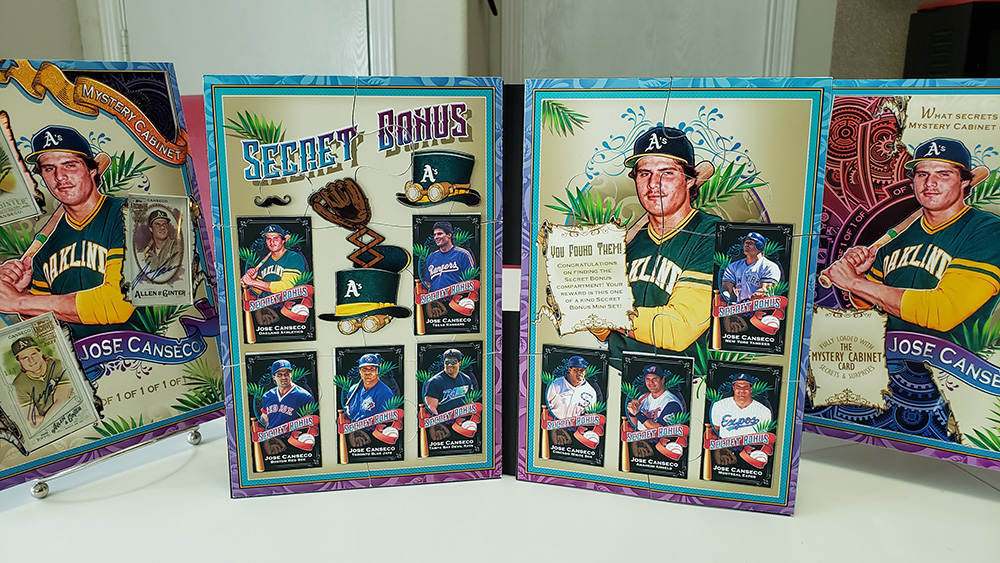
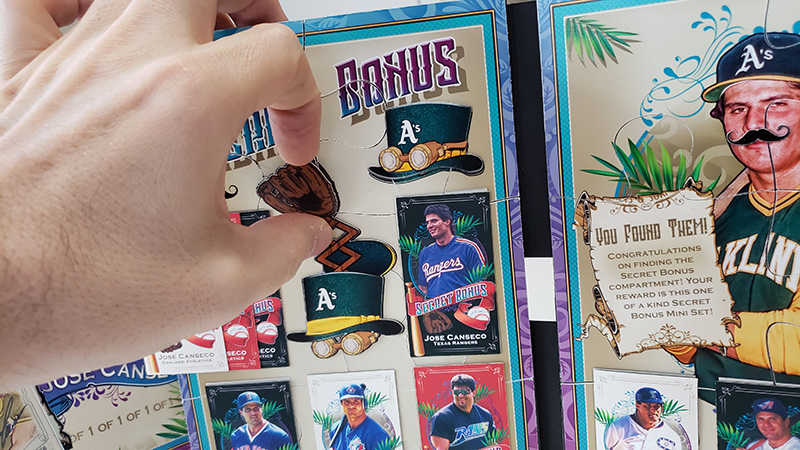
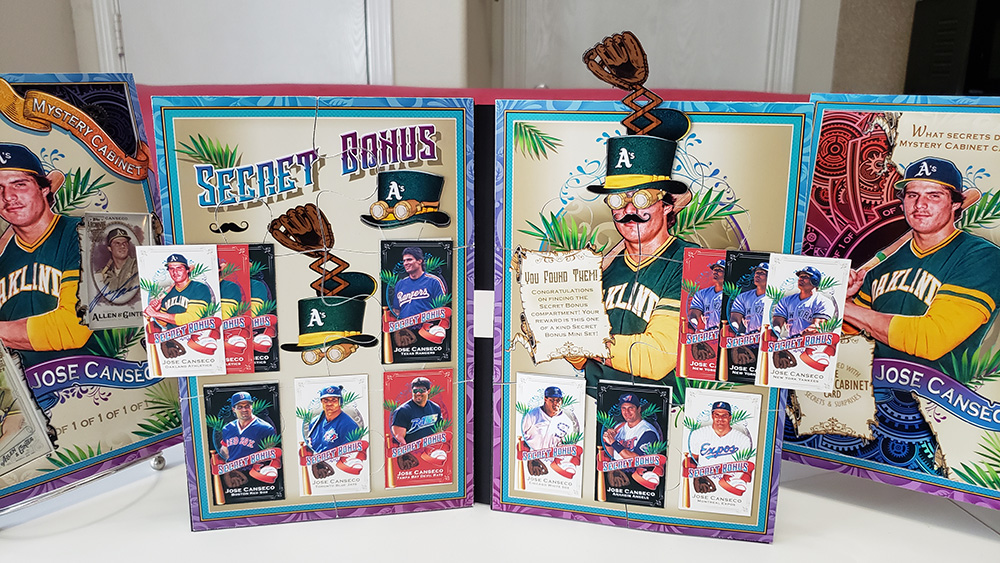
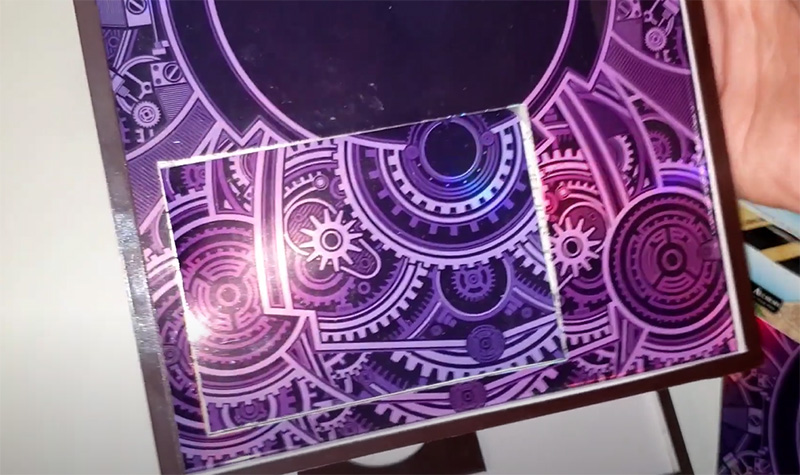
Let’s move to the front of the Mystery Cabinet again, and pull off the front face.
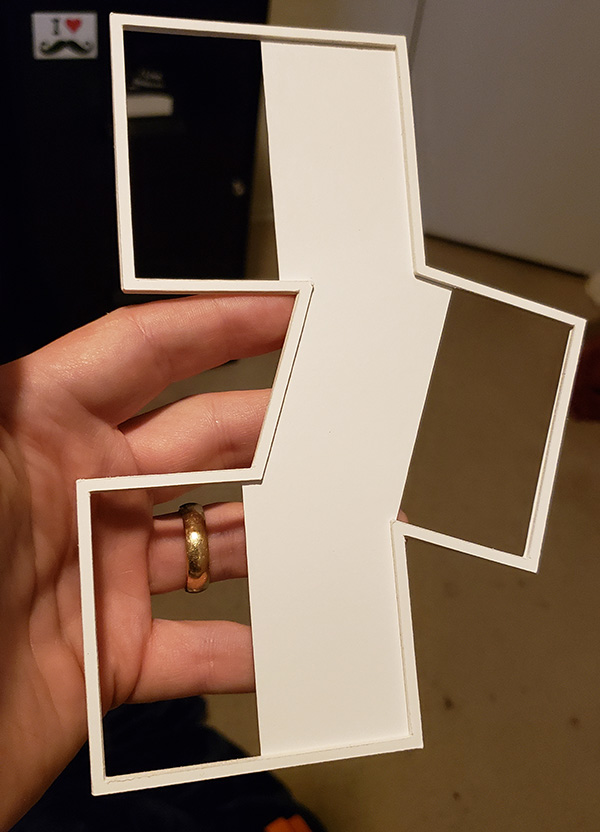
Puzzle pieces!
Let’s have some fun and build this together. We’ll use the purple holofoil sections and fasten them to a couple of the magnetic frames of the Mystery Cabinet …
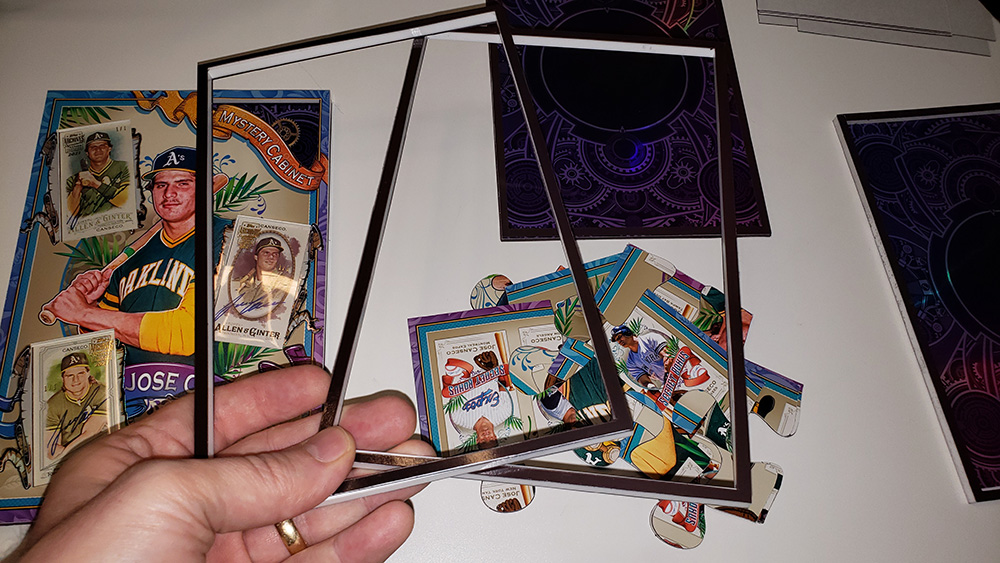
Before we attach them, it should be noted that the purple centerpiece can be separated into two, revealing a couple more puzzle pieces, and yet another surprise that we’ll get to later …
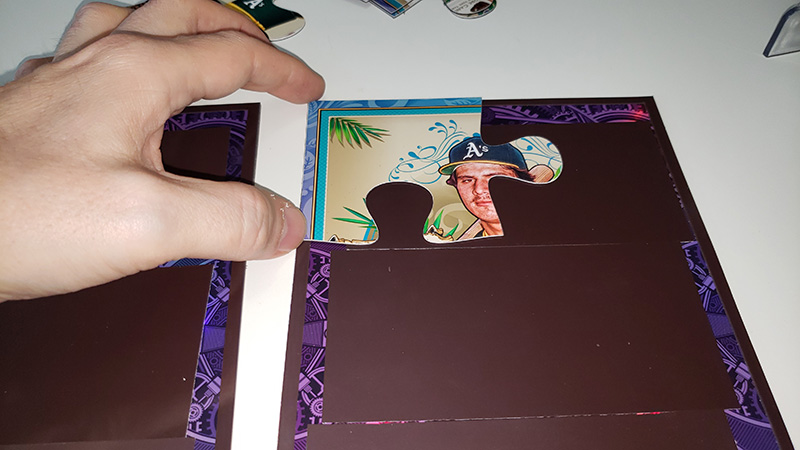
After a minute, they are put together!
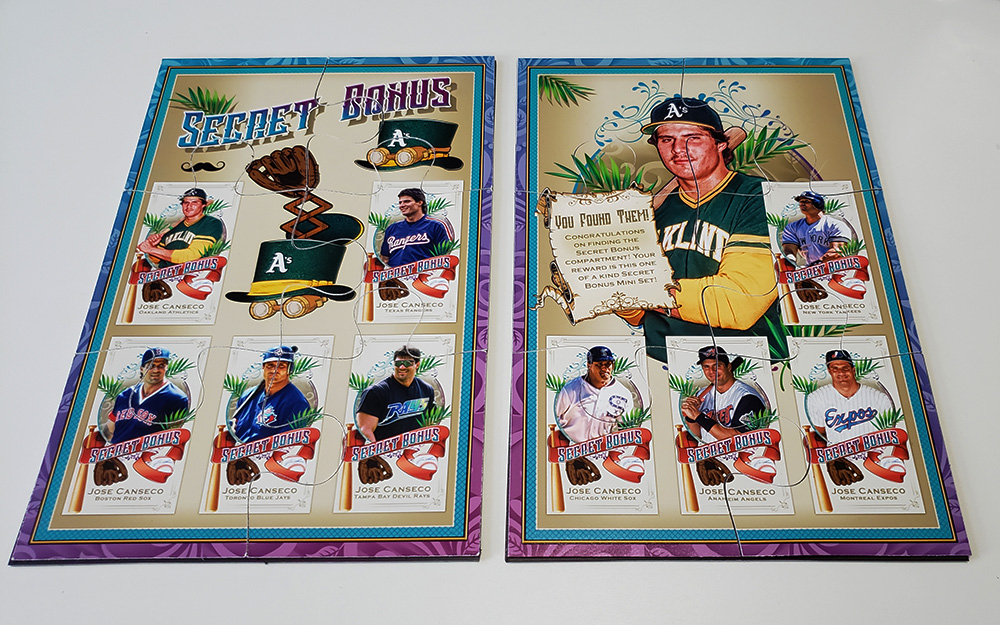
As you can see below, the two puzzles look like a huge booklet – the binding pieces were hidden in the first secret compartment to allow these puzzles to stand up, and be attached to each other. My office is filled with large transformers – I LOVE the fact that these robots can turn into one thing from another – we just did that with this Mystery Cabinet! It is fun to think that we can build something larger than the Mystery Cabinet itself using nothing but pieces from inside the Mystery Cabinet.
Oh, and the front and back can now be displayed as separate pieces as well.

The puzzle isn’t just a puzzle. It is a display board. That’s right! You can display whatever mini set you would like directly on the puzzles!
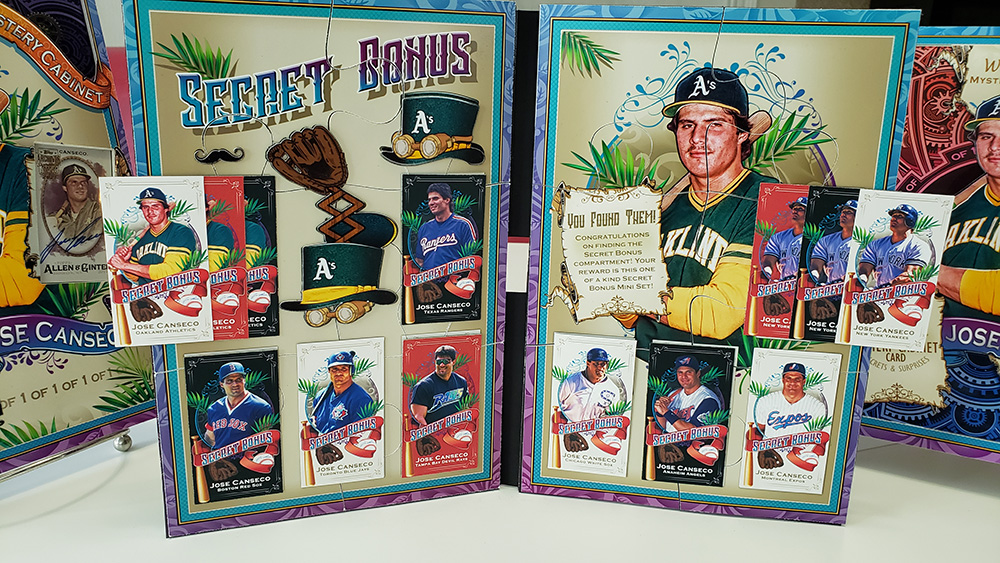
The white set …
Black set …
and red set …
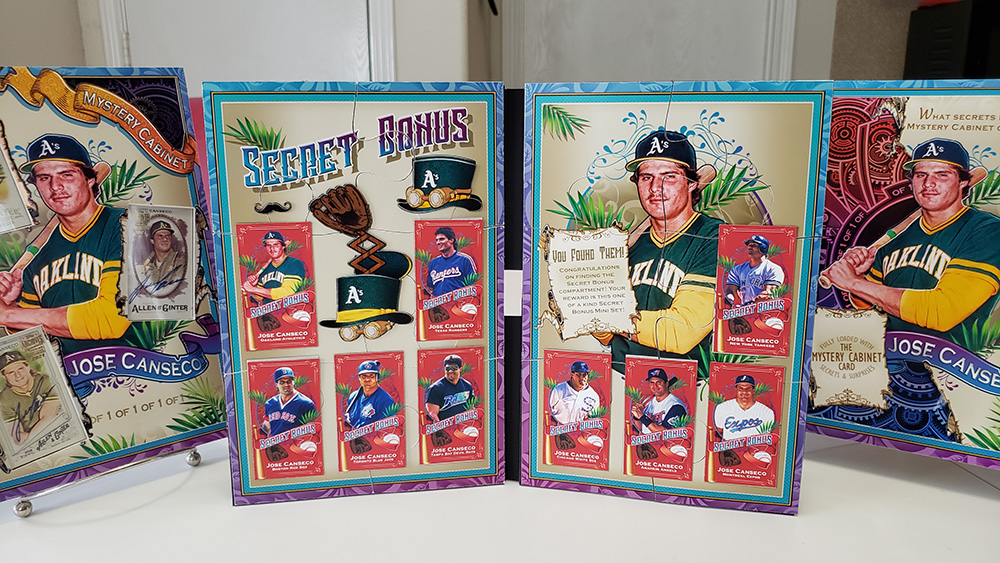
You can even mix & match! The cool thing about these minis, is that they too are magnetized, so you can have a few hanging off the sides – I love that you can display these outside the conventional rectangular shapes of the puzzle booklet.
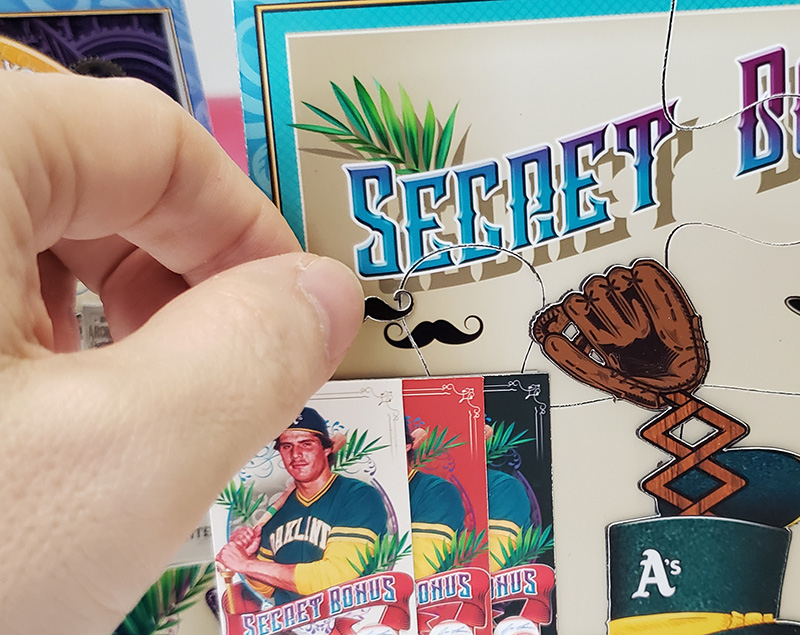
As you can see, I also designed some fun steampunk elements, and mixed them in with A’s / baseball. It is obvious that young Jose’s moustache needed some big league help, so threw in a big league moustache – a moustache on steroids, if you will.
What if I told you they weren’t just thrown in there? Check it out … Jose can actually *wear* the hat and moustache.
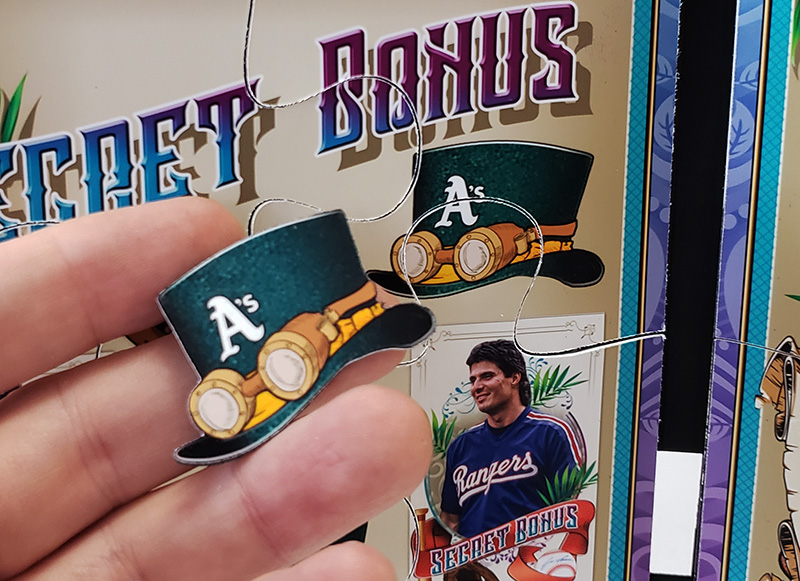
If you recall, he had a ball bounce off his head for a home run in one game, so I decided to create something to protect my favorite player from that happening again. The glove artwork is the same one utilized in the mini set – I love how the glove goes beyond the puzzle display border at the top!
So, is there anything else? Heck yes, there is!
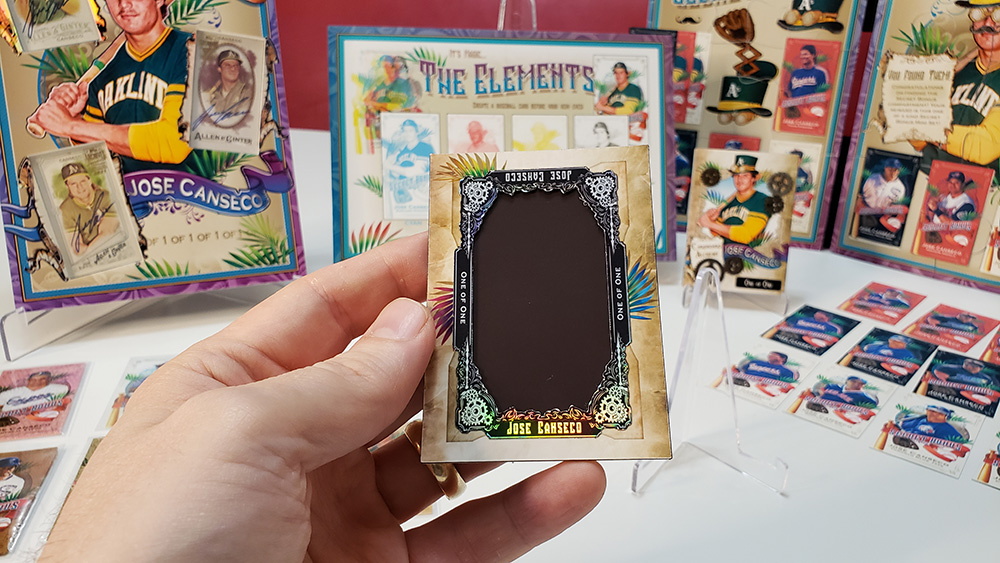
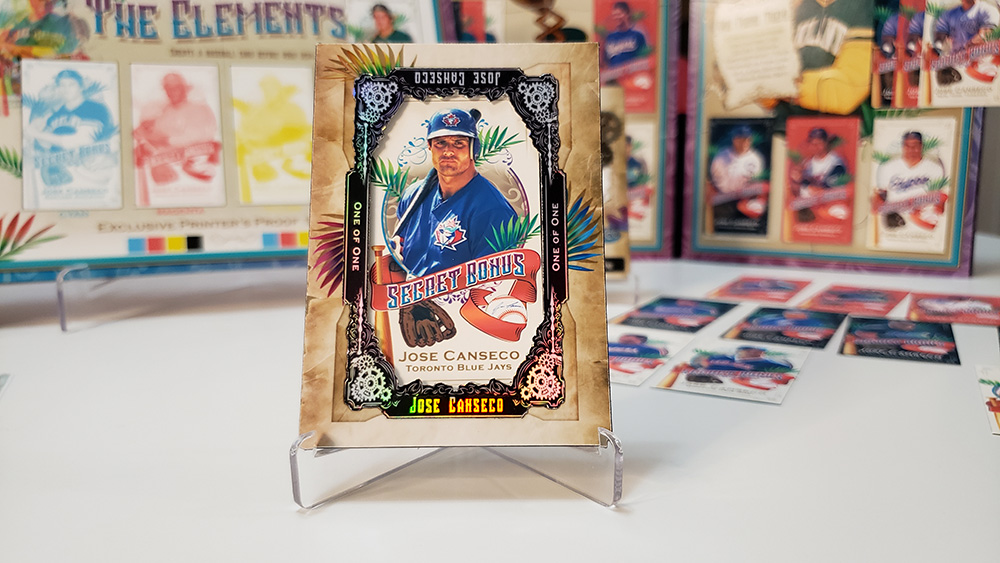
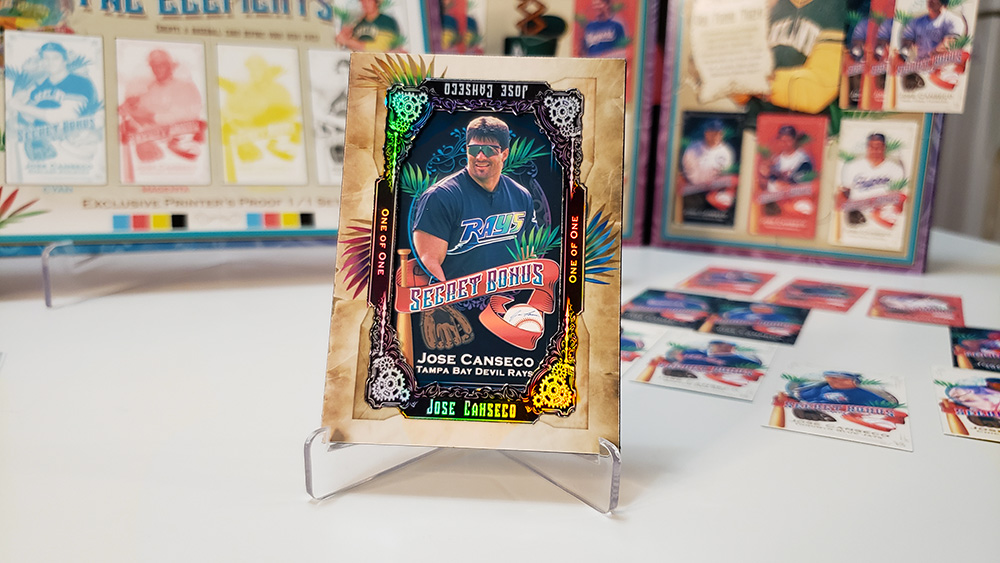
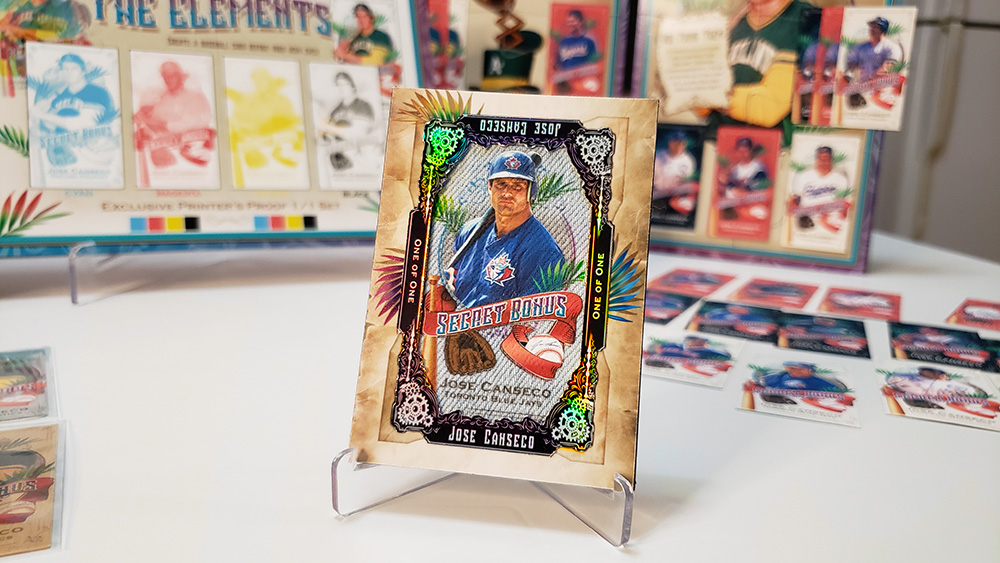
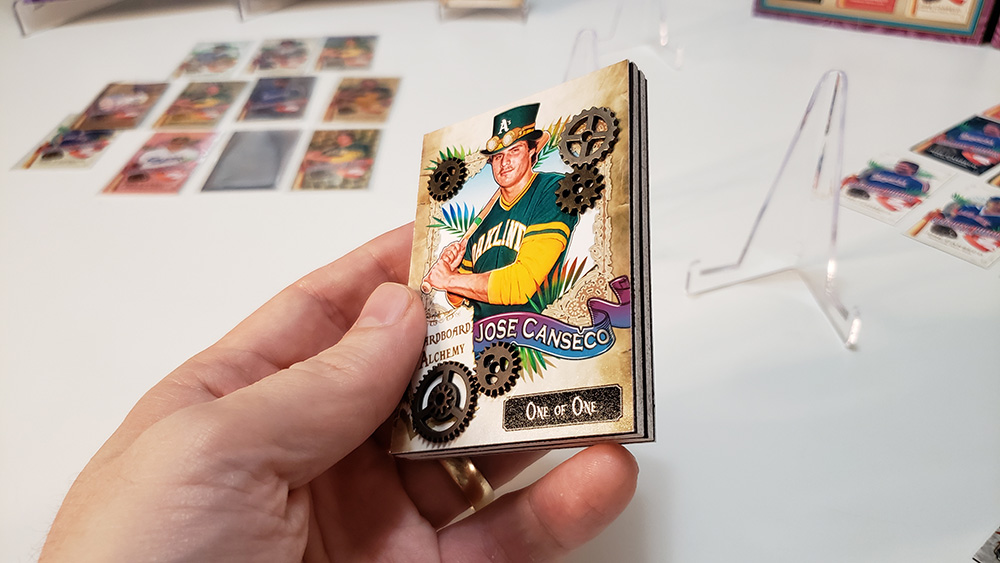
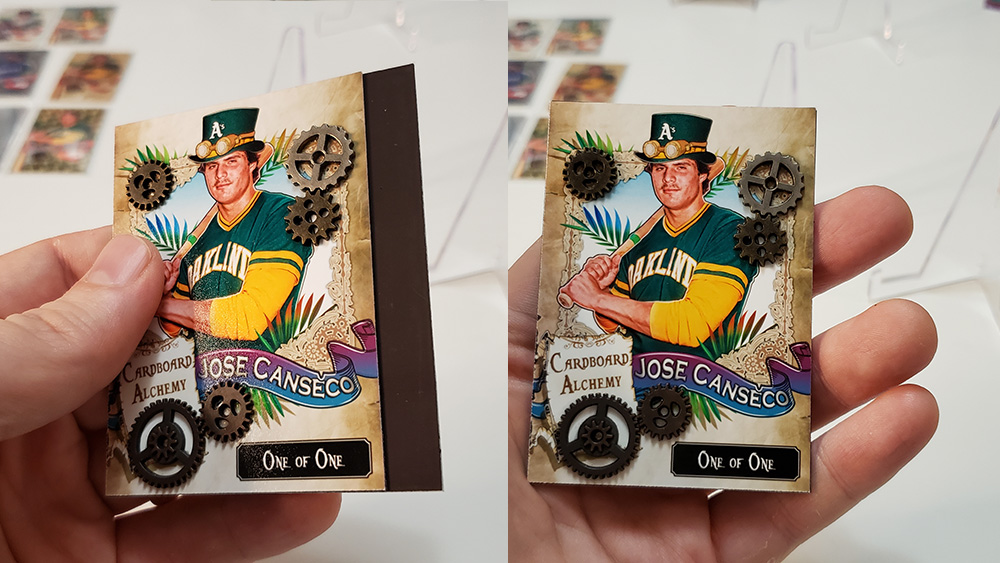
The puzzle pieces were covering something – a card. Not just any card. A rip card. I just HAD to include one of these in my project, because I love a good mystery.
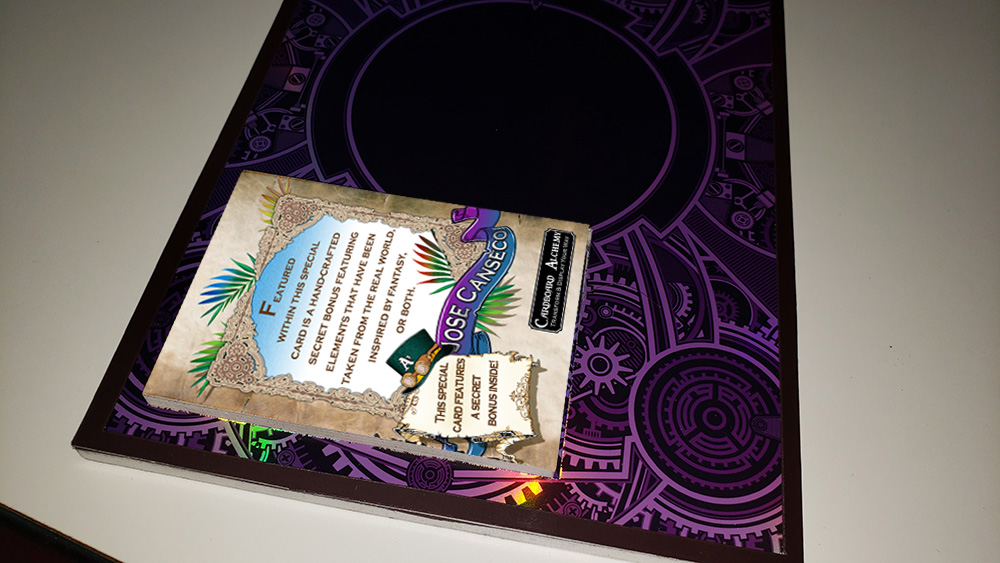
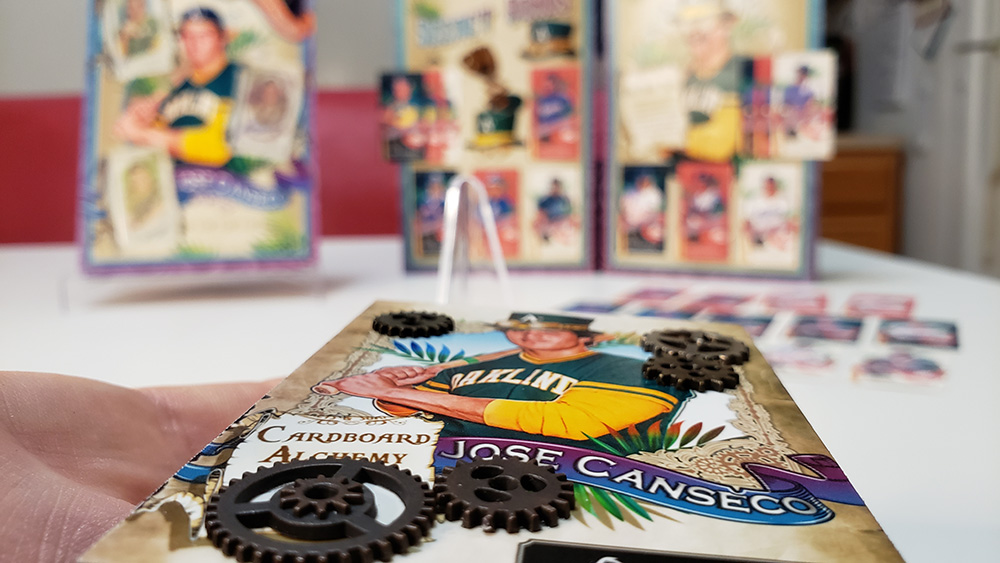
As you can see, Jose is wearing the steampunk hat, and there are actual gears that match the one on the front of this Mystery Cabinet.
This isn’t a rip card like you’ve ever seen before, though.
It doesn’t include one card. It includes an entire parallel set!
I first thought about including an entire refractor set inside …

But instead opted for something way, way, way crazier.
Let’s take a look!
First, it is important to note that I’ve utilized a magnet system as well that allows you to “peel and reveal”, or “slide and unhide” the contents. That way, no damage is done to the card.
The contents of this rip card … err. .. “peel card(?)” probably took the longest amount of time for me to create out of everything else in this project, as it utilizes several different technologies. It required a ton of thought, planning, and testing.
One of the things I love about Allen & Ginter are the various types of materials used. Silk, metal, etc. I LOVE it all. Each mini in this rip card utilizes a different material.
To begin with, we have the Angels – it is a card that was made on actual canvas.
This didn’t make it into the Mystery Cabinet, but I had fun creating this just because.
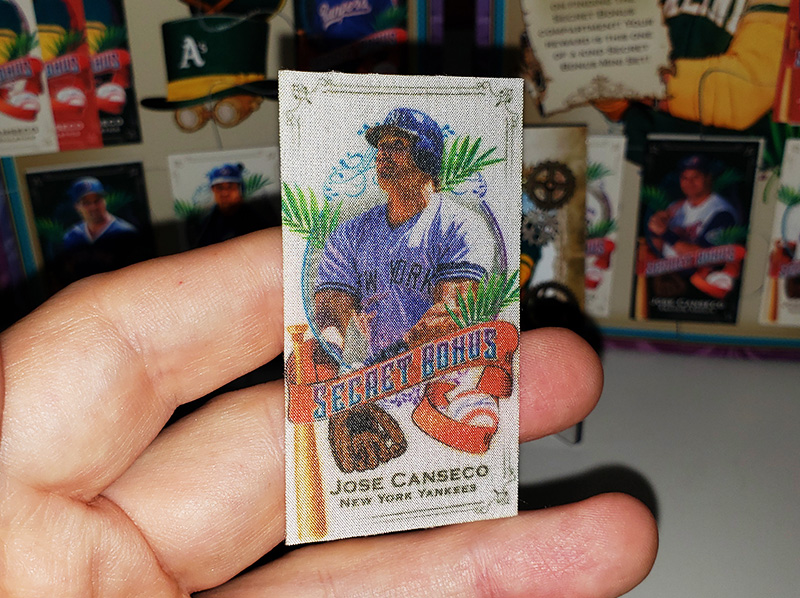
Next up is the Yankees – a silk card.
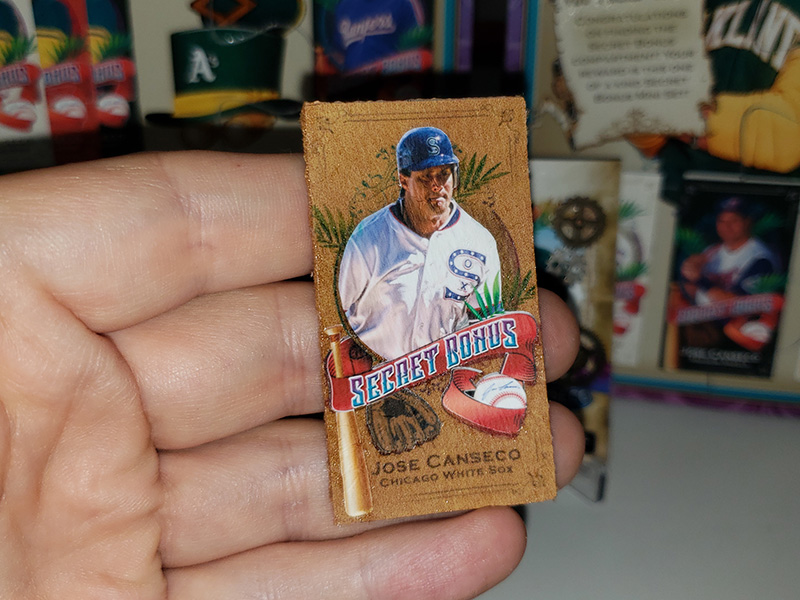
The White Sox? Actual leather!
I like to call the Expos parallel Dragon Scale. It shifts color a bit from pink/gold to pinkish when you move it around.

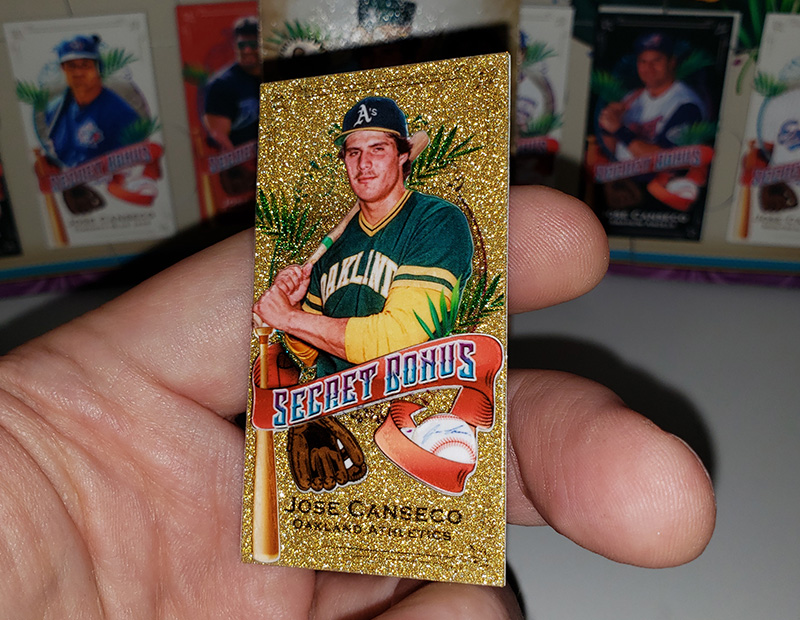
For the flagship card of the set, I created the A’s “Gold Dust” parallel. It sparkles quite nicely in the light!
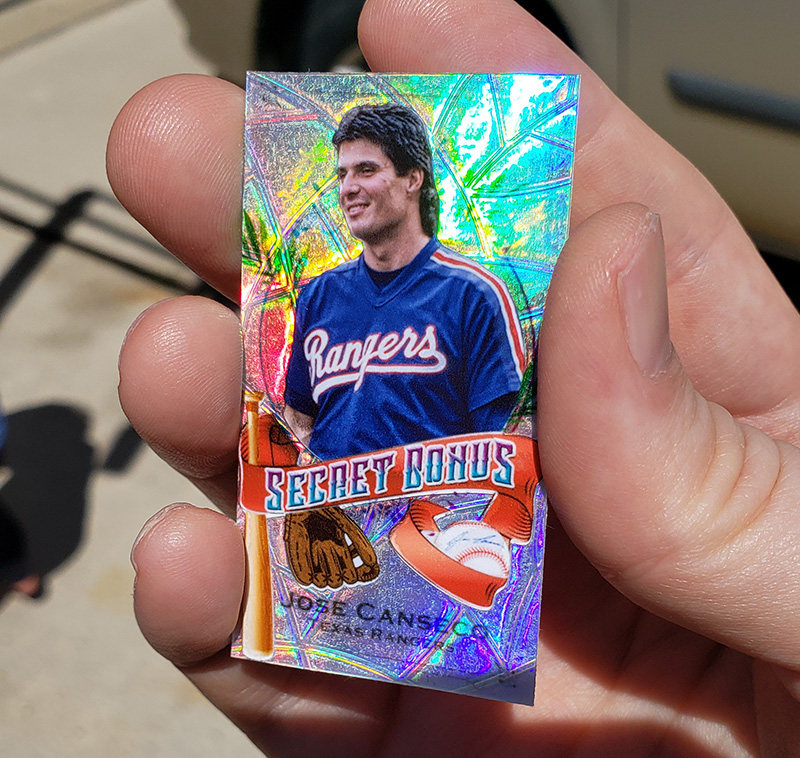
For the Rangers, we have something that may be a bit off-putting for some folks, but is definitely unique: A card made out of REAL snake skin!

Here is an alternate I created – I was conflicted as to which to utilize, so … why not both? I call this one a diamond diffractor – it utilizes a couple different technologies which I’m proud of how it turned out! This isn’t in the Mystery Cabinet – just an alternate!
The Red Sox card is truly a fun one – I call it the radioactive parallel. Here’s why …
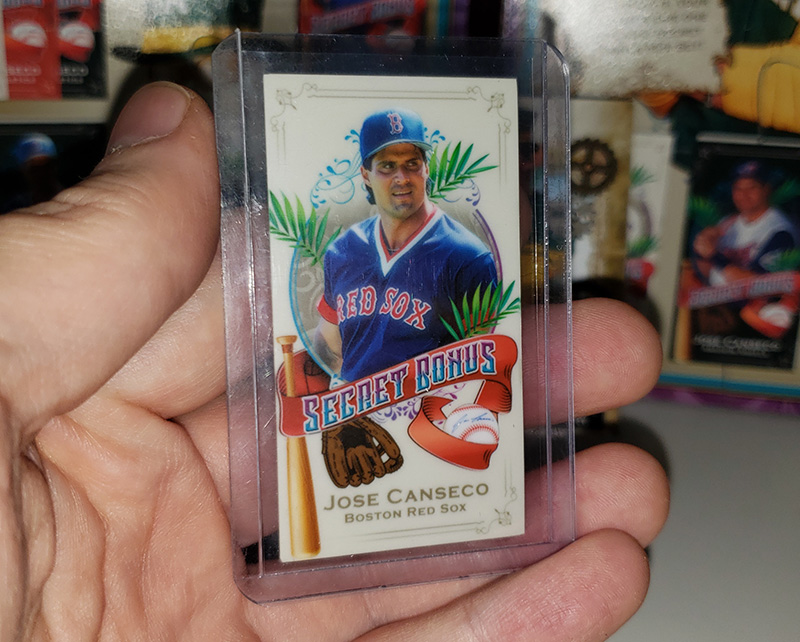
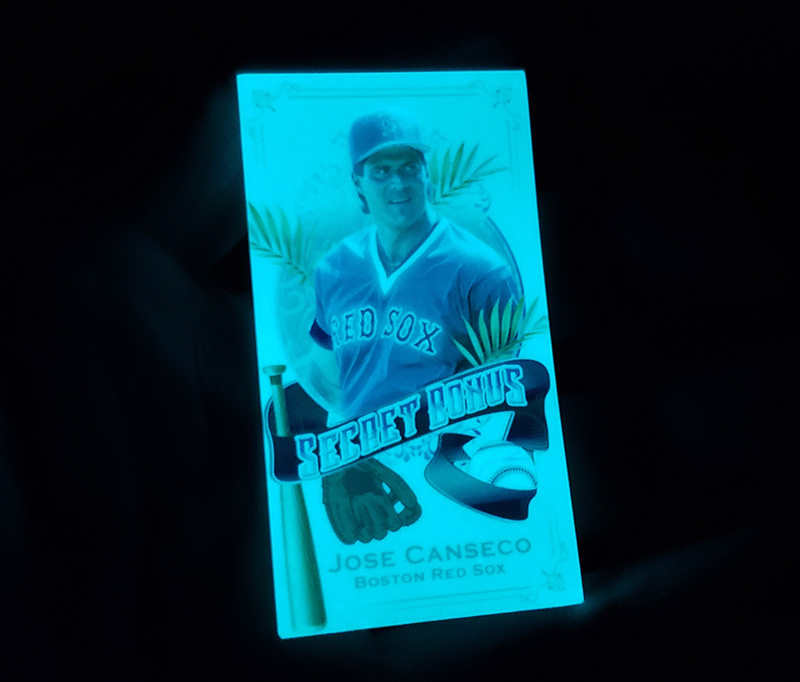
It glows so nicely – I LOVE it!
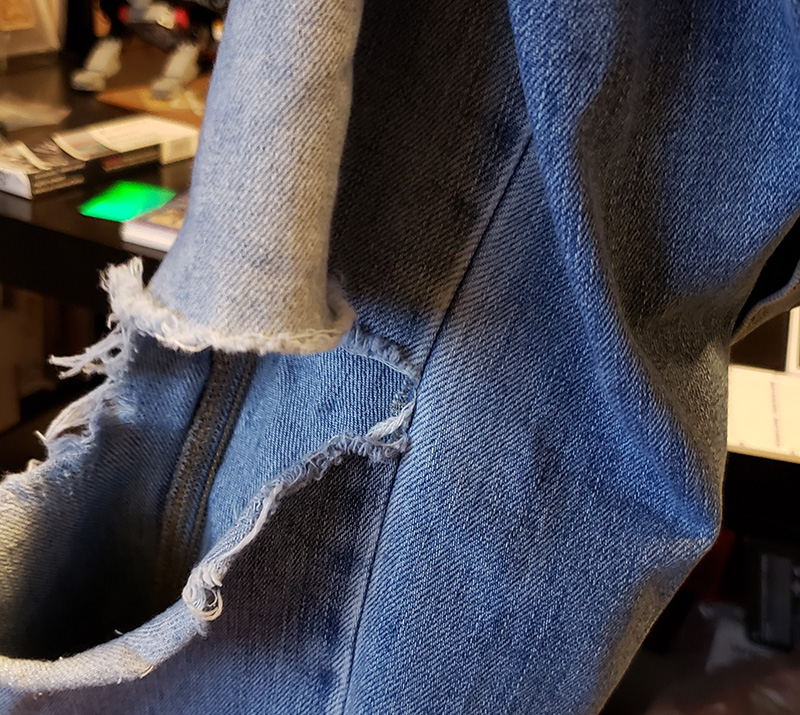
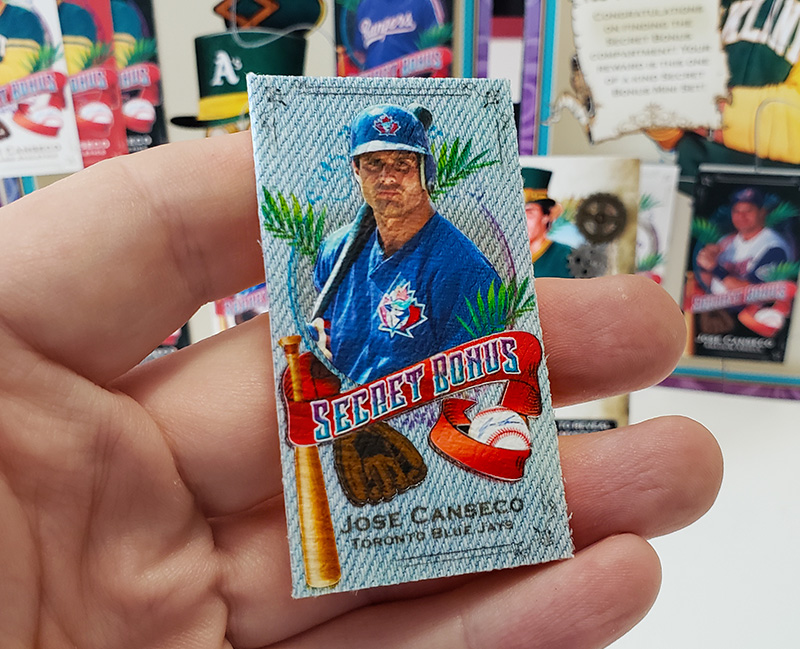
Next up? Blue Jays. I had it in my mind to a blue jeans blue jays card – so this is a denim parallel. Yeah, real, honest to goodness denim. It was literally taken from a pair of my wife’s old pants! (Don’t worry … I asked permission before cutting them up, first!)
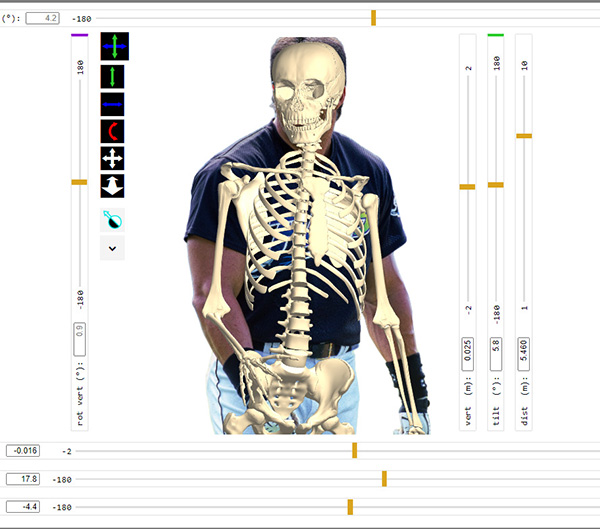
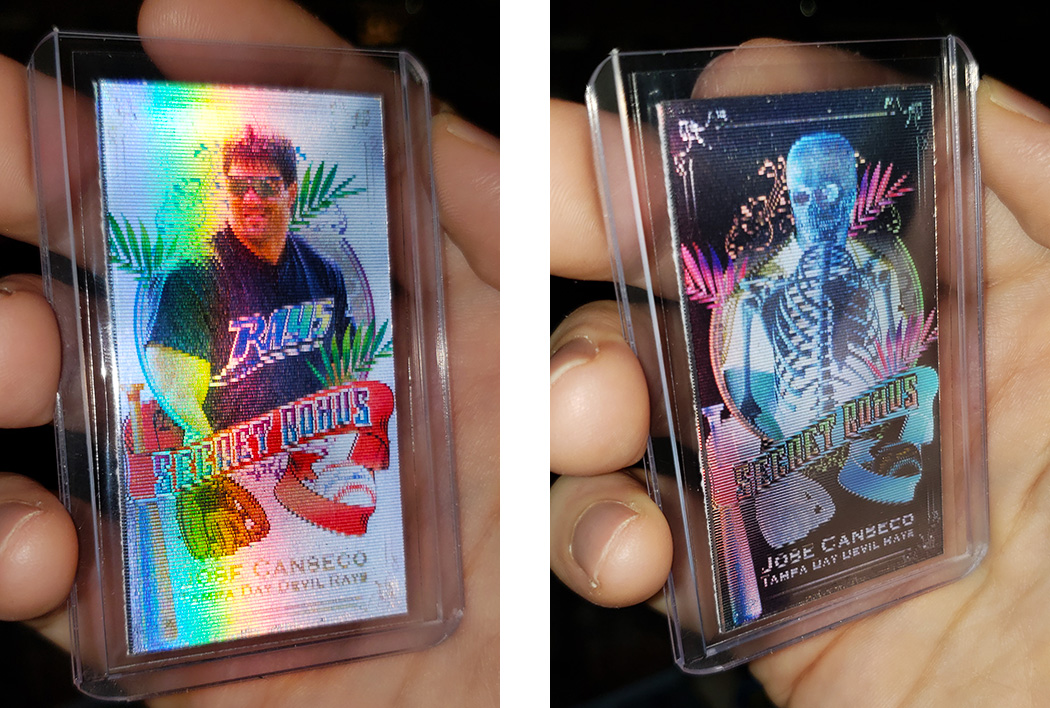
Last but not least is my favorite of the set (this or the denim one, that is!) I called it the X-Rayfractor. It is reminiscent of sportflics from the 80s, but with holographic foil. What makes it stand out even further is the 3d modeling system used to create a skeleton, hence the x-ray look. It took FOREVER, but I seriously can’t get enough of looking at it!
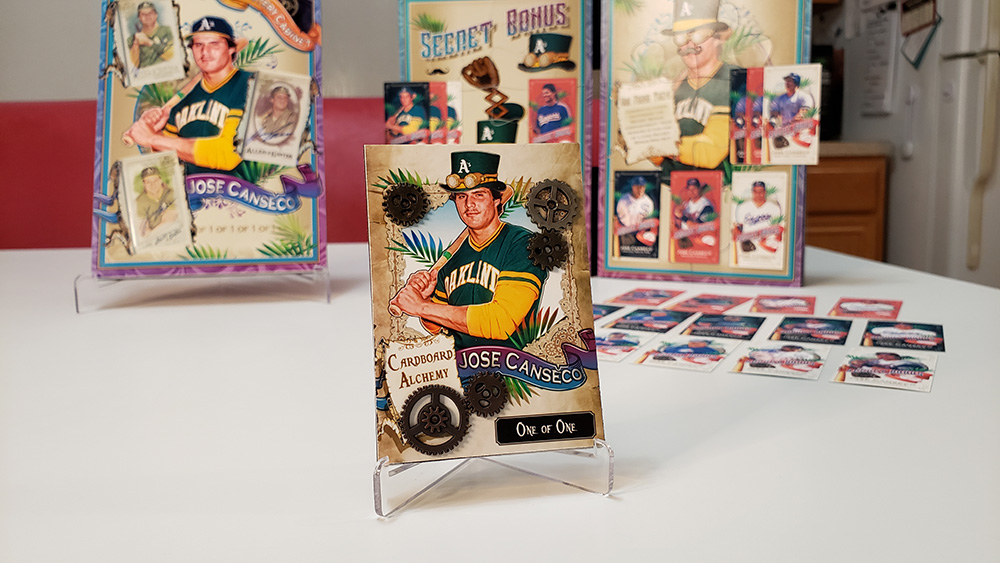
Remember recessed area with holographic purple foil that housed the real gear on the front of the card? That gear isn’t just for show. It is a pull tab. Check out what it pulls out! Three extra parallels of the Secret Bonus flagship card.
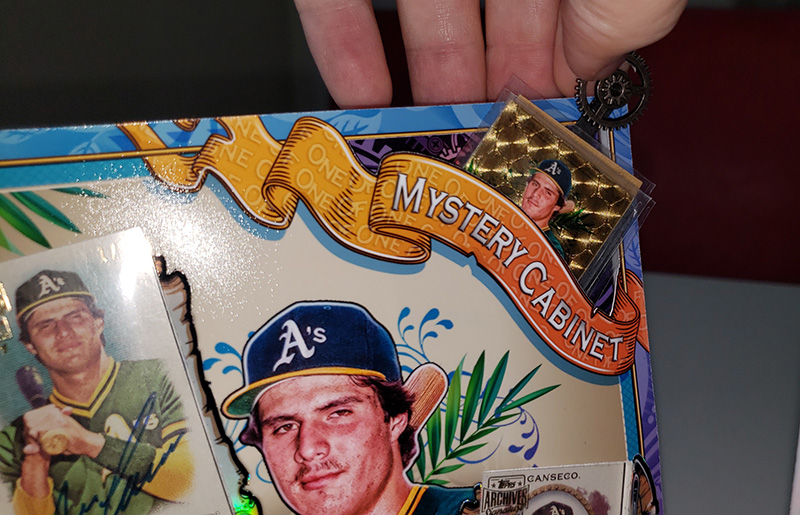
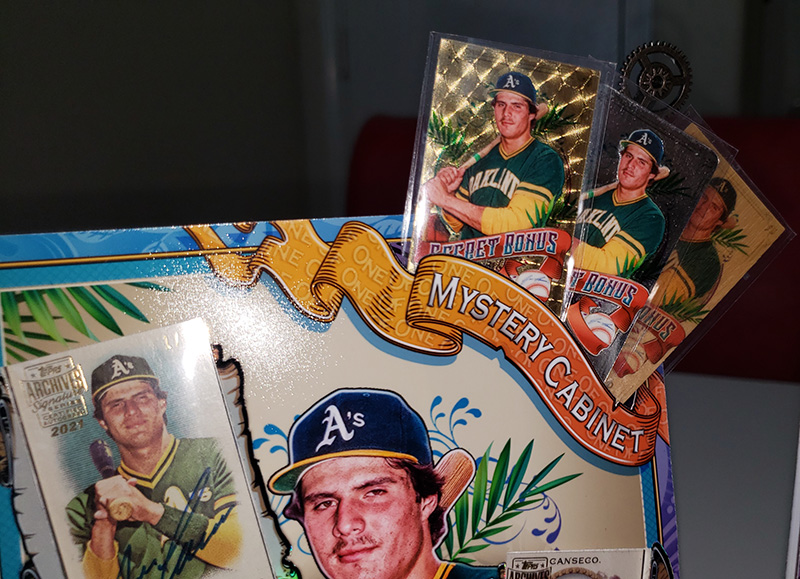
While I love displaying them popping out of the edge like that, let’s take a closer look at each one …
The metal …
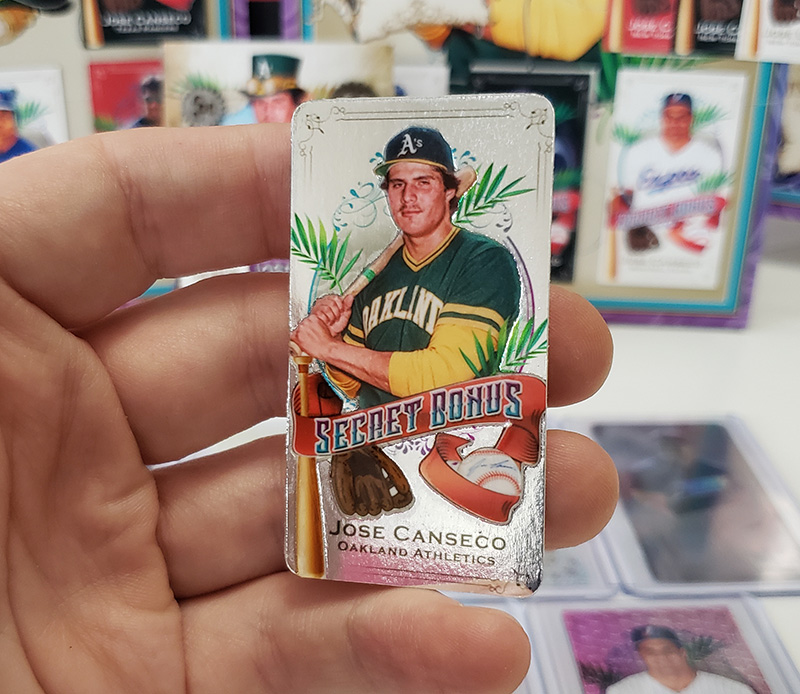
The Superfractor …
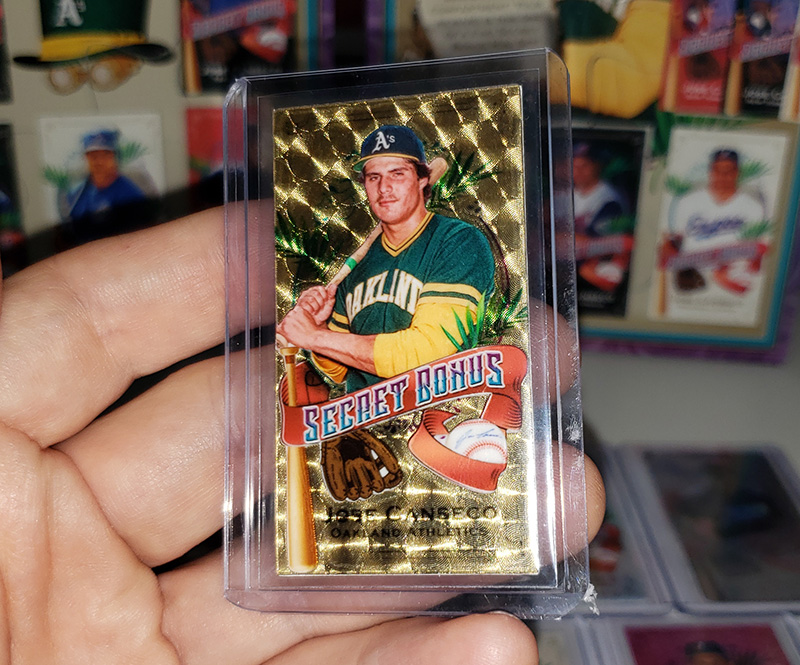
and the wood …
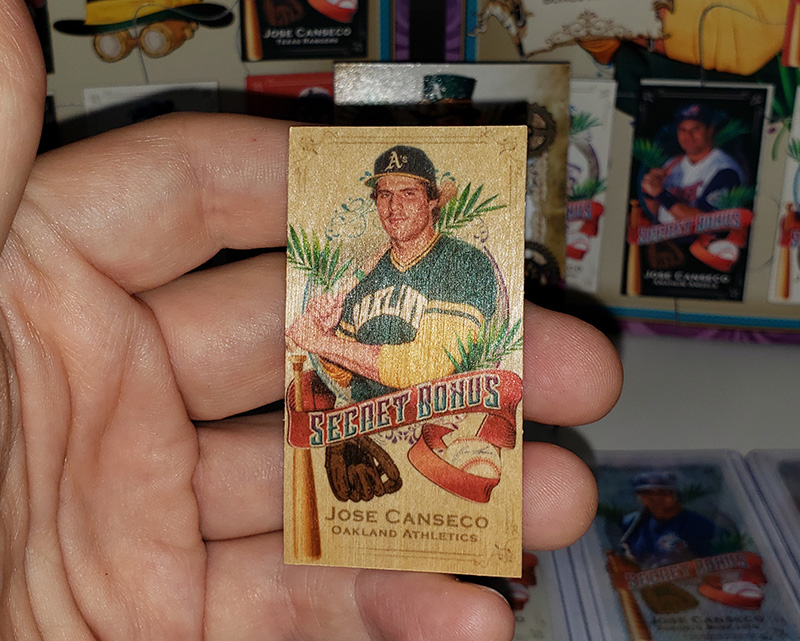
Since I wanted the Mystery Cabinet to incorporate virtually all of the things I loved about the hobby, I figured it would be a crime to not include wood, metal, and superfractor parallels. Just for fun, here is what the front of the Mystery Cabinet looks like with the three additional parallels instead of the 1/1 buybacks …
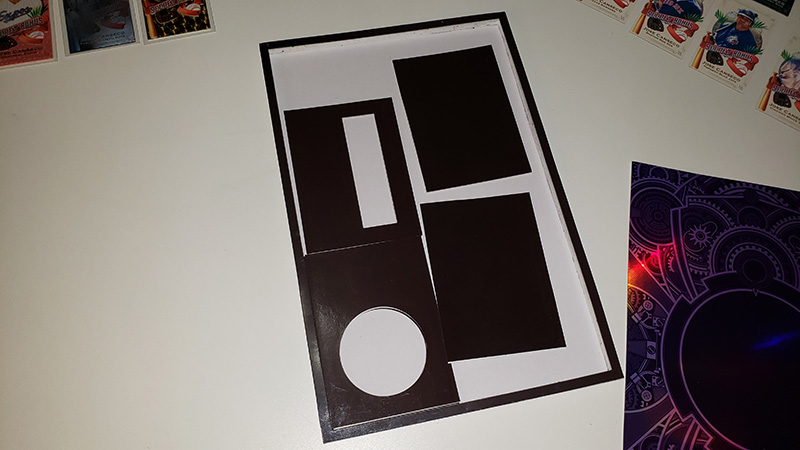
As I mentioned before, in the middle of the Mystery Cabinet was what may have appeared as one solid piece of holographic gear foil cardstock. It is actually something that can be split into two. The two parts were used as backing for the puzzles, but they also hid yet another mystery!
I like to call this section “The Elements”. This display shows an outlay of four “printer’s proofs” that can be setup and displayed using one of the Mystery Cabinet’s frames.
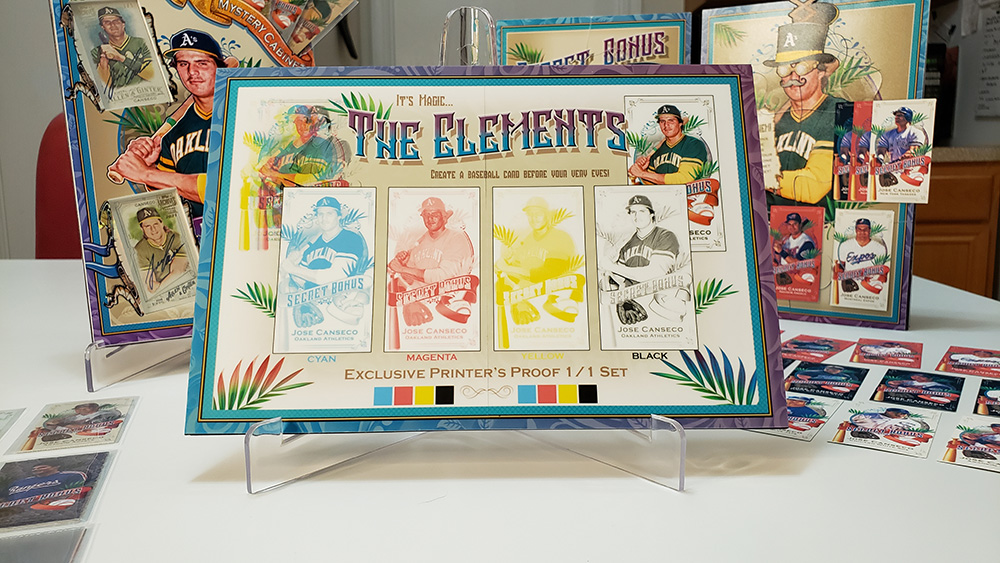
In the same secret compartment is the actual set of four printer’s proofs …
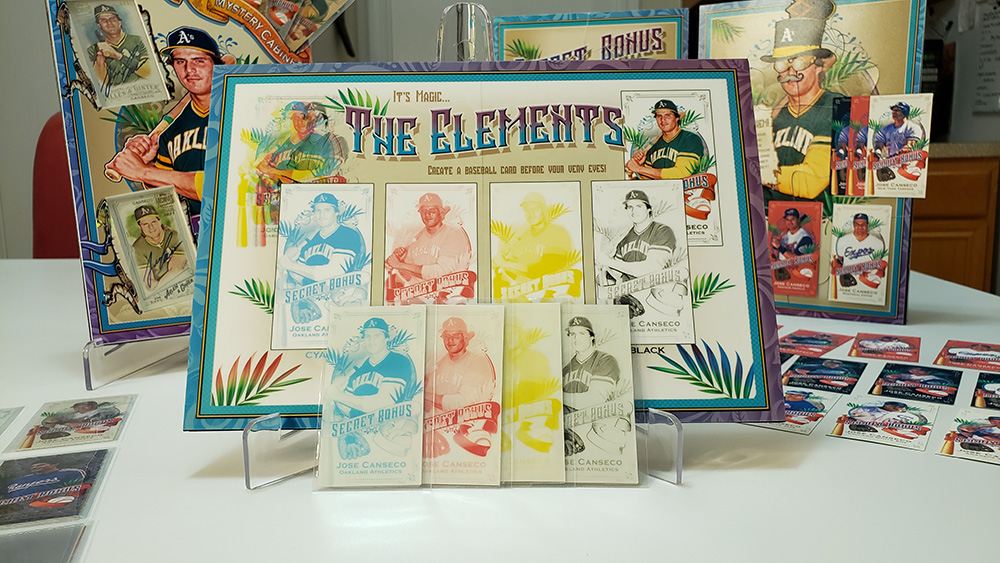
As you can see, Cyan, Magenta, Yellow, and Black are all represented. Wanna see something cool? Check this out!
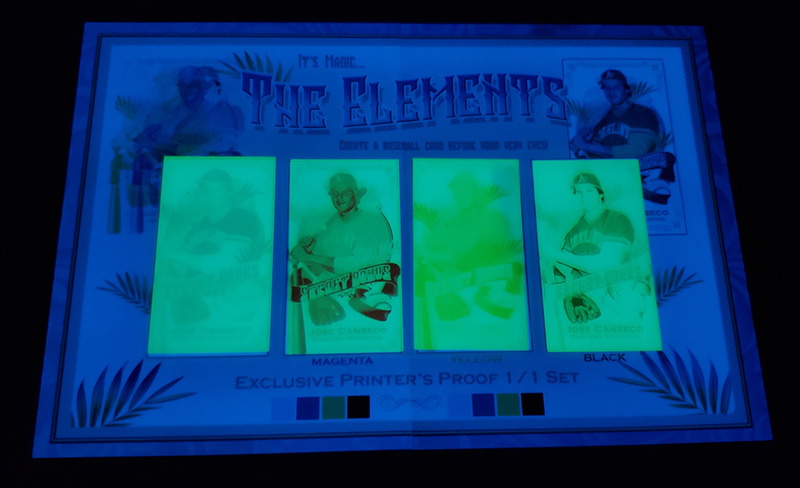
I LOVE building and hiding easter eggs in this project.
That’s not all. Let’s build a card together!
You can actually take the proofs out of their sleeves – they are on clear acetate – and place them on top of each other. Watch what happens!
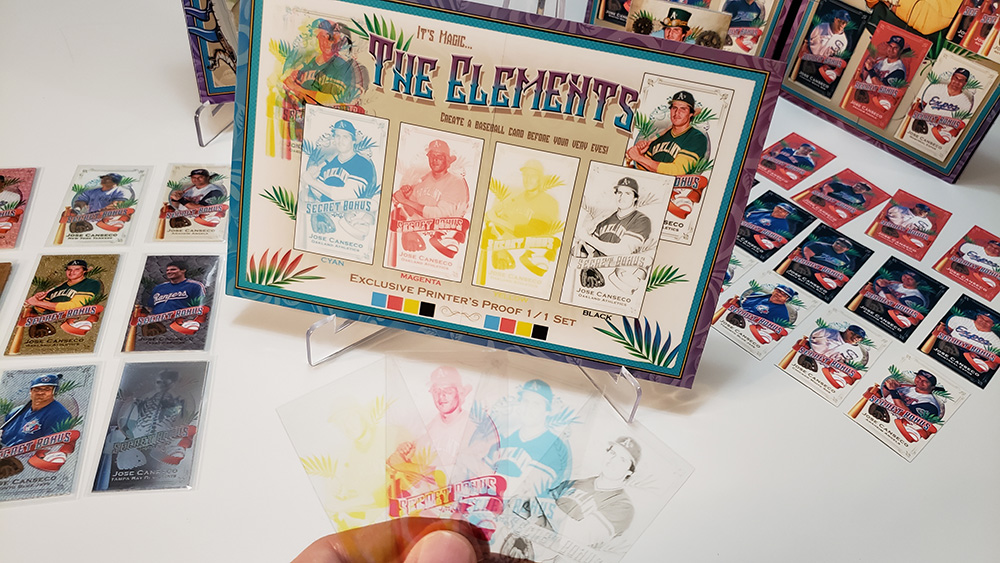

Slide magenta on cyan …
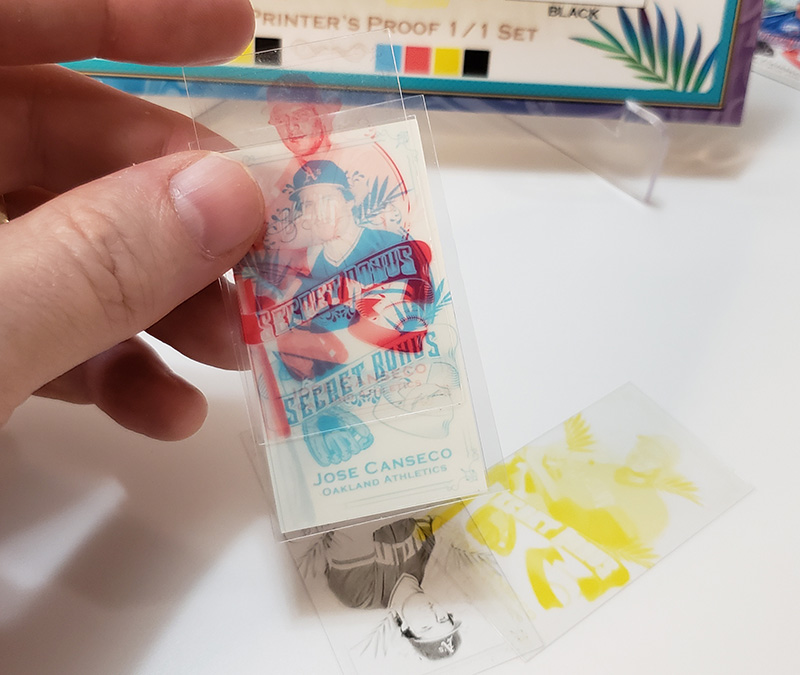
the colors are starting to pop …
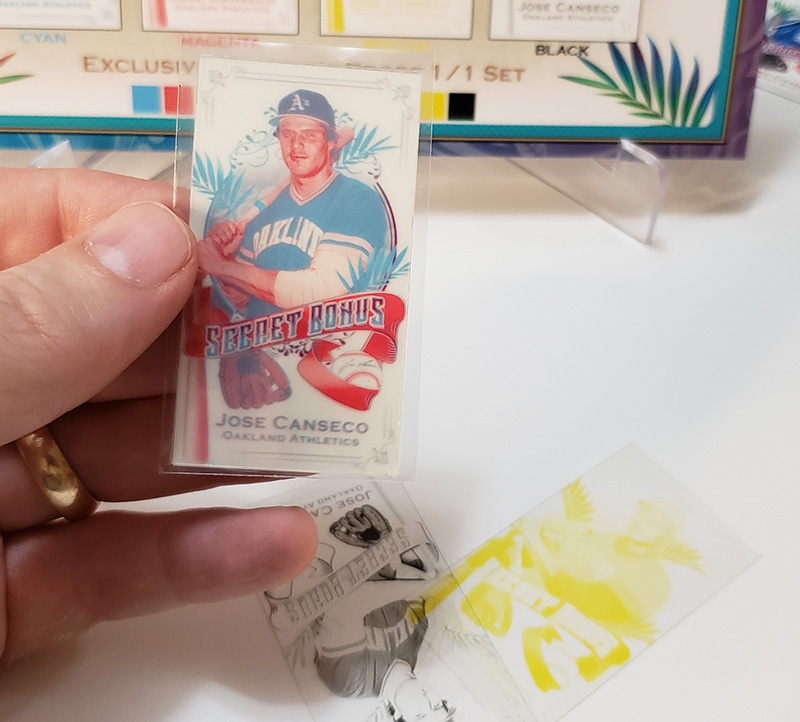
yellow next …

If you have ever seen a “blackless” parallel, this is it … it is simply lacking black ink!
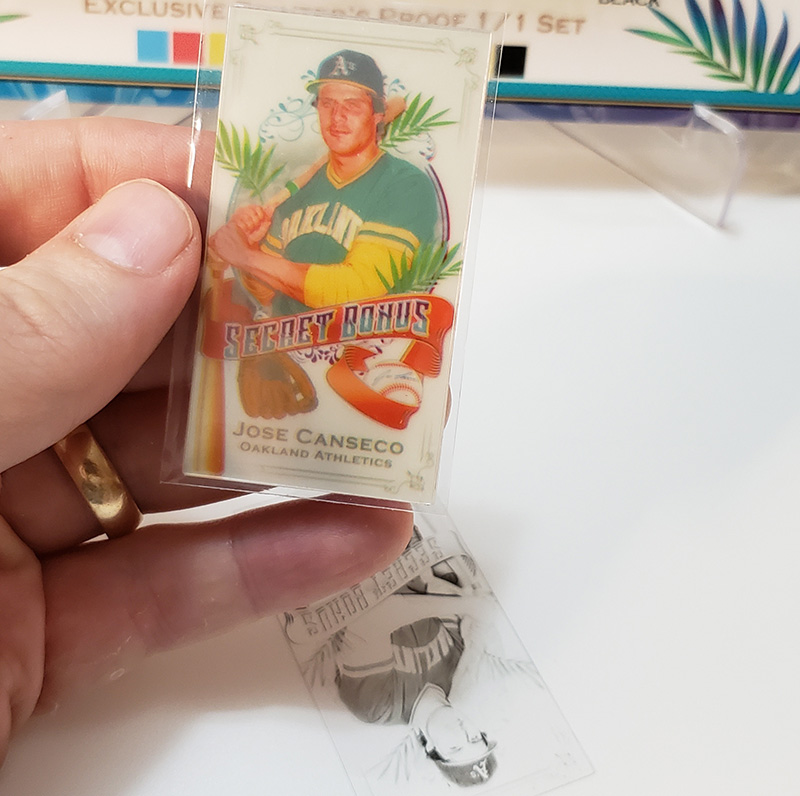
finally, black …
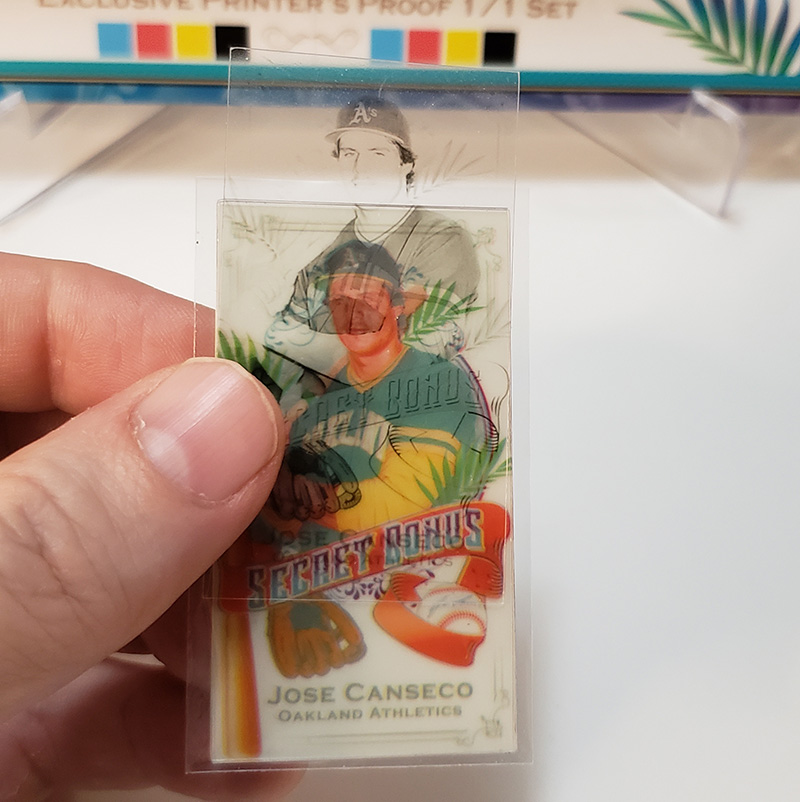

This is truly a fun way to “play” with baseball cards. I enjoy swapping out colors, seeing what they look like, etc. For now, let’s separate them again and display them where the metal, wood, and superfractor were …
It is amazing to see four seemingly simple colors combine together create a beautiful full color card.
I always wanted to be able to do this “for real” instead of just in photoshop. It is so much fun!
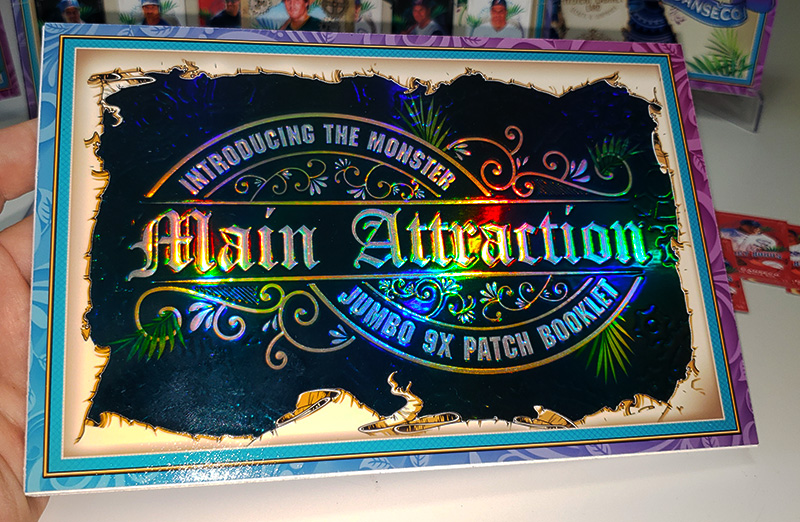
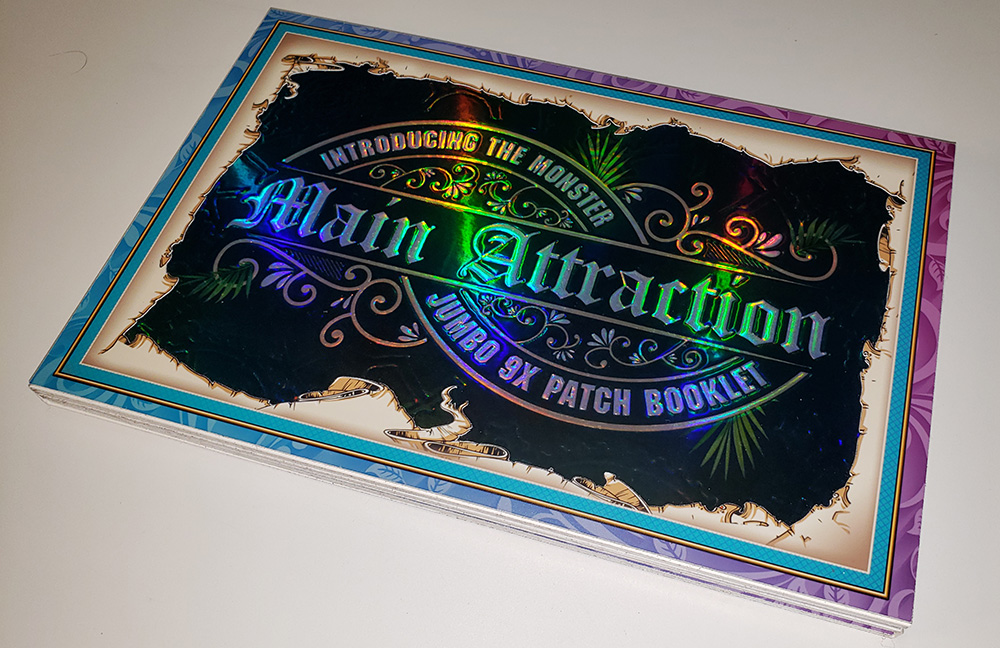
There is still one final piece to reveal: The Main Attraction! (Get it? Since magnets are being used? Attraction? Yeah, I hear my wife’s eyes rolling too!)
One day during this project, I was laying on the couch, while Beckett was watching a cartoon. “What if I could stuff a jumbo patch booklet in this somehow?” As with all my previous ideas, I thought “No way, I’m not even gonna try it. It won’t fit. It will be too much trouble. It may not even work!” Then I tried it. Guess what – it worked!
The Main Attraction is a jumbo booklet – the biggest booklet I’ve ever created. It is over two feet long!
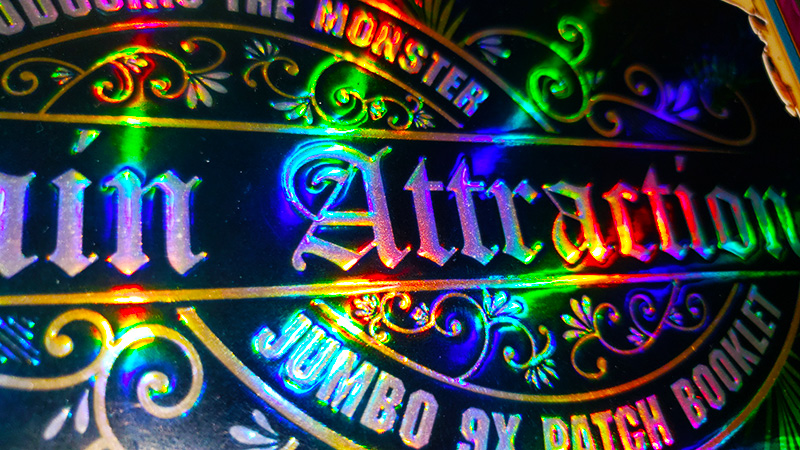
The front features some different methods and techniques I hadn’t tried before, and they all worked together beautifully (after LOTS of testing, that is!) The embossment of the holographic foil really worked well, and the subtle gear embossments in the background look 3d as you shift the piece in your hands.
Here is a pic of it while I was in the middle of trying things out, and producing it …

It is really toned down when more color is added, but it gives it a ton of depth (not to mention you can actually read what it says now!)
The back shows 9 pictures of Jose wearing the jerseys the patches are from. I LOVED how cards from the mid 2000s would show pictures of the full jersey/bat/etc. on the back of the cards so you could see what the relic was taken from. I think showing Canseco actually wearing the exact jerseys takes it a step further.
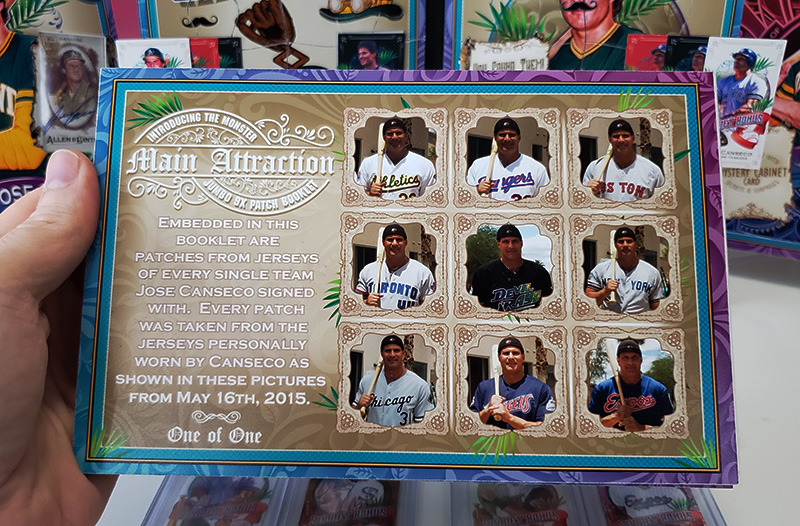
So without further ado, here is the Main Attraction booklet opened in all of its two foot long glory …
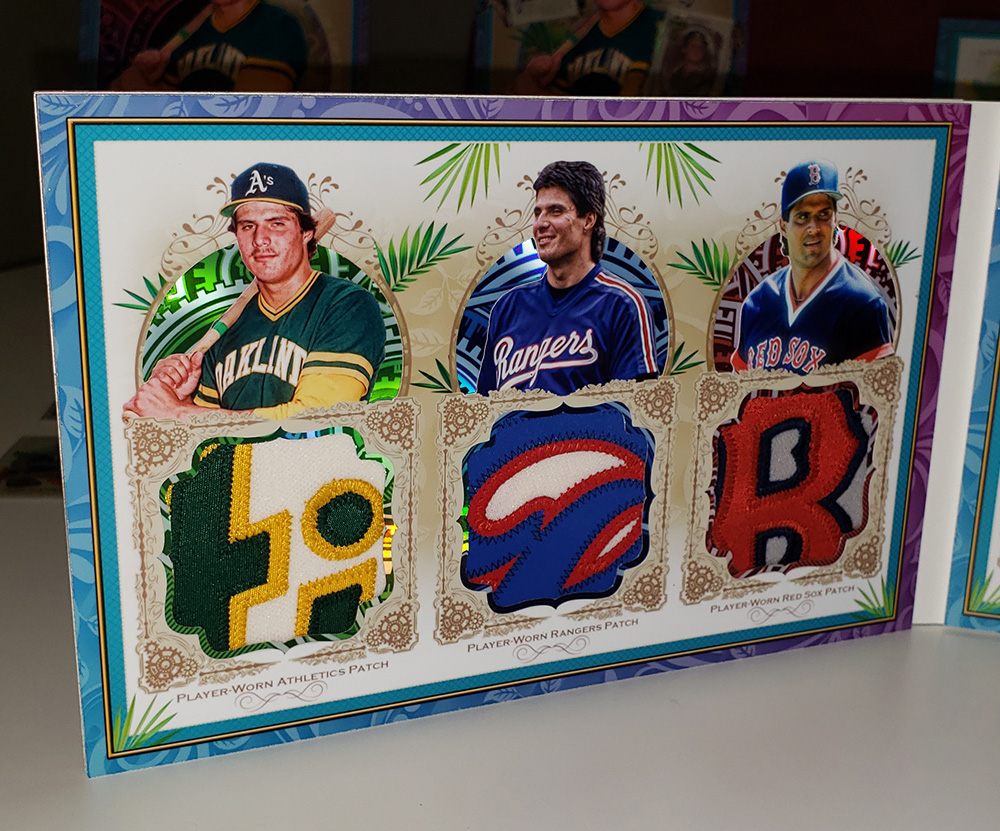
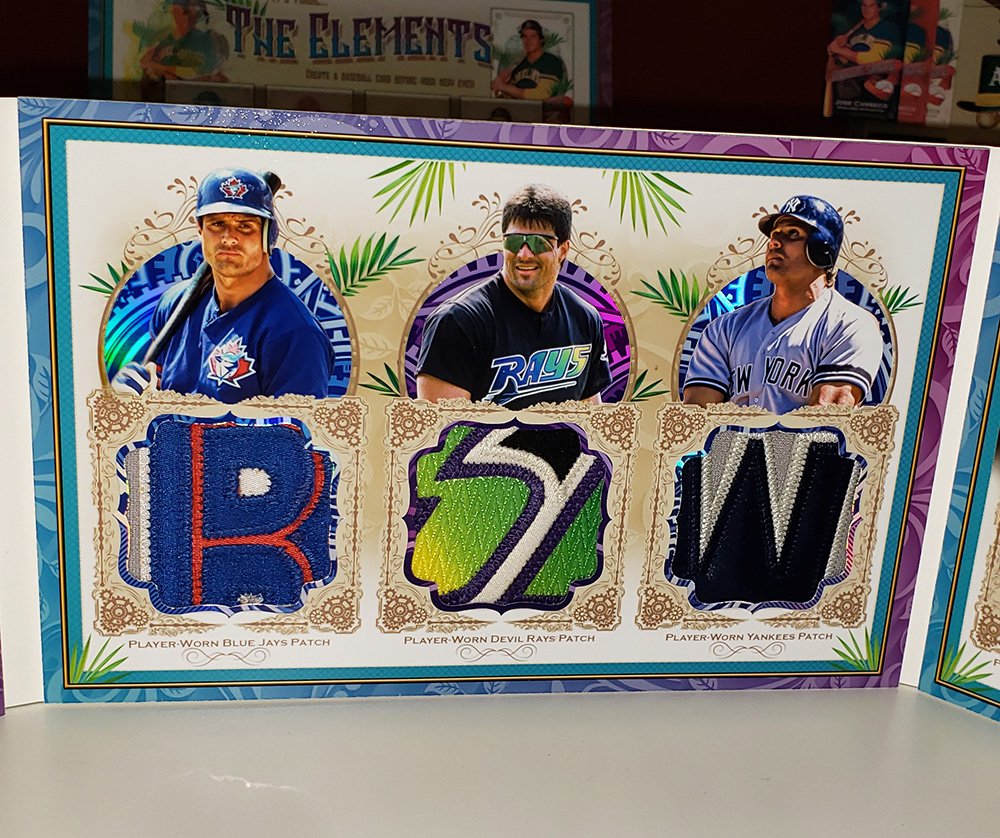
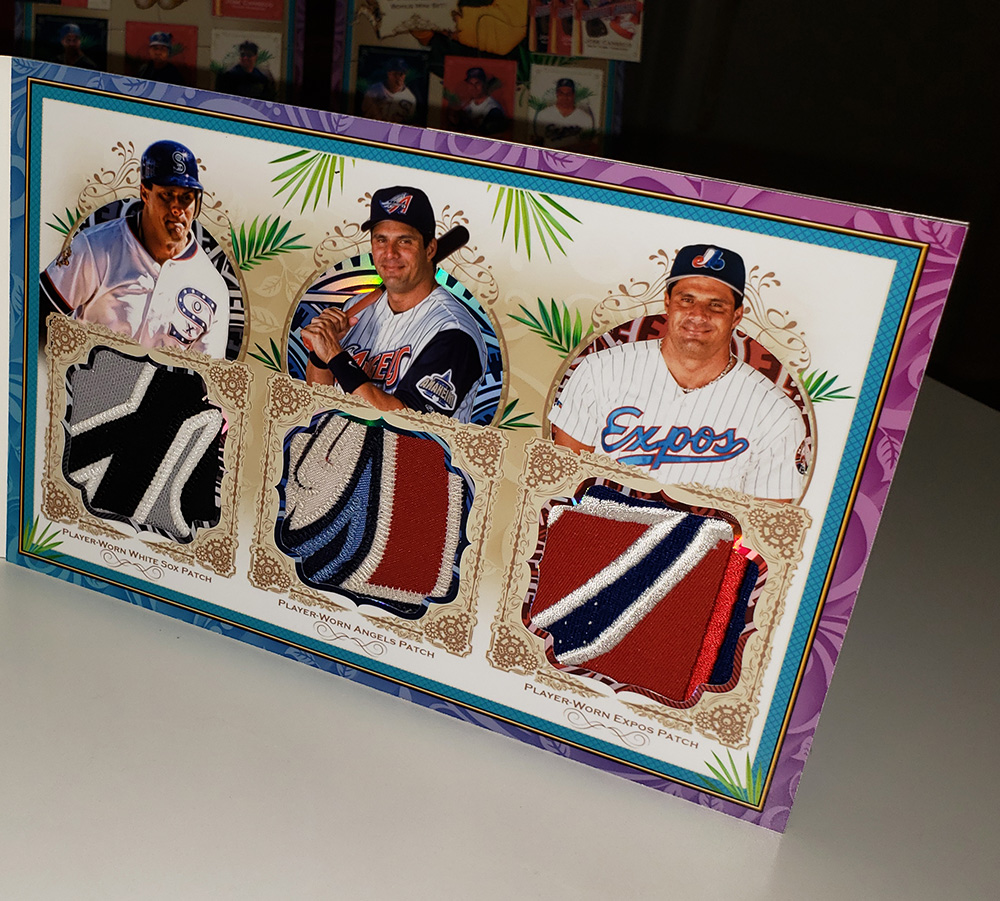
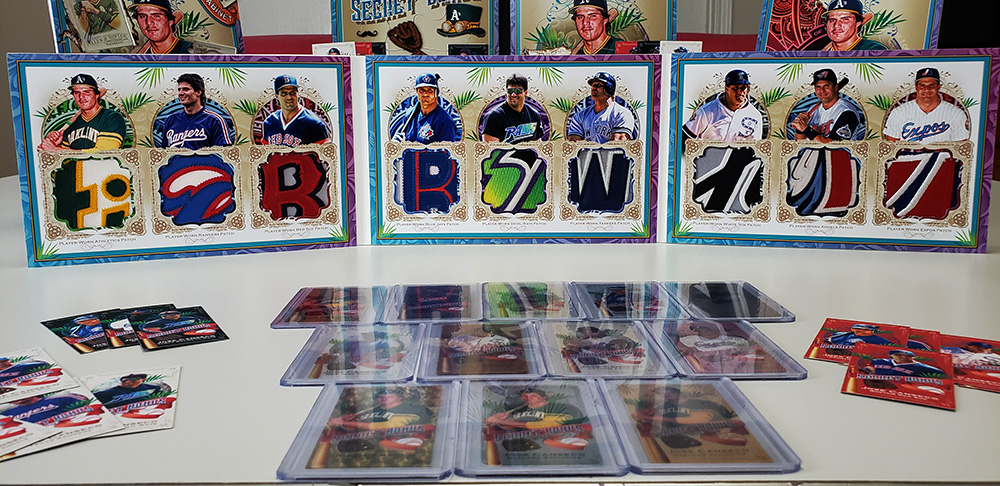
This piece probably makes me the happiest to look at. The 9 jumbo patches are all from jerseys Jose wore in front of me. It spans every team he signed with. The card companies will never do anything like this for him, so that makes it extra special to me.
I finished this project happy and satisfied. Then, I had an idea while I was sitting in the middle of church. What if I could add some more high-end goodness to this thing? So I did.
I installed YET ANOTHER trap door that, when removed, features another secret compartment in the very back. This was behind the first secret compartment we looked at. A false bottom of the false bottom.
Inside of this, you are met with various pieces to build your own cards.
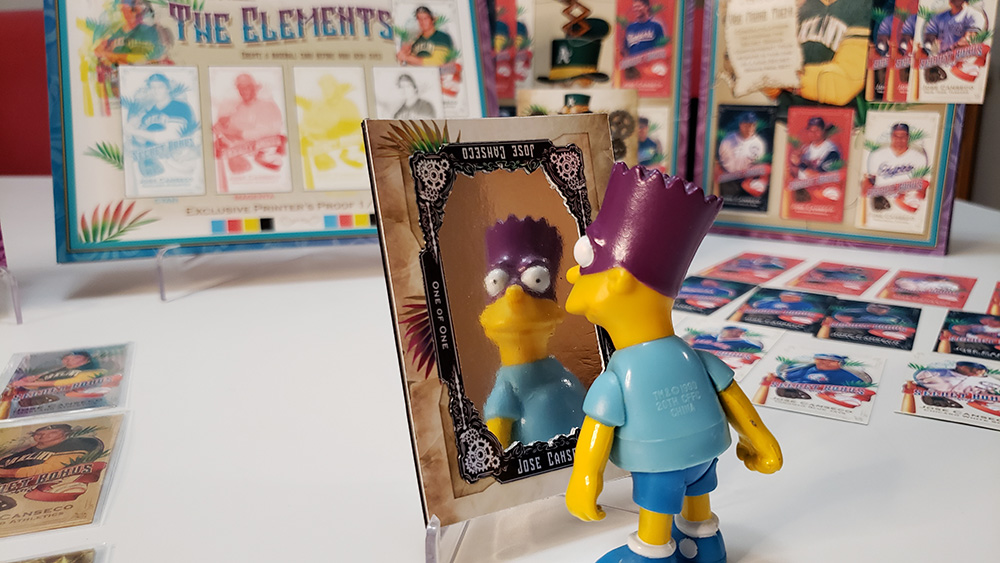
The first one we’ll look at is the framed mini. Any mini parallel from the Mystery Cabinet fits nicely in it.
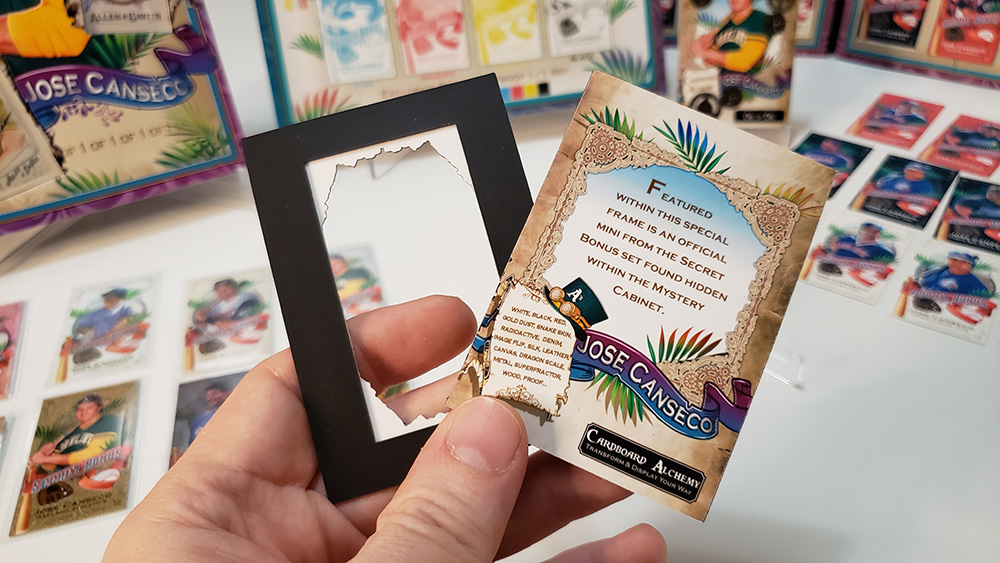

Even a little mirror is fun to put in it for Bart Man to look at himself.
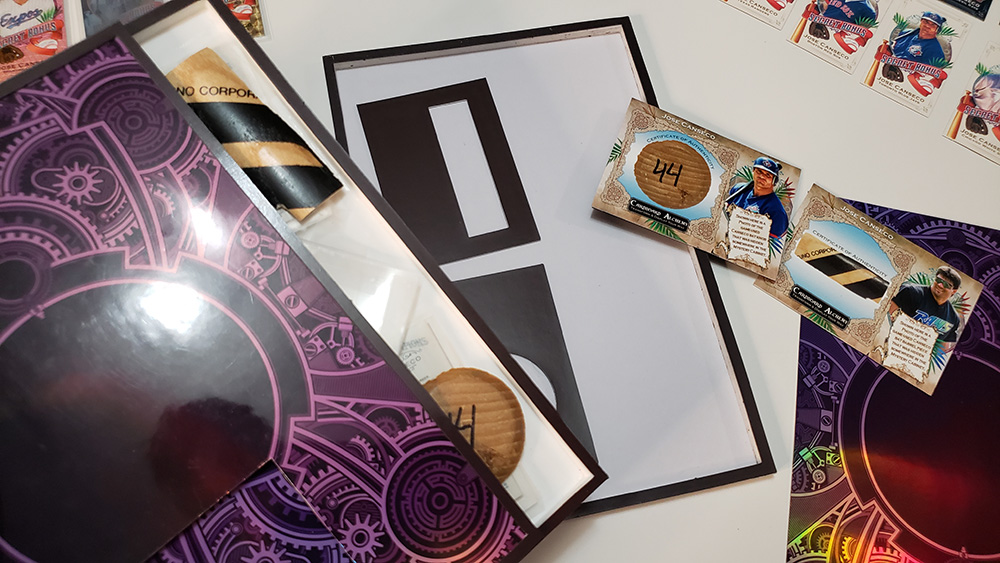
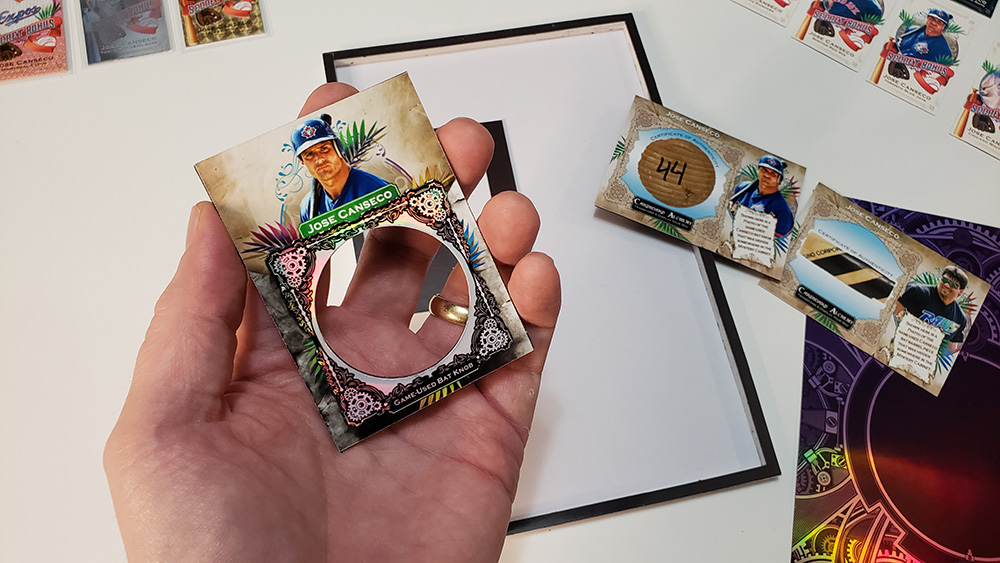
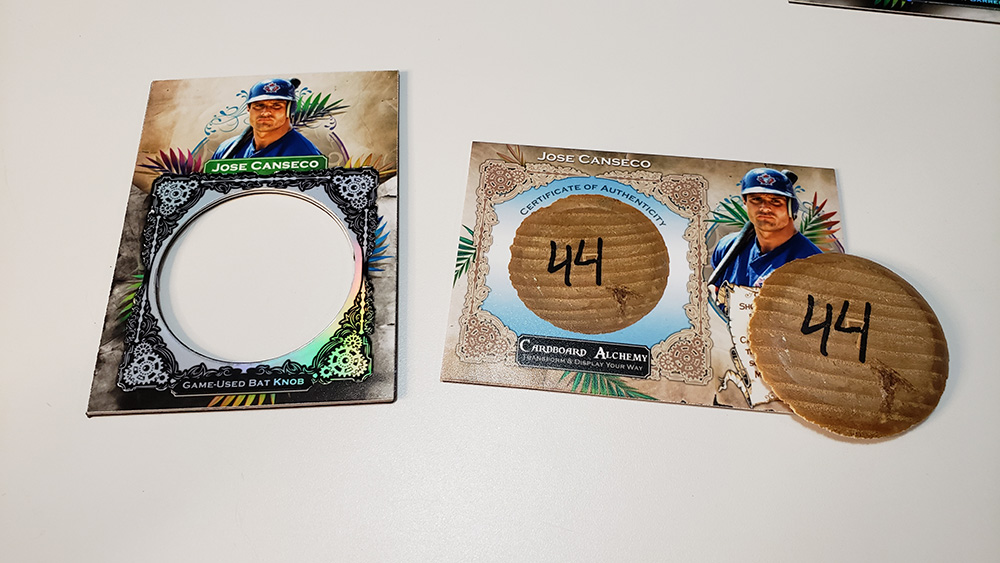
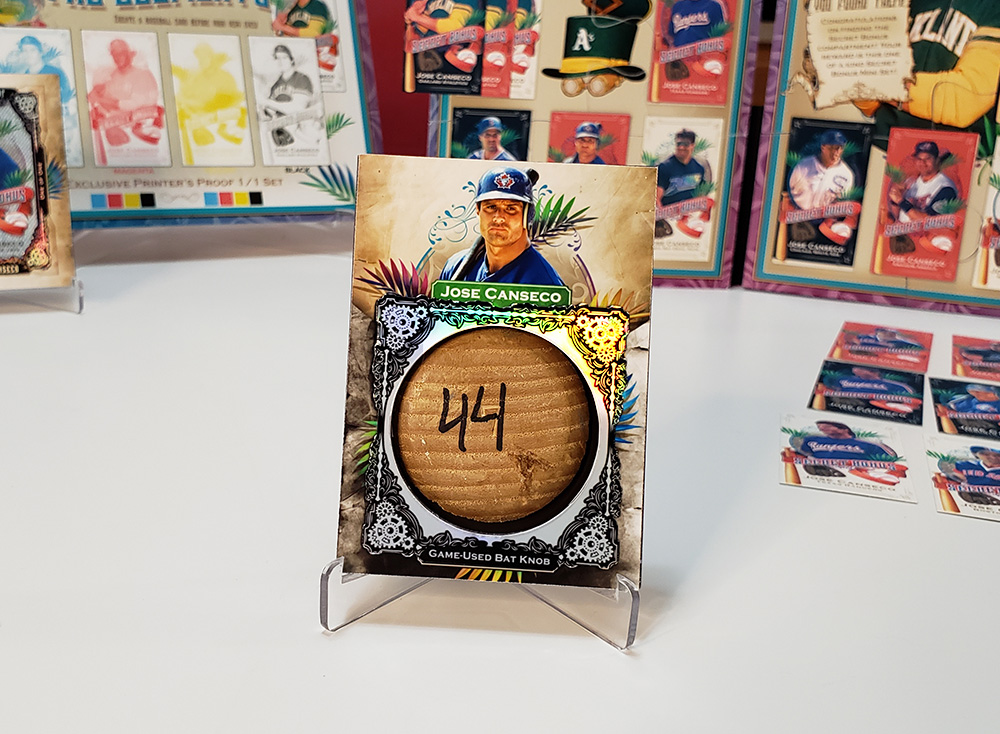
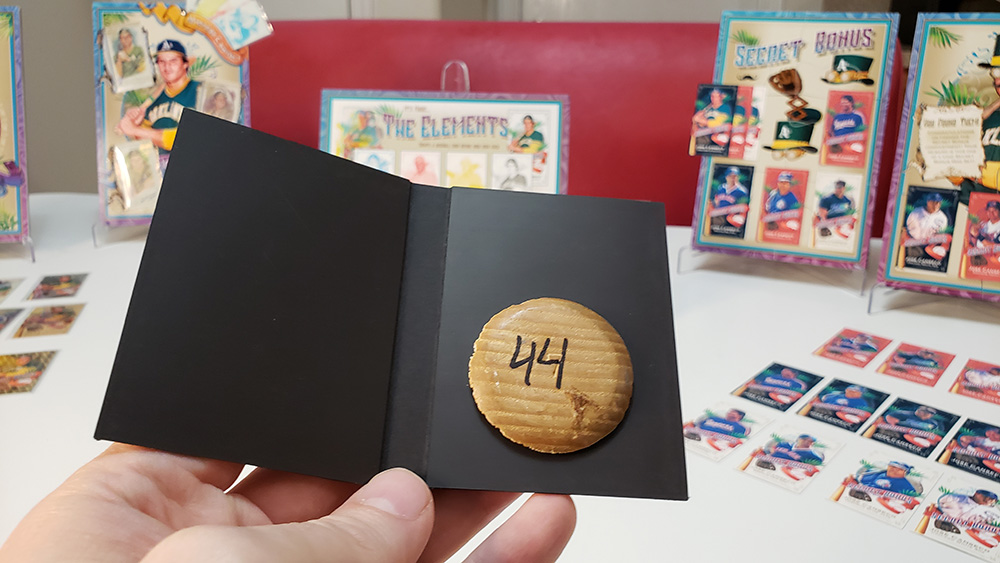
The next two are spicy meatballs … COAs for a game-used bat knob and barrel.
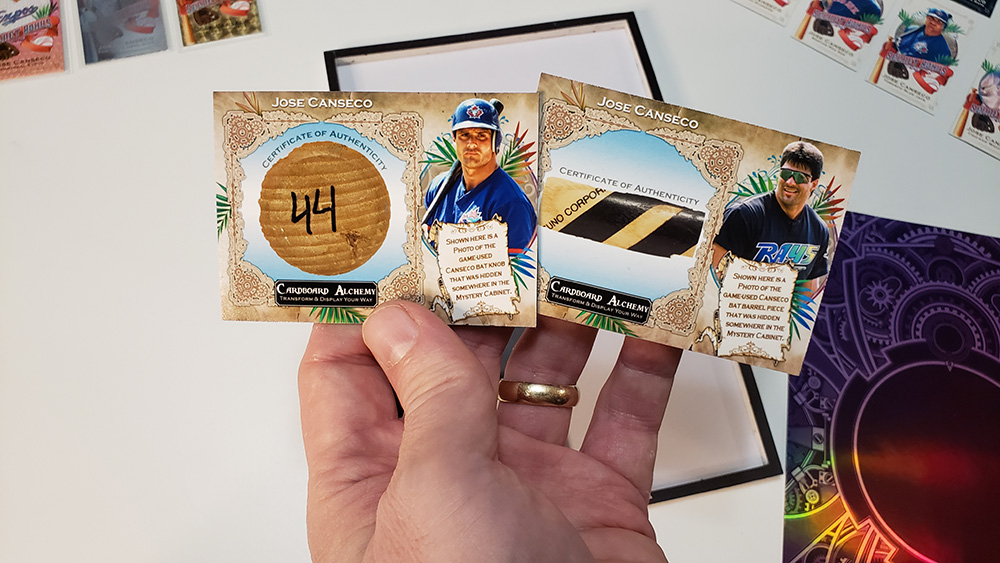
They mention that they are not redemptions … but rather the knob and barrel are hidden somewhere in the Mystery Cabinet! Since I’m the creator of this thing, I know exactly where to look 🙂
Here’s a hint, though …
If video games have taught us ANYTHING, it’s that if you see something like this, you explore. (This was the cavity that the rip card was placed in.)
Just behind the very front of the Mystery Cabinet is a a sliding wall that reveals the knob and barrel pieces.
This is where it gets really fun.
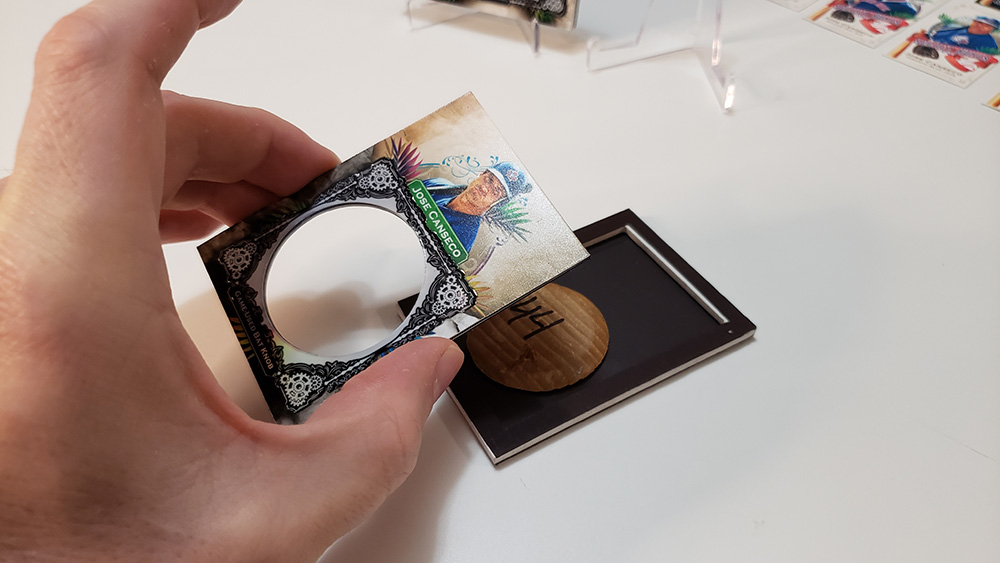
Going back to the last secret compartment, the COAs are accompanied with card fronts for the barrel and knob. The barrel has a sticker autograph – this is an autograph I had Jose sign right in his kitchen so I could create something fun later. Well, now is that time!
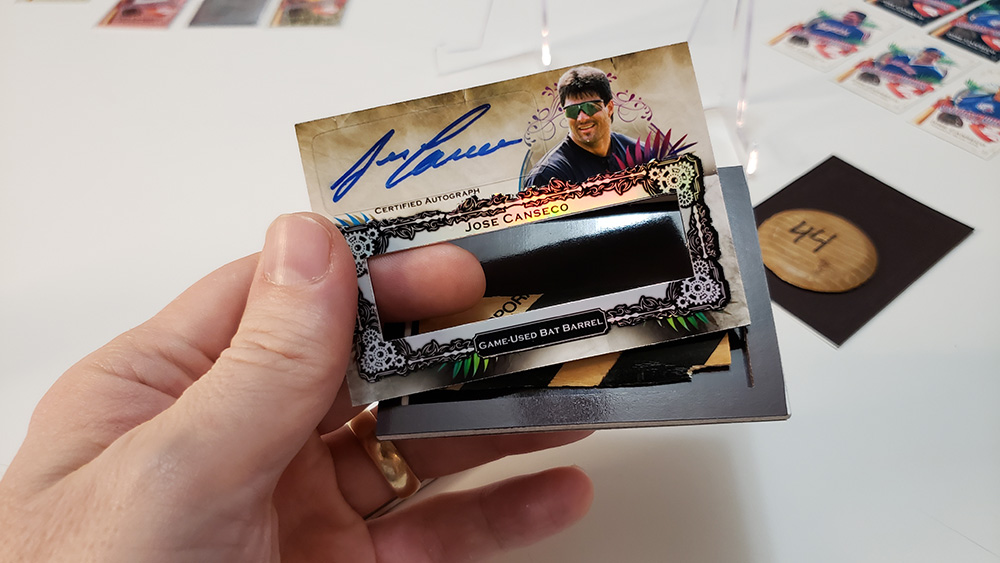
We are going to break apart the rip card and transform it into special, one of a kind cards!
Do you see how it looks like an ice cream sandwich? That’s because there are two magnetic frames that make the “thickness” of the card. We are going to use those pieces.
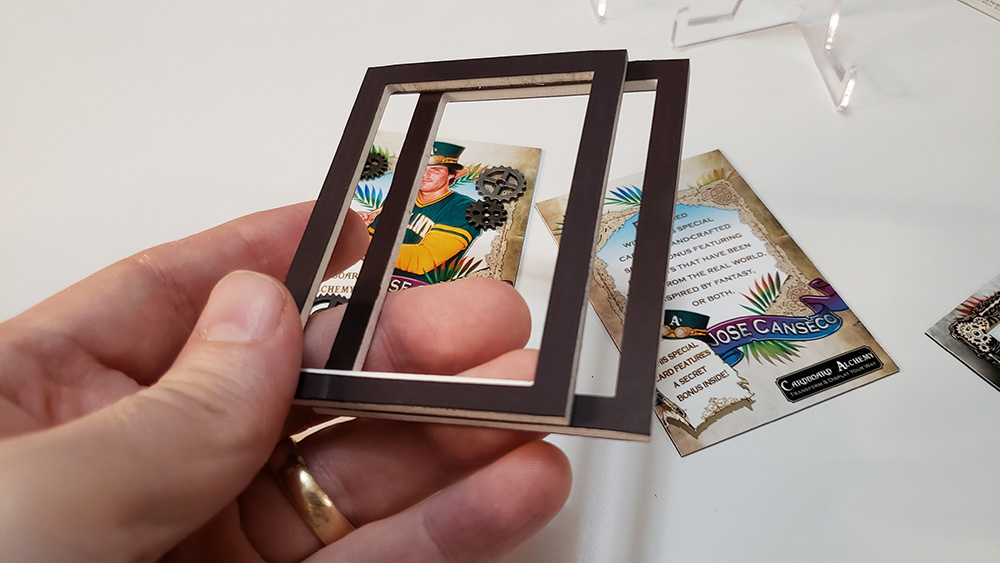
Without these frames, the rip card front and back collapse to make a thinner card that is still displayable.
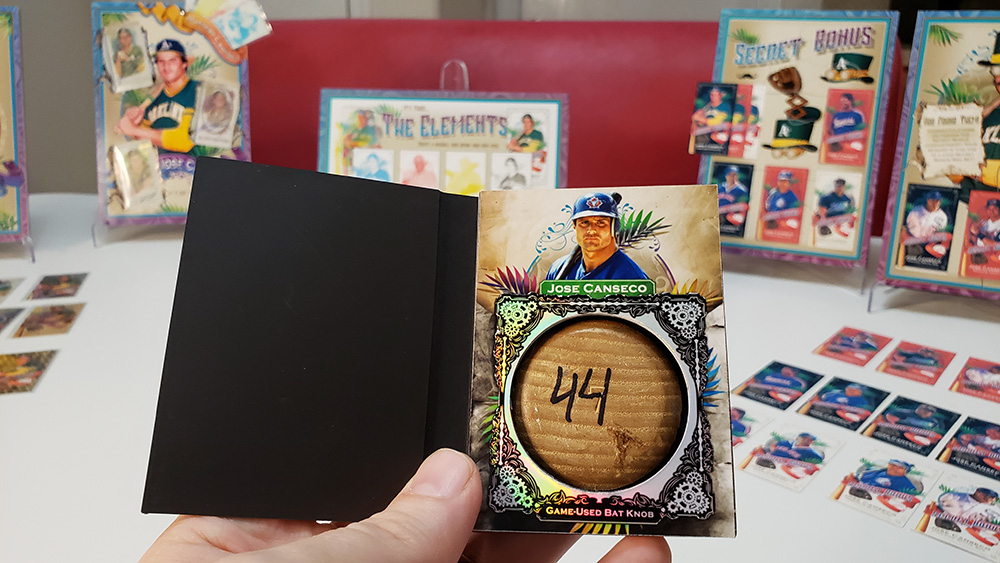
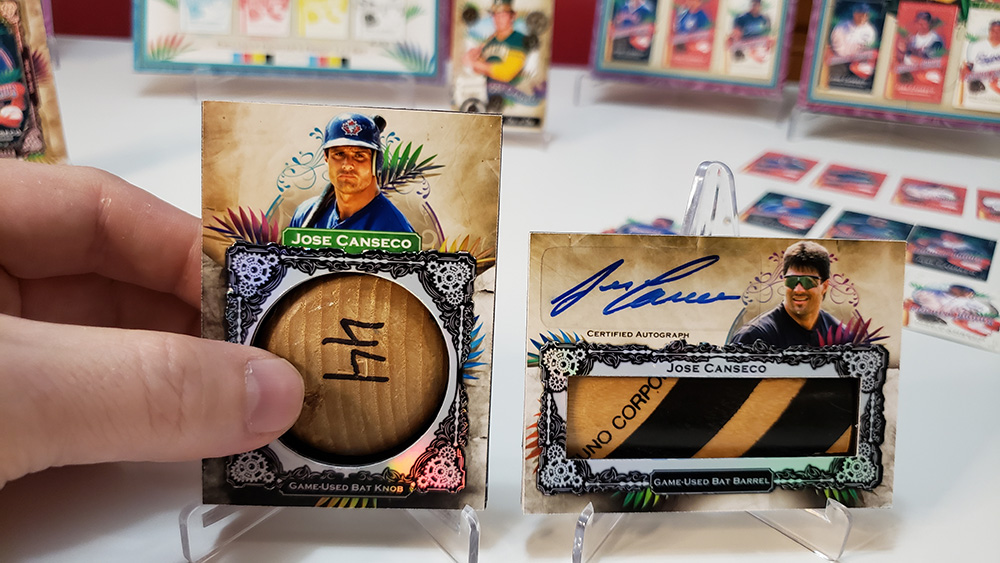
Using one of the frames, let’s create a knob card together! The COA is used as the back. The knob sticks to it, as does one of the frames from the rip card.

Stick the front on …
There it is! A 1/1 knob card that was created by transforming parts of the rip card and COA.
Watch this …
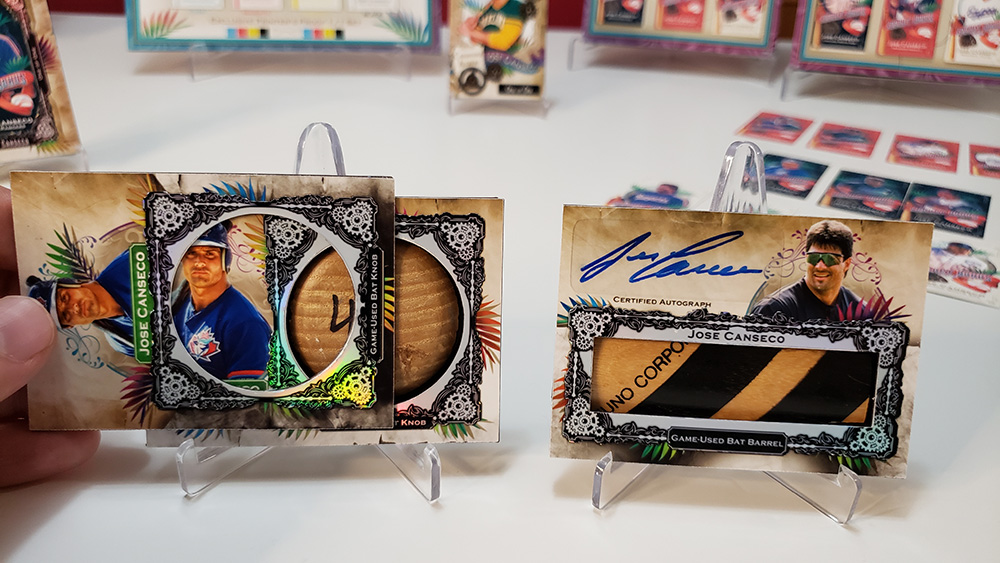
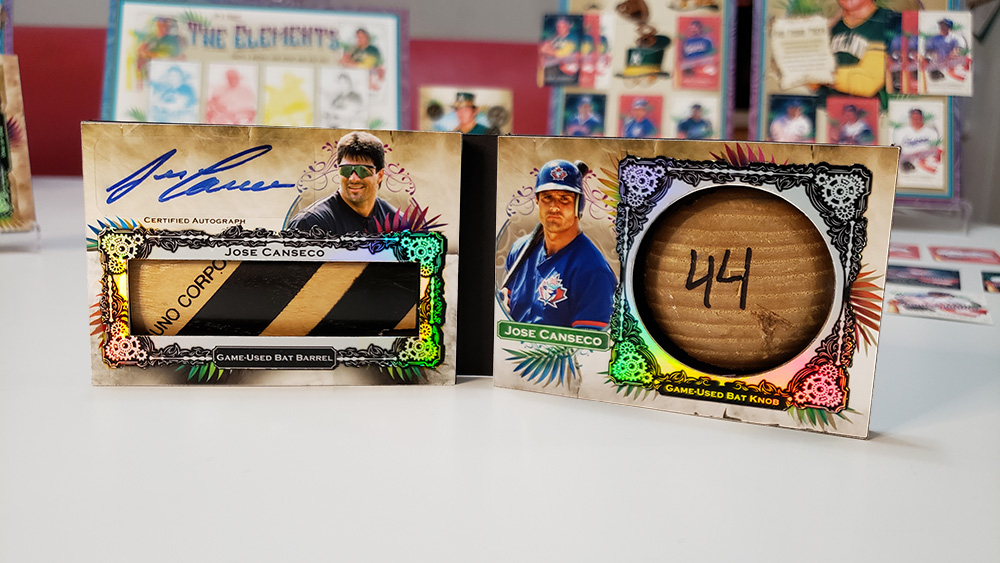
Taking one of the bindings from the puzzles, (which are now two separate standalone puzzles) we can actually use it to create a booklet card with the knob and mini.
ANY mini can be used. Here are a few I tried – the denim and superfractor parallels.
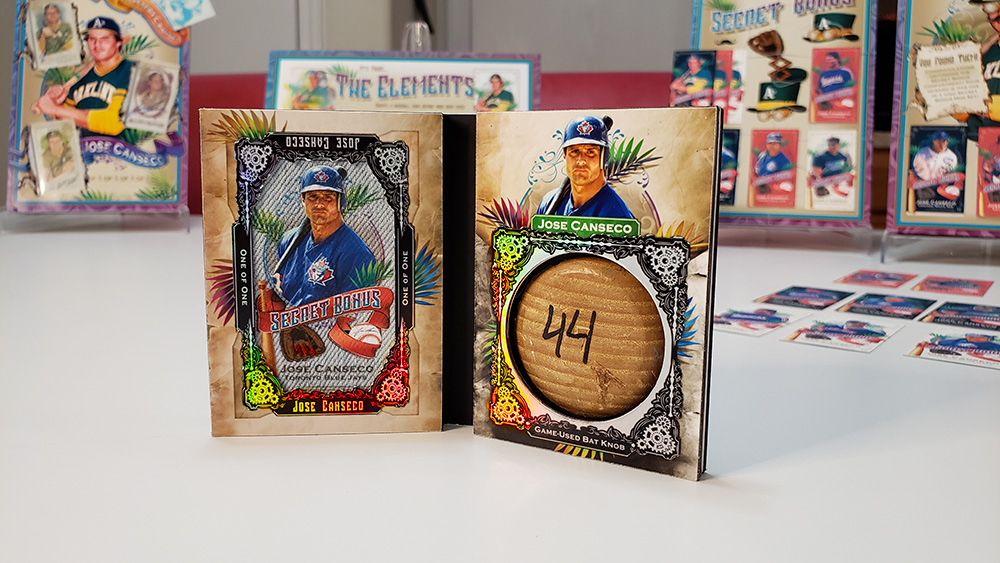
It is so much fun testing things, placing the knob on the right and the mini on the left, using a base, the x-rayfractor, etc.
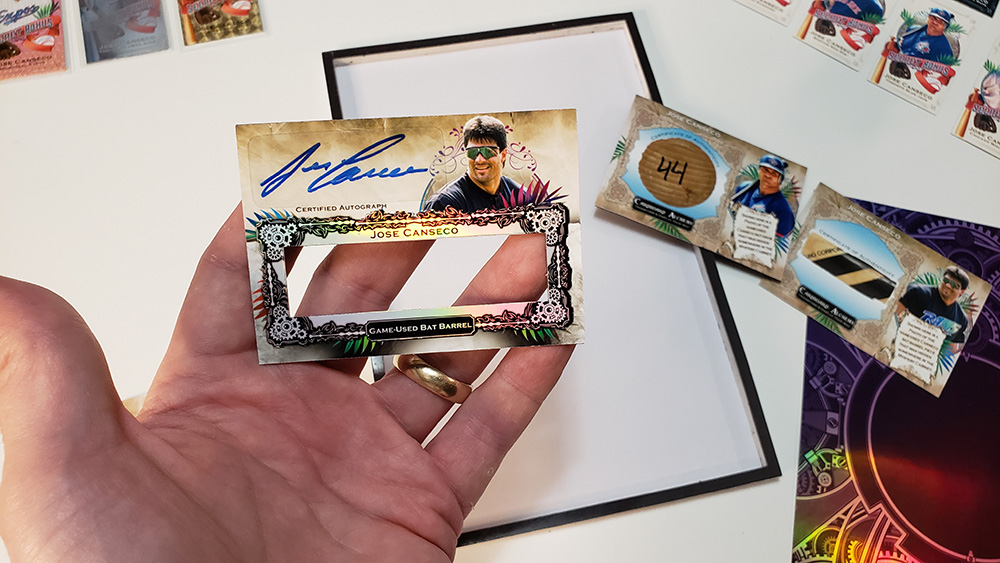
But wait, there’s more!
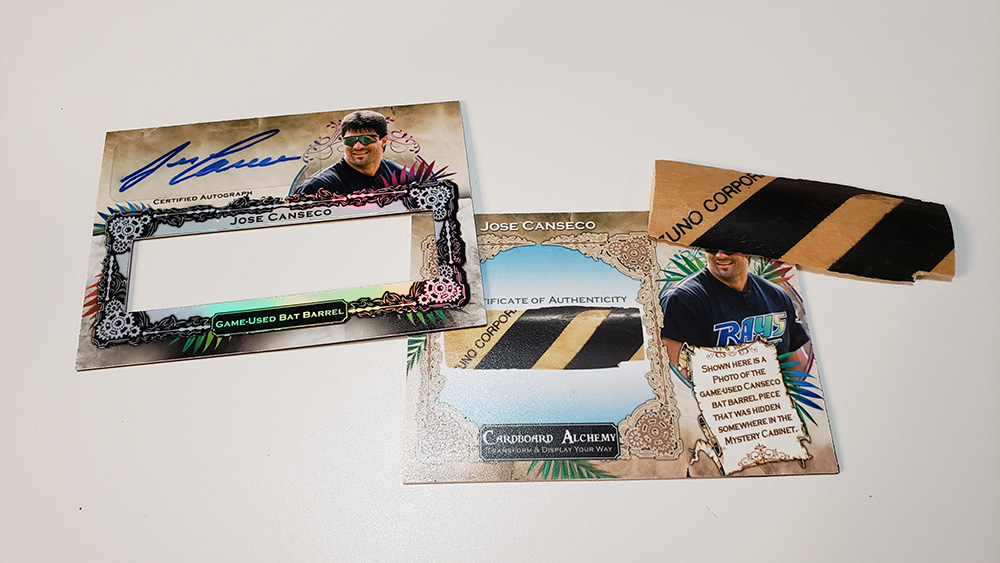
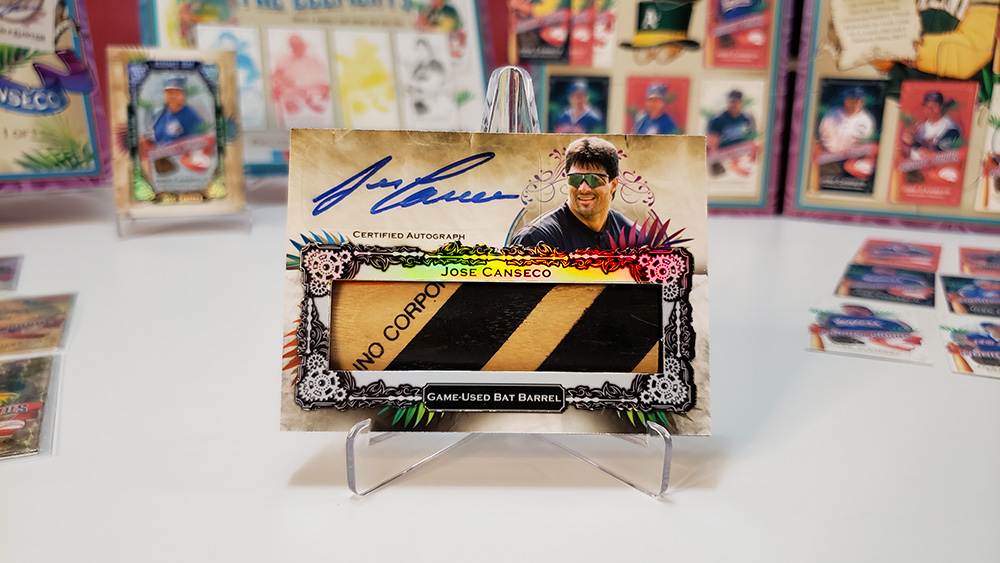
Let’s use one of the frames for the barrel by using the COA as the back of the card. The barrel sticks to the back of it, and the frame sticks around it.
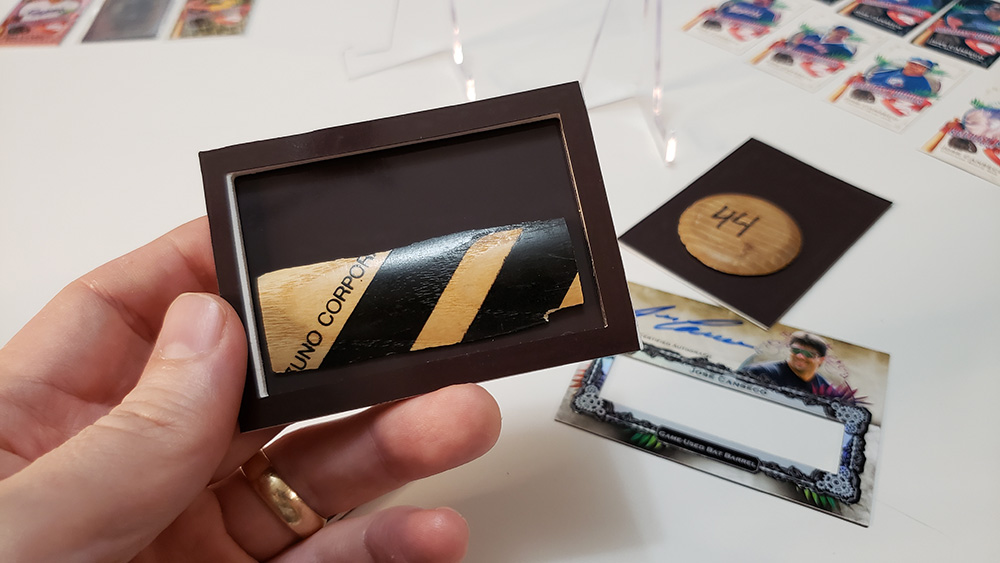
Then we can quickly place the top over it …
BAM! A barrel card.
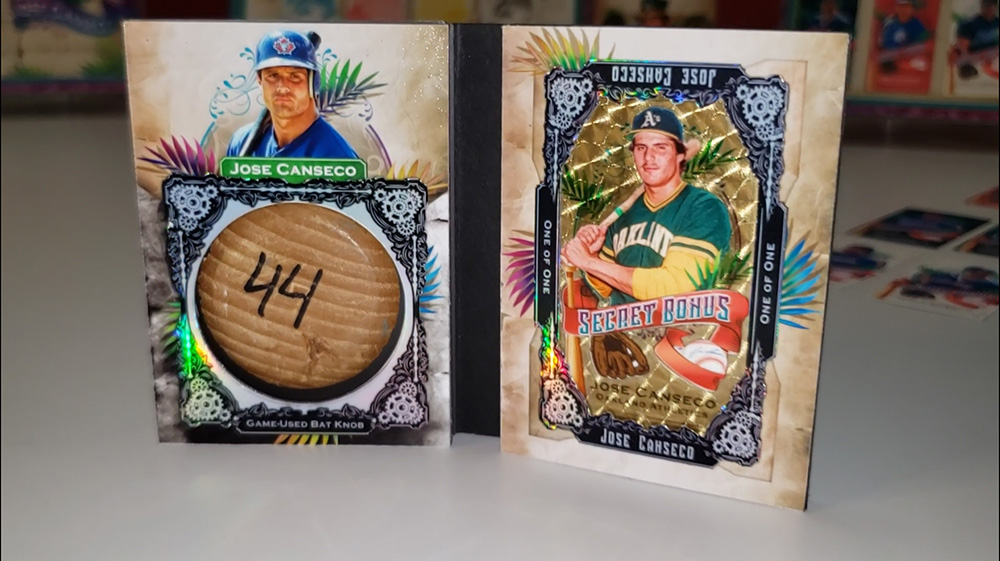
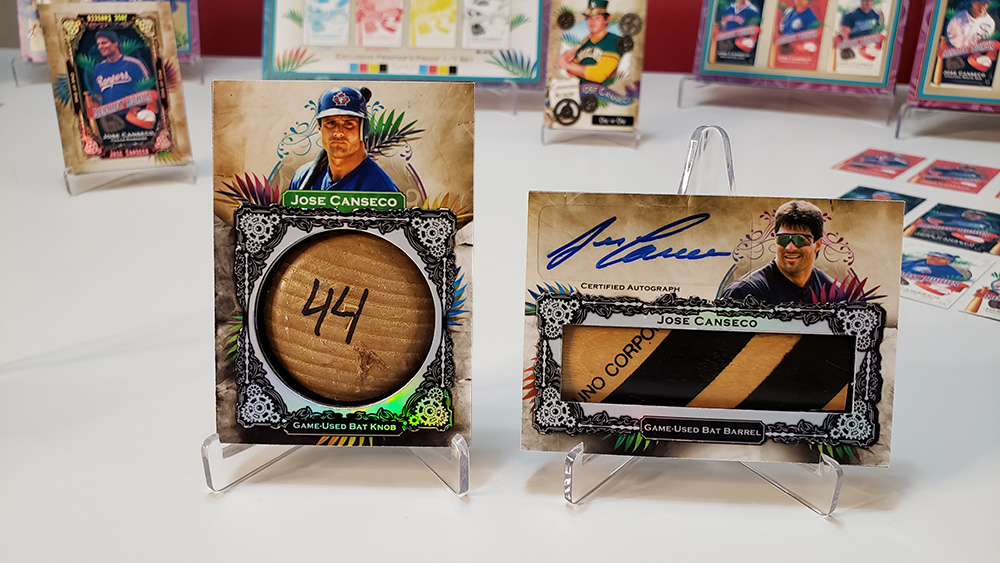
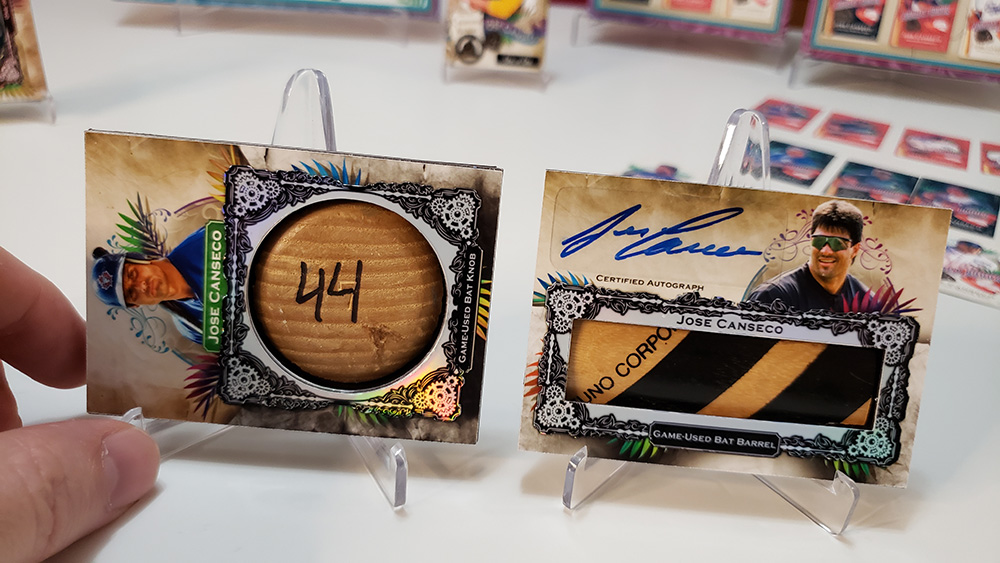
Here are the knob and barrel cards together!
The other binding used for the puzzles can be used for a horizontal booklet. It would be great for the barrel and something else.
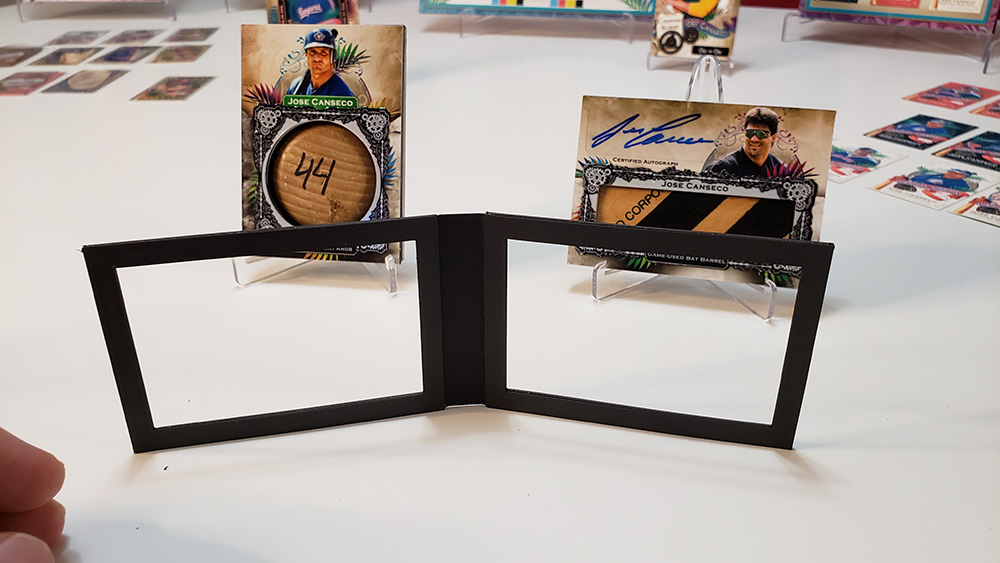
Man, if only the knob were a horizontal card….
Cue the Transformers sound… Hidden behind the vertical frame is a horizontal front. With a turn of the knob, now it is!

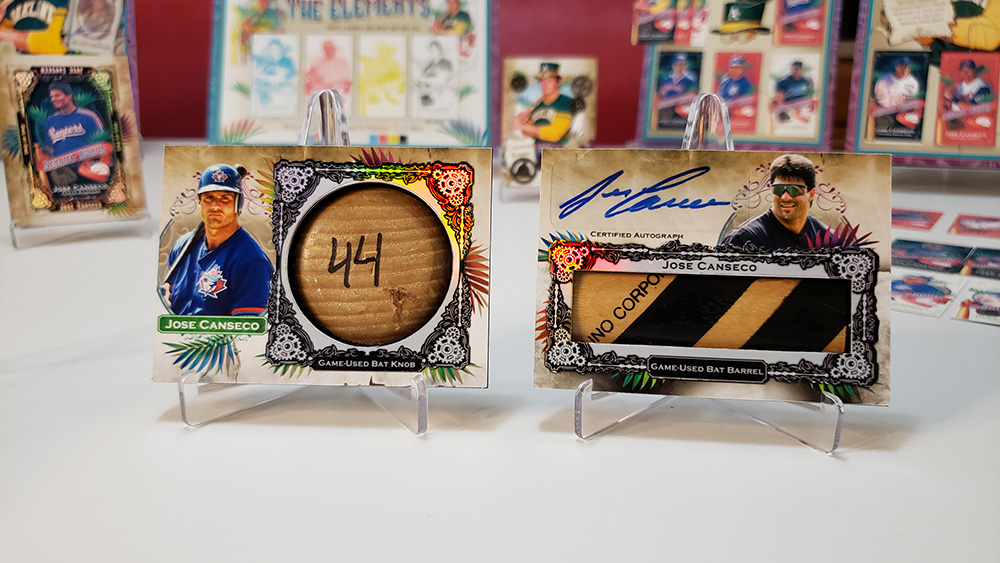
Now, here it is! A 1/1 game-used bat barrel / bat knob Jose Canseco booklet card! Every piece used was either transformed from previous pieces (COA’s, or the rip card) or found hidden inside of secret compartments.
There are so, so, SO many options and combinations that can be created! That’s part of what makes this entire thing so much fun. This is no longer just about displaying a card to enjoy, but rather to have the ability to actually play. To try new things, and discover what combinations I like best.
Let’s do one final fun thing here.
As I was turning out the lights after filming the video for this piece, (it was SUPER LATE … errr … early in the morning) I noticed something glowing that shouldn’t be glowing …
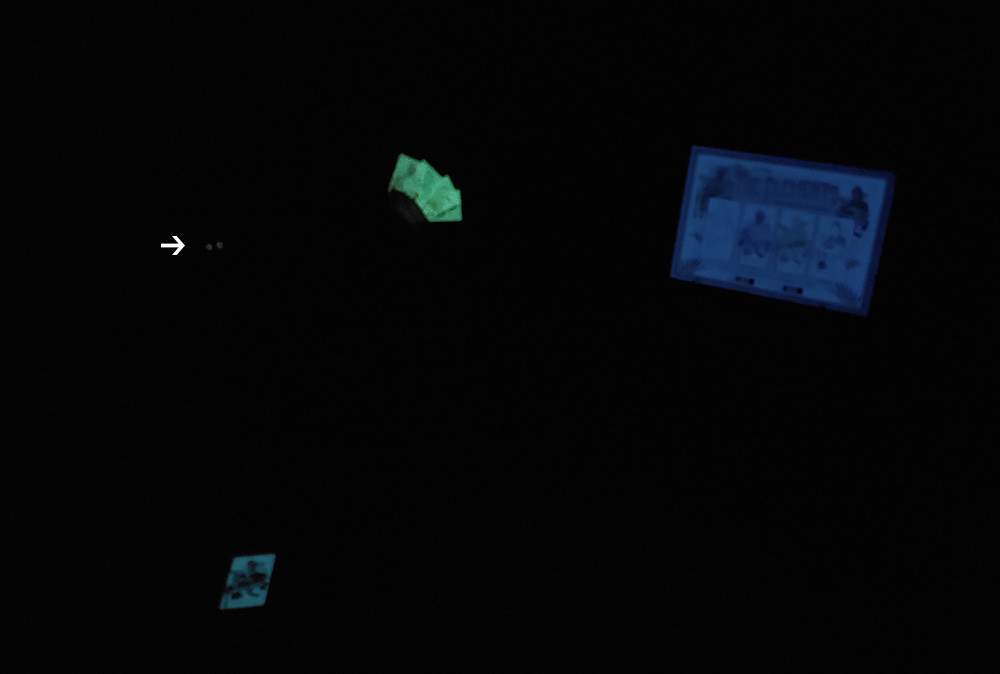
Turning on the lights confirmed that the glasses of the steampunk hat were glowing!
I turned the lights off again, I also noticed there was something glowing on the back of the hat.
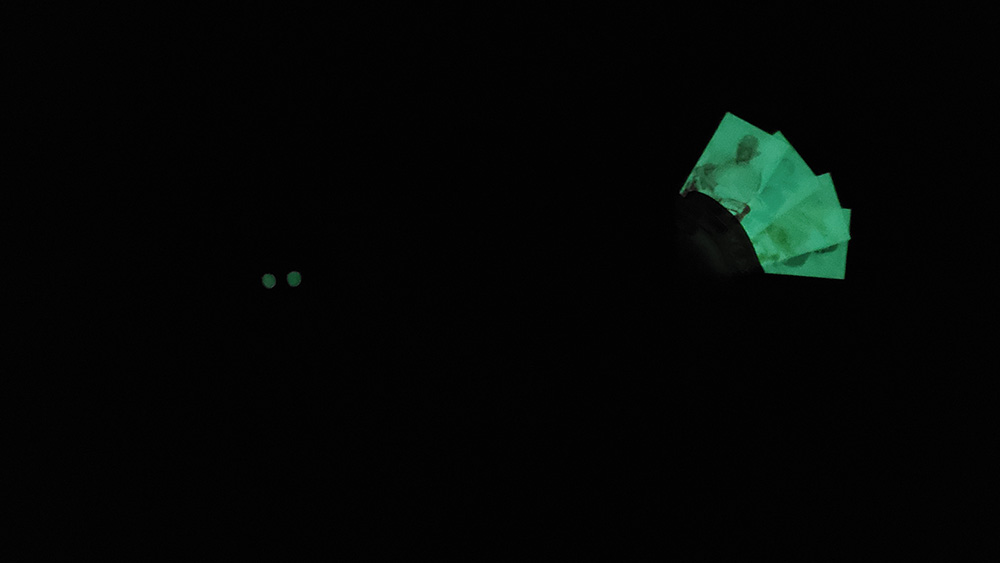
A QR code!
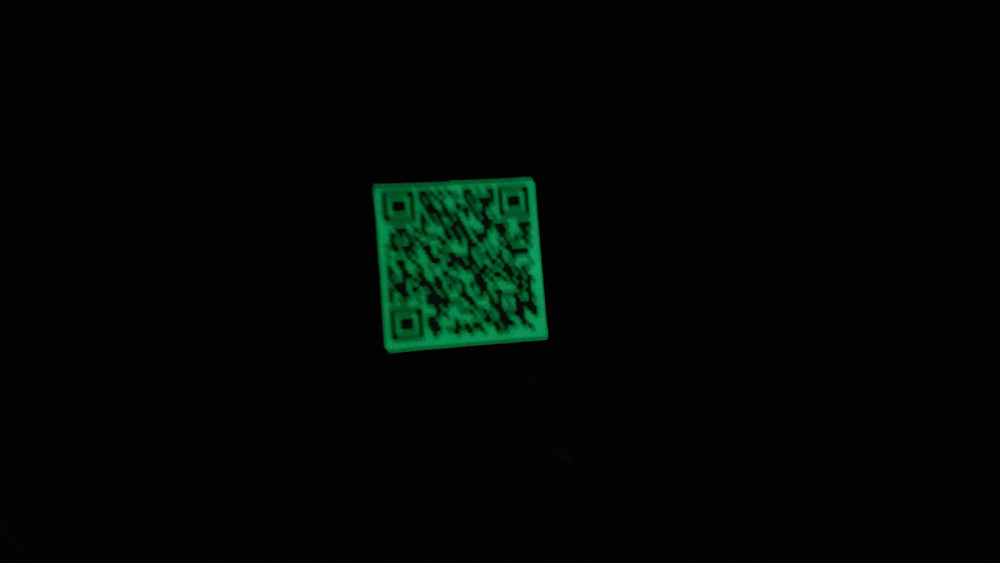
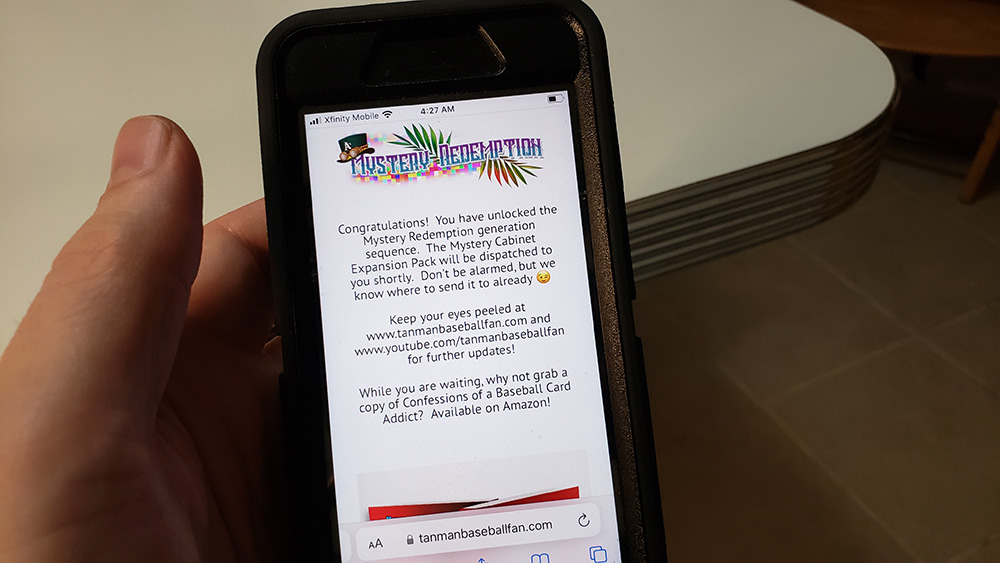
Using my wife’s phone, I checked, and it brought me to MysteryRedemption.com, which then prompted me to enter a six digit code.

I entered the wrong code, and was met with this:
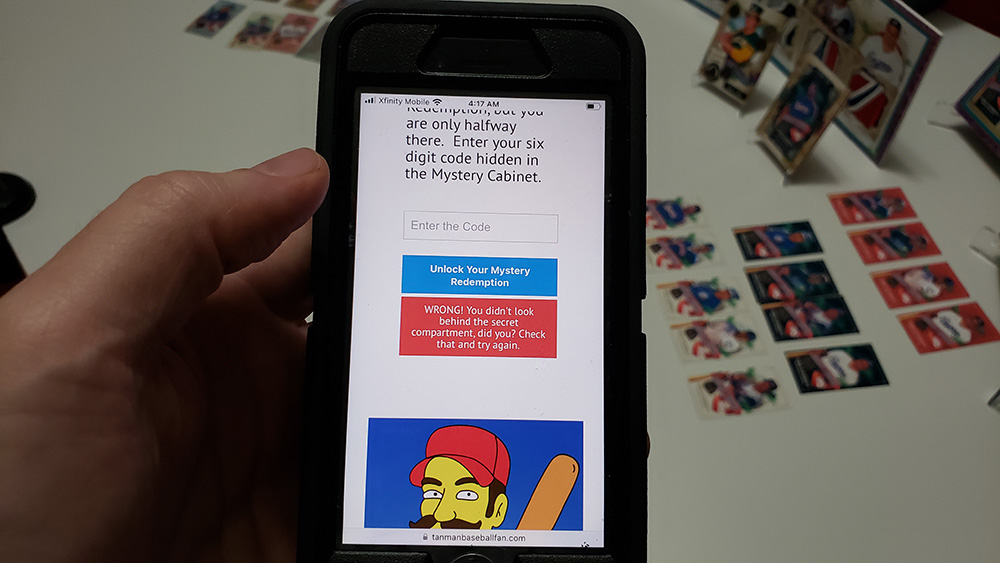
Based upon what the error said, I looked in the back of the secret compartment trap door…
…and found something quite curious – a jumbled mess of colored pixels:
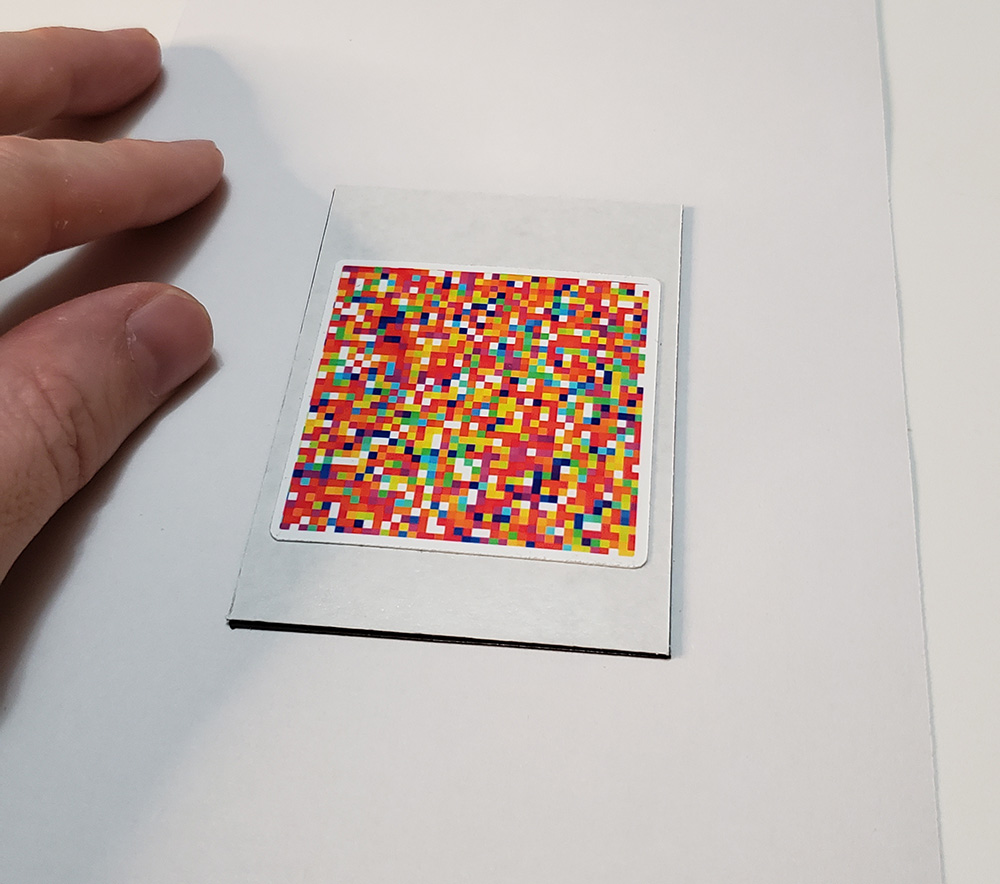
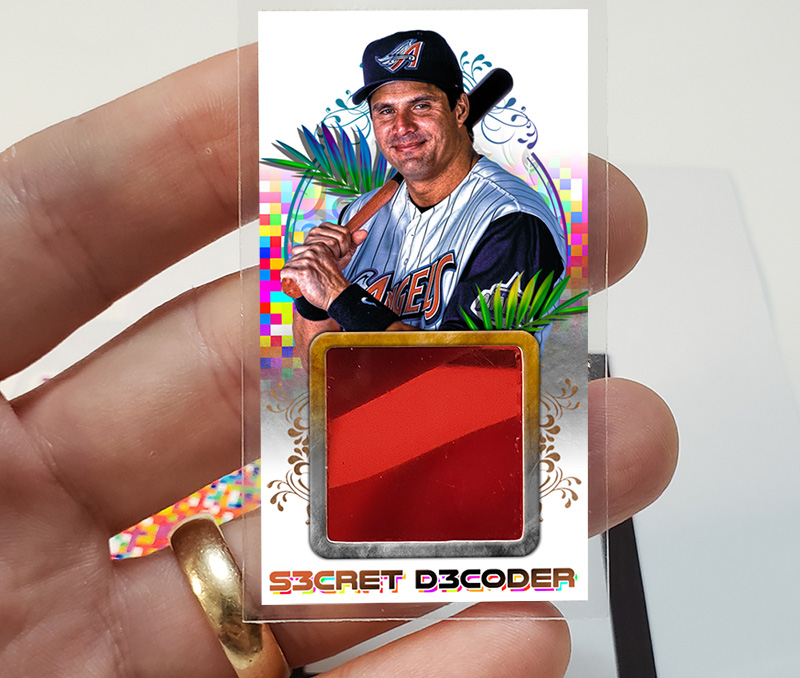
Nudging it to the right revealed a secret compartment that held a 1/1 mini called “S3CRET D3CODER”. The relic area held a red lens! Does this remind you of the backs of the Transformers boxes on the 80s?
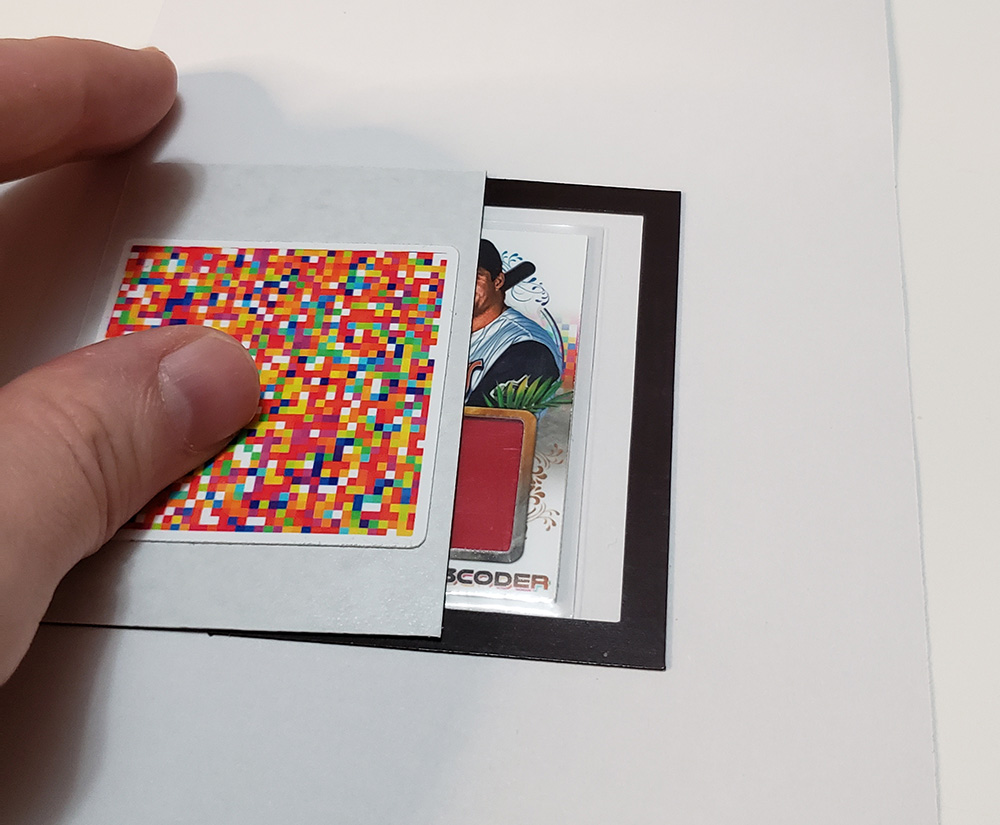
Let’s see what happens whenever we run over the colored pixel mess with this card …
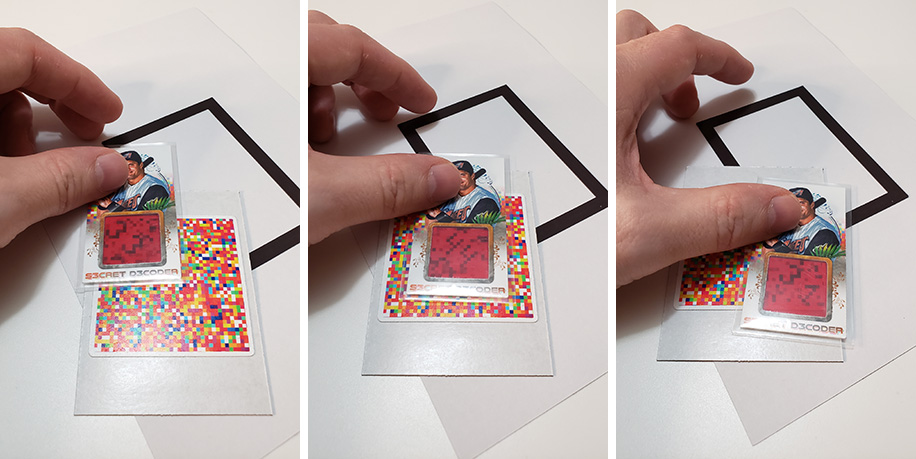
Whammo, just like that, we have a six digit code to use!
I guess this is my “not so subtle” way of saying there is going to be a sequel to this! In the coming few-several weeks (depending upon how it goes) I’ll show the eXpansion Pack. It’ll be a lot of fun to show.
Stay tuned for part two!
This project was by far the most in depth thing I’ve ever built. It was a lot of hard work, caused me to think outside the box, get creative, and try new things beyond just designing a pretty card in Photoshop. I found myself transforming, and “playing” with the various elements over and over again after I created the pieces.
These pieces are not only enjoyable to look at; they are also entertaining to mess around with. “Playing” is a good word, here. I remember my wife teasing me in the past … “Are you still playing with your baseball cards?” That has never been more true than now! I’m literally playing with these cards, and am having a blast – from changing up framed combinations, to doing different things with the proofs, to messing around with booklet combinations. I’m literally playing with my baseball cards!
The collector in me wants to have ALL minis framed, and all versions of booklets shown at all times. I guess I could create multiples of these elements to do that, but I am having way more fun playing with them, and switching up combinations to display.
I’d love to hear from you! What is your favorite piece of this project? What was your favorite parallel?
I love knowing all of the fun that is packed inside of this thing that now sits on my shelf. I have several Transformers displayed in my office, and while I never “play with” or “transform” them, for some reason, it is fun being able to look at them and know what all is possible. The Mystery Cabinet is the first “card” that gives me the exact same feeling – that I can take it out of its holder and legitimately have fun playing with it.
It is wild to me that this single piece …
(or this if you prefer…)
Can be turned into all of this …
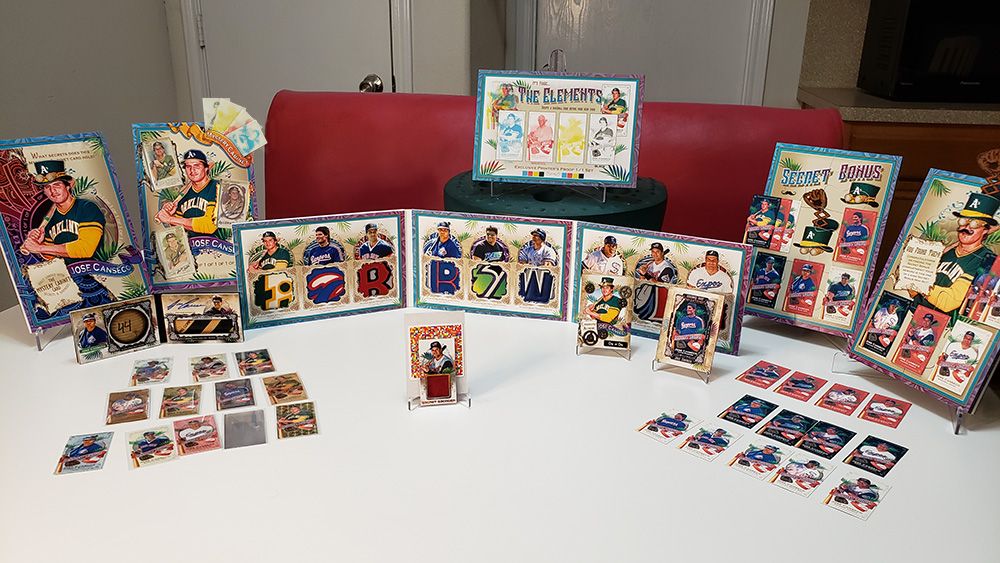
So there it is! The Mystery Cabinet: the wildest, most elaborate project I’ve ever created. I’m super happy with it, and hope it was entertaining for you to see. In this day and age, there are a billion things calling for our attention, so I’m grateful you have taken the time to read about this journey I’ve been on!
And as I said, stay tuned for part two of this project that includes the Mystery Redemption: The eXpansion Pack to the Mystery Cabinet! TO BE CONTINUED ….
By the way, please check out the video of this project!
Leave A Comment
You must be logged in to post a comment.